Connecting to the Net with a Modem
| Most ISPs provide dial-up access through the Point-to-Point Protocol, or PPP. The KDE program that gets you connected to the Internet with a modem is called kppp. On a standard KDE setup, you'll find it under Kicker's big K by choosing the Internet menu, then clicking Internet Dialer. On Mandrake, look under Networking, then Remote Access; and Red Hat has it under Extras and Internet. You can always just start the application with the command kppp & from an X window terminal session or by using your old friend, the <Alt+F2> combo once again, just type kppp. Tip
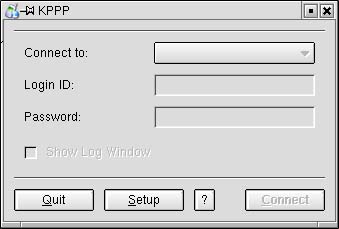
When KDE's Internet connection tool comes up for the first time (Figure 9-1), there isn't much to see because nothing has been configured. You'll see a blank Connect to list, as well as blank user name and password fields. Figure 9-1. First time with KPPP.
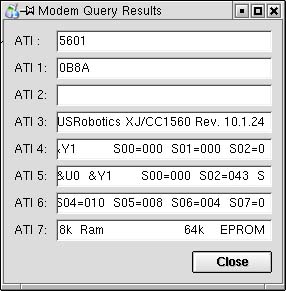
To get started, click the Setup button. This will take you to the KPPP Configuration screen. I realize that the Accounts tab is the first, but I want to talk about the Device tab for a moment. I covered devices back in Chapter 8, specifically the issue of modems, and it is particularly relevant here. If you click on that tab, you'll notice that the modem device is set to /dev/modem, which is a symbolic link to the actual port for the modem. That might be /dev/ttyS0, but it could be many other things, as well. If you find yourself having problems here when you dial out, it may be that the link wasn't set properly. Never fear, click on the drop-down list, and you will see a number of potential devices. After choosing a device, click on the Modem tab and choose Query Modem. If kppp successfully sees your modem, you should see something similar to Figure 9-2. Figure 9-2. Modem query results.
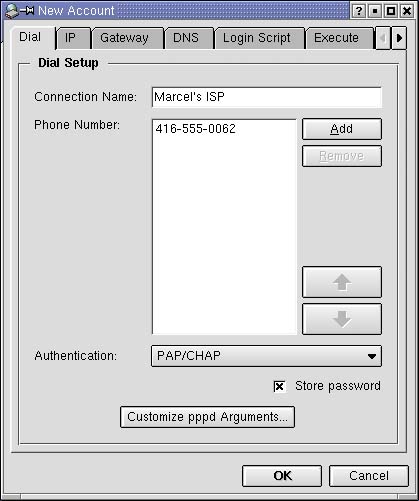
Let's get back to the Accounts tab now. As you can probably infer from this screen, it is possible to configure and maintain several dial-up accounts from here. Most people will probably use just one, but you can also use it to set up multiple profiles of the same account. If you happen to be a road warrior or globe trotter with a notebook, you can create profiles for the various cities you visit. From the Account setup window, click New to create a new account. Skip by the Wizard option (which tends to be for European sites) and choose the Dialog Setup instead. You'll be asked for a connection name, a phone number for your ISP, and the authentication type (see Figure 9-3). This defaults to PAP authentication (which most ISPs today use). If your ISP still has you go through some kind of authentication script (known as an expect/send dialog), choose Script-based from the list. Figure 9-3. New account setup.
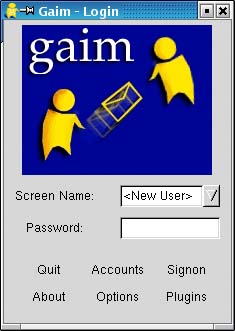
Notice that you have some additional tabs on the menu. The IP tab enables you manually to enter the IP address provided by your ISP. Because most dial-up accounts use dynamic addresses, that is the default selection, and you probably don't have to change anything there. The same goes for the next tab, the Gateway tab. This is usually set for you as you connect. Once again, you can override this setting by providing a static gateway address if your ISP provides it. The last tab is one you will probably need to worry about the DNS tab. In all likelihood, you will want to configure an address here as indicated by your ISP. Click the Manual button. Enter the DNS address you were given into the DNS IP Address field, then click Add. If you have a second address, enter it in the same way. Of course, the most work you may have to do comes under the Login Script tab, where you may have to provide your dial-up configuration with the appropriate dialog for a connection. This is also something your ISP should have supplied you with. When you click OK, you'll find yourself back at the configuration screen. Click OK one final time and you return to the initial Kppp window, with one difference. In the Connect to connection list, your new connection should be visible (see Figure 9-4). Enter your login name and password, click Connect, and you are on your way. Figure 9-4. First time out with GAIM.
Before I move on, notice the Show Log Window check box. If you find that you are having problems connecting, checking this box will show you a login script window as the connection takes place. This can help you debug any problems you might have with the connection. Cable Modems and High-Speed DSLFor the most part, if you installed your Linux system with the cable modem connected, this is probably already working, and you have nothing left to do. If, however, you are already up and running and you are just now getting a cable modem, it is probably time for a few pointers. Quite frankly, these days (with a modern Linux distribution), there isn't much to it. To begin with, cable modems aren't modems in the classic sense. The so-called modem is connected to your cable TV service on one side and to an Ethernet card inside your PC on the other. High-speed access through your phone company's DSL service is similar, in that they will provide you with an external, modemlike device (in many cases, it is really a router) that also connects to an Ethernet card. The Ethernet card (which should be automatically detected by your system) gets an IP address from the cable modem via the Dynamic Host Configuration Protocol (DHCP). Although this address may appear permanent, in that it rarely (if ever) changes, it is nevertheless dynamic, because your actual Ethernet card gets its address whenever it connects. The process of getting your system configured varies a little bit from distribution to distribution but only cosmetically. When you install your new Ethernet card (for access through the cable modem), it will be autodetected by the system on reboot. As part of that process, the system will ask you whether you want to configure the card. The answer is yes, of course. Next, the system will ask whether you want to supply an IP address or have it autoconfigure via DHCP. With a cable modem, as with DSL, autoconfiguring is what you want. Now that I've told you how incredibly easy it is to do this, I'm going to mention that there are many different providers of high-speed cable and DSL access. What this means is that if your system doesn't autorecognize and configure your connection, you may need to do one of these things. For cable modems, the answers vary, but start by checking out the Cable Modem HOWTO at http://www.tldp.org for details on your particular geographic location. If you are on a phone company DSL service, look on your distribution disks for the rp-pppoe package (PPP Over Ethernet) and install it. You can also get the package from Roaring Penguin at http://www.roaringpenguin.com/pppoe/, but you probably have it on your CDs. Make sure that you check there first. Once the package is installed, open a shell (Konsole) and switch to the root user. Do this by typing "su root" at the shell prompt. You'll be asked for the root password. Once you have entered it, type this command: adsl-setup This is basically a fill-in-the-blanks session. Your phone company will have assigned you a username and password, along with some connection information, and will have provided you with this. Answer all of the questions (the information is case-sensitive, so be careful entering it). When you have answered everything, type the following at your shell prompt: adsl-start That's it. You have no doubt guessed that there is also an adsl-stop command, as well as adsl-status (which, among other things, will tell you your IP address). If you install the RPM package from your distribution, adsl-start will run automatically when you reboot your system, so you don't need to worry about it each time. |
EAN: 2147483647
Pages: 181