Quicken 2007 On Demand
Authors: Carrillo G.
Published year:
Pages: 44-47/138
Buy this book on amazon.com >>

Record Loan Payments

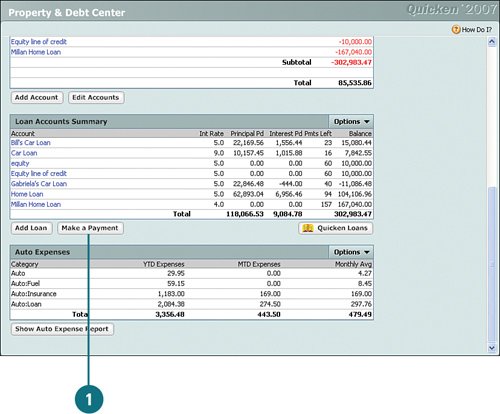
To record a loan payment, in the Loan Accounts Summary section of the Property & Debt Center, click Make a Payment.

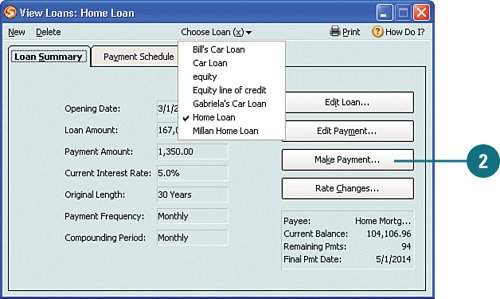
Click the Choose Loan menu, select the loan you want to use, and then click Make Payment .

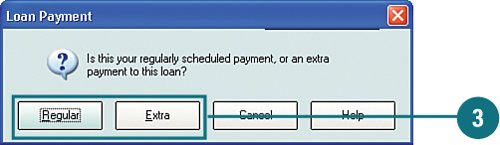
If this is a regularly scheduled payment, click Regular . If this is an additional payment, click Extra .

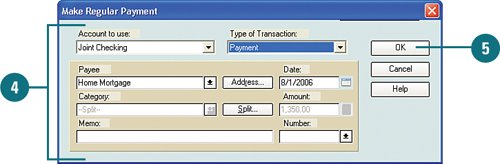
Verify that the loan information is correct. If you selected to make a regular payment, the amount is already filled in for you. If you selected to make an extra payment, the amount is empty so that you can type the amount you want to pay.

Click OK .


Chapter 5. Getting the Big Picture a Snapshot at a Time

What You'll Do

Set Up Alerts

Analyze Your Cash Flow

Analyze your Investments and Retirement Information

Track Investment Performance

Analyze Investment and Retirement Account Summaries

Analyze Investment and Retirement Performance

Analyze Your Property and Debt


Introduction

All of your accounts are grouped into account types and housed in account centers: Cash Flow, Investing, and Property & Debt. The Cash Flow Center contains all your spending (checking), savings, and credit card accounts. In addition, your bills and scheduled transactions are housed in the Cash Flow Center. The Investing Center contains all your investment and retirement accounts. The last account center, the Property & Debt Center, contains all of your property accounts, such as your house, car, and other assets, as well as your liabilities, such as the loans that accompany your properties.

Quicken organizes all of your financial information into these centers to allow you to review, analyze, and manage your accounts. Account centers provide the big picture for all of your similar accounts. You can manage account information from each of the centers by monitoring balances , interest rates, setting up and editing alerts, adding and editing account information, and much more. In addition, you can access registers from the centers, access services specific to each center, and view reports and graphs. The account centers provide everything you need to analyze your financial information for all account types. This chapter shows you how to get the most out of the account centers.


Setting Up Alerts

Quicken uses alerts to remind you of any actions you need to take with your accounts (for example, paying a bill, transferring money to savings) and warnings (for example, when one of your balances reaches its limit or when your checking account is getting too low). Alerts can save you money by notifying you before you are charged over-the-limit fees or non-sufficient funds (NSF) fees. Alerts can also make money for you (for example, by watching your securities).

You have full control of the alerts you use and how often you are reminded. Alerts are listed on the Quicken Home Page and in each account center. For example, alerts for the Cash Flow Center appear in the Cash Flow Alerts section at the top of that center. You can view, change, and delete all alerts for all your accounts from the Alerts Center. You can also manage alerts from any of the account centers. With taxes, interest charges, fees of all sorts, and other financial leeches sucking the life out of your hard-earned money, you should protect yourself, take control, and set those alerts.

Set Up Alerts

To set up alerts, select Tools, Set Up Alerts

If it's not already open , click the Setup tab.

Select the type of alert you want to set upfor example, Cash Flow and click the plus sign to expand the list. A check mark means the alert is active. A blank box means the alert is not active.

To set up an alert, click the box next to the name of the alert; for example, Account Min. Balances .

Complete the alert information. For example, to enter a minimum balance alert for a checking account, click in the Min. Balance column and type the minimum dollar amount allowed for that account.

Click in the Remind Me At column for that account and type the dollar amount you want Quicken to use for the alert. When your account reaches this amount, Quicken will display an alert to let you know that your account has reached this amount.

Did You Know?

You can review and delete alerts. You can review all alerts by clicking the Show All tab. If you no longer need an alert, you can delete it by clicking the box next to the alert you want to remove and then clicking the Delete button at the bottom of the window. A message appears, asking if you want to delete the alert; click OK . Deleting an alert removes only one instance of the alert; it does not remove the alert altogether. If you no longer want to be reminded of an alert, you must disable it by performing step 10 in this task.


See Also

See "Managing Alerts" on page 144 for information on accessing and updating alerts from the activity centers.


From the Show Me the Alert As section, select the type of alert you want: a text message that appears in the alert list in the appropriate account center or a pop-up type of message.

From the Keep the Alert in the List For menu, select the duration for which you would like Quicken to monitor and display the alert.

Repeat steps 34 and complete the related options for each alert you want to set up.

To disable an alert, clear the check from the box next to the alert name.

Review and change all alerts as needed, and then click OK when you are finished. The alerts you set up are now active. When you complete a task in an alert, it automatically goes away until it is triggered again.

IMPORTANT Be sure to keep your account information and transactions up-to-date because alerts are only as current as the information in Quicken. In addition, review your alerts from time-to-time to ensure they are working for you.


Quicken 2007 On Demand
Authors: Carrillo G.
Published year:
Pages: 44-47/138
Buy this book on amazon.com >>

Similar books on Amazon