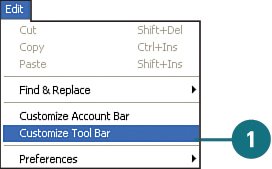
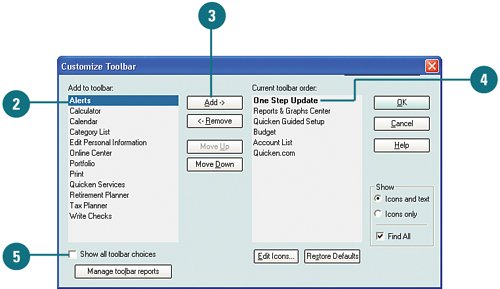
| The toolbar is your portal to quickly moving to specific areas of Quicken. To make accessing specific information even more convenient, you can customize the buttons on the toolbar to show only the buttons you want to use and the order in which you want them to appear. Handpicking and organizing the buttons on the toolbar ensures that the areas most important to you are only a click away. Add and Remove Buttons  From the toolbar, click Edit, Customize Toolbar. The buttons that are currently on the toolbar are listed in the Current Toolbar Order column in the order in which they appear on the toolbar; those that are not on your toolbar are listed in the Add to Toolbar column. From the toolbar, click Edit, Customize Toolbar. The buttons that are currently on the toolbar are listed in the Current Toolbar Order column in the order in which they appear on the toolbar; those that are not on your toolbar are listed in the Add to Toolbar column.
  To add a button to the toolbar, from the Add to Toolbar column, select a button title. You can add more than one button at a time by holding down the Ctrl key and clicking each title you want to add. The titles you select are boldfaced. To add a button to the toolbar, from the Add to Toolbar column, select a button title. You can add more than one button at a time by holding down the Ctrl key and clicking each title you want to add. The titles you select are boldfaced.
 When you have selected all items you want to add to the toolbar, click Add. When you have selected all items you want to add to the toolbar, click Add.
 To remove a button from the toolbar, from the Current Toolbar Order column, select the button title and click Remove. To remove a button from the toolbar, from the Current Toolbar Order column, select the button title and click Remove.
 To view all available toolbar buttons, select Show All Toolbar Choices. To view all available toolbar buttons, select Show All Toolbar Choices.
See Also See Chapter 3, "Using Quicken Home Page Features," on page 57 for more information on the home page. |
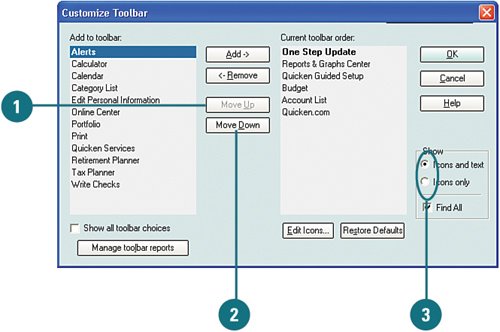
Change the Order and Appearance of Buttons - To move a button to the left on the toolbar, select the button that you want to move and click Move Up. Each time you click Move Up, the button moves left one position. Click Move Up as many times as necessary to move it where you want it.
- To move a button to the right on the toolbar, select the button you want to move and click Move Down. Click Move Down as many times as necessary to move the button where you want it.
- To view only the button icon (and not the text), select Icons Only; otherwise, select Icons and Text to view both.
Rename Buttons and Assign Shortcuts - To rename a button title, select the button title and click Edit Icons.
- In the Label box, type the new name for the button, keeping in mind the amount of space on the toolbar for lengthy names.
- If you want to assign a shortcut to the button, in the Shortcut box, type the shortcut you want to use. For example, if you type A for the Accounts List button (renamed "My Accounts"), you can open the My Accounts window by pressing Alt+Shift+A.
- Click OK.
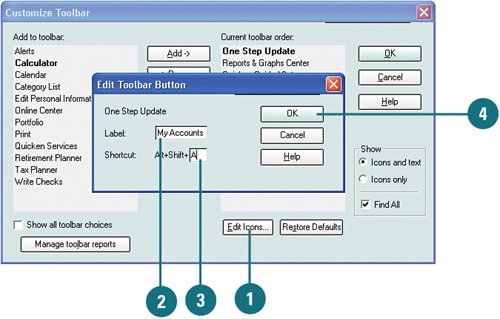
Did You Know? Changing a button title does not change where the button takes you. For example, if you change the name of the Accounts List button to My Accounts, when you click that button on the toolbar, the window titled Account List always opens, no matter what you've titled the button. |
|