Formatting Table Information
To enhance the appearance of a table, you can format its text by using the buttons on the Formatting toolbar, just as you would to format any text in a Word document. You can apply character formatting such as font styles and font effects, and you can apply paragraph formatting such as alignment and indenting.
You can also format the table s structure by adding borders and shading. Clicking the Borders and Shading command on the Format menu opens the Borders and Shading dialog box, where you can specify options to best delineate the relationships within your table.
To quickly apply predefined sets of formatting to a table, you can choose a table autoformat . Clicking the Table AutoFormat command on the Table menu displays the Table AutoFormat dialog box, which offers formats that include a variety of borders, colors, and attributes to give your tables a professional look.
| |
You can control many aspects of a table by clicking Table Properties on the Table menu and setting options on the tabs of the Table Properties dialog box. On the Table tab, you can specify the preferred width of the entire table, as well as the way it interacts with the surrounding text. On the Row tab, you can specify the height of each row, whether a row is allowed to break across pages, and whether a row of column headings should be repeated at the top of each page. On the Column tab, you can set the width of each column, and on the Cell tab, you can set the preferred width of cells and the vertical alignment of text within them.
To adjust table properties:
-
On the Table menu, click Table Properties .
The Table Properties dialog box appears.
-
Click the tab of the table element whose properties you want to adjust.
-
Make adjustments to the properties as necessary.
-
Click OK to close the Table Properties dialog box.
| |
| |
If none of the table autoformats meets your needs, you can create formatting styles for table text in much the same way you create styles for regular paragraph text.
To create a style for text in a table:
-
On the Format menu, click Styles and Formatting .
The Styles and Formatting task pane appears.
-
In the Styles and Formatting task pane, click New Style .
The New Style dialog box appears.
-
Type a name for the new style, click the down arrow to the right of the Style type box, and click Table .
-
Click the down arrow to the right of the Apply formatting to box, and select which text the new style should be applied to.
-
Select the formatting options you want, and click OK .
-
Select the text you want to format with the new style, and in the Pick formatting to apply list, click the style.
| |
Many of the table formatting tools are available on the Tables and Borders toolbar. You can turn on this toolbar either by clicking Toolbars on the View menu and then clicking Tables and Borders, or by clicking the Tables and Borders button on the Standard toolbar.
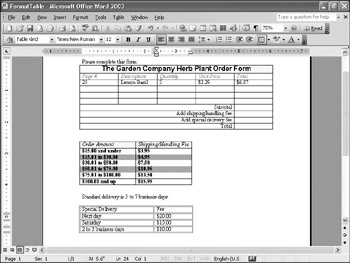
In this exercise, you will format the text in a table and add shading to a cell. You ll also apply an autoformat and add a border to a table.
USE the FormatTable document in the practice file folder for this topic. This practice file is locatedin the ![]() My Documents\Microsoft Press\Office 2003 SBS\PresentingInfo\FormattingTable folder and can also be accessed by clicking Start/All Programs/Microsoft Press/Microsoft Office System 2003 Step by Step .
My Documents\Microsoft Press\Office 2003 SBS\PresentingInfo\FormattingTable folder and can also be accessed by clicking Start/All Programs/Microsoft Press/Microsoft Office System 2003 Step by Step .
OPEN the FormatTable document.
-
In the selection area, point to the first row in the order-form table, and click to select the first row.
-
On the Formatting toolbar, click the down arrow to the right of the Font box, and click Arial . Then click the down arrow to the right of the Font Size box, and click 16 .
-
On the Formatting toolbar, click the Bold button.
The bold font style is applied to the text.
-
On the Formatting toolbar, click the Center button.
The text appears in the center of the cell.
-
On the Format menu, click Borders and Shading .
The Borders and Shading dialog box appears.
-
Click the Shading tab.
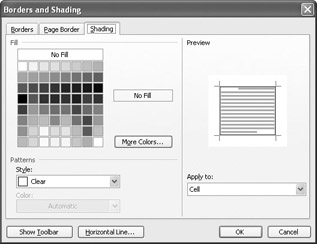
-
In the third column of the seventh row in the color palette, click the Yellow box, and then click OK .
Word shades the background of the first row in light yellow.
-
Select the second row of the table.
-
On the Formatting toolbar, click the Bold button, and then click the Italic button.
The headings in the second row are now italic.
-
On the Formatting toolbar, click the down arrow to the right of the Font Color button, and then in the first column of the third row of the color palette, click the Red box.
-
Select the last four rows in the order-form table.
-
On the Formatting toolbar, click the Align Right button.
Word aligns the text in the last four rows at the right margin.
Tip To change the direction of text in a cell ”for example, to rotate column headings so that they read vertically instead of from left to right ”select the cell(s), click Text Direction on the Format menu, and then make adjustments in the Text Direction ”Table Cell dialog box.
-
Zoom the document to 75% .
-
Click anywhere in the shipping and handling fees table, and on the Table menu, click Table AutoFormat .
The Table AutoFormat dialog box appears.
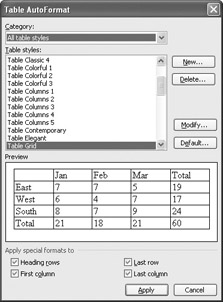
-
Scroll through the Table styles list, click Table List 8 , and then click Apply .
Word formats the table in yellow and red.
-
Click anywhere in the special delivery table, and on the Format menu, click Borders and Shading . Then click the Borders tab.
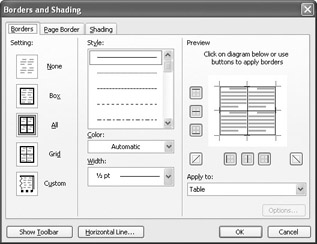
-
In the Setting area, make sure the All icon is selected.
-
In the Style list, click the down scroll arrow (not the scroll bar) twice, and then click the double-line style.
-
Click the down arrow to the right of the Color box, and in the first column of the third row of the color palette, click the Red box.
-
Click OK .
Word adds a red double border to the entire table.
-
On the Standard toolbar, click the Save button.
Word saves your changes to the document.
CLOSE the FormatTable document.
EAN: 2147483647
Pages: 350