Displaying Existing Dialog Boxes
|
| < Day Day Up > |
|
The procedures that you write in VBA can execute Excel's menu commands, and if those commands lead to a dialog box, your code can apply settings to the dialog box. You can also access Excel's built-in dialog boxes using the Dialog object. An interesting and very useful fact about working with dialog boxes is that you can execute your dialog box routines completely behind the scenes; the dialog box doesn't need to be in view to apply the settings.
The Dialogs collection represents the list of dialog boxes that are built into Excel. The xlBuiltinDialog constant is used to access an individual Dialog object in the Dialogs collection. Use the syntax Dialogs(xlDialogObjectName), where xlDialogObjectName is the built- in constant identifying the dialog box you want to open. The following example displays the built-in File Open dialog box:
Sub ShowOpen()
   Result = Application.Dialogs(xlDialogOpen).Show
End Sub
The Result variable lets you determine if the user clicked the OK button or if the action was cancelled by pressing the Esc key or by the user clicking the Cancel button. You can then use the value assigned to the variable to specify the next action that should occur based on the user's input.
The Excel Object Library includes intrinsic constants for many of the built-in dialog boxes. Each constant is formed from the prefix xlDialog followed by the name of the dialog box. For example, the Data Validation dialog box constant is xlDialogDataValidation, and the Define Name dialog box constant is xlDialogDefineName. These constants are examples of the type of members found in the xlBuiltinDialog property.
For more information about, and a complete list of, the available xlDialog constants, type built-in dialog boxes in the Visual Basic Editor Ask a Question box and click the Built-in Dialog Box Argument Lists help topic.
A Dialog object represents a single built-in Excel dialog box. Each Dialog object will have additional custom properties depending on what type of Dialog object it is. Besides the typical collection attributes, the Dialogs collection also has a Count property that returns the number of Dialog objects in the collection.
For example, the following VBA statement is equivalent to clicking Edit, Go To, and specifying the range A1:C3 and clicking OK. However, when you use the VBA code, the Go To dialog box does not need to appear, so the action is seamless to the user.
Sub GotoRange()
Application.Goto Reference:=Range("A1:C3")
End Sub
In some cases, however, you might want to display one of Excel's built-in dialog boxes so the user can make the choices. There are two ways to do this:
-
Access the Dialogs collection of the Application object.
-
Execute a menu item directly.
The Dialogs collection of the Application object represents most of Excel's built-in dialog boxes. The Dialogs collection has predefined constants to make it easy to specify the dialog box that you need. For example, Excel's Go To dialog box is represented by the constant xlDialogFormulaGoto.
Use the Show method to actually display the dialog box. Here is an example that displays the Go To dialog box, with the results shown in Figure 18-1.
Sub ShowGoto()
Application.Dialogs(xlDialogFormulaGoto).Show
End Sub
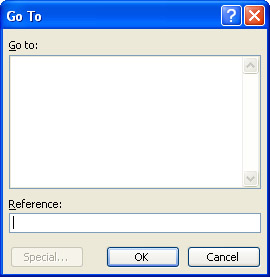
Figure 18-1: The Go To dialog box appears when called using the xlDialogFormulaGoto intrinsic constant.
When the Go To dialog box is shown, the user can specify a named range or enter a cell address to go to. The dialog box displayed using the xlDialogFormulaGoto constant is the same one that appears when you choose the Go To command from the Edit menu.
You can also write code that uses a variable to determine how the user dismissed the dialog box. In the following statement, the Result variable will be True if the user clicked OK, and False if the user clicked Cancel or pressed the Esc key.
Sub ShowGoto2()
Result = Application.Dialogs(xlDialogFormulaGoto).Show
End Sub
Contrary to what you might expect, the Result variable does not hold the range that was specified in the Go To dialog box. Instead, as stated, the variable holds a Boolean value that reflects how the dialog box was dismissed.
It's important to understand that built-in dialog boxes are not documented very well. The online help is very sketchy, and the files do not mention the fact that displaying one of Excel's dialog boxes using VBA code might not always work exactly the same as using a menu command to display the dialog box. Consequently, you might have to do some experimentation to make sure your code performs as it should.
In the case of the Go To dialog box, you will notice that the Special button is grayed out when the dialog is shown using a VBA statement. This button normally displays the Go To Special dialog box. To display the Go To Special dialog box using the VBA code, you need to use the intrinsic constant for that dialog box, xlDialogSelectSpecial. The results are shown in Figure 18-2.
Sub ShowGotoSpecial()
Application.Dialogs(xlDialogSelectSpecial).Show
End Sub
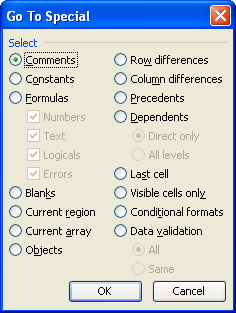
Figure 18-2: Displaying the Go To Special dialog box requires you to use the intrinsic constant for that dialog box.
Another potential problem you might encounter when you work with the built-in dialog boxes is that you are not able to display some tabbed dialog boxes as they appear when you display them using the menu system. For example, there's no way to show the Format Cells dialog box with the tabs. Rather, you can only show one tab at a time. The following statement displays the Alignment tab of the Format Cells dialog box (with the results shown in Figure 18-3).
Sub ShowAlignmentTab()
Application.Dialogs(xlDialogAlignment).Show
End Sub
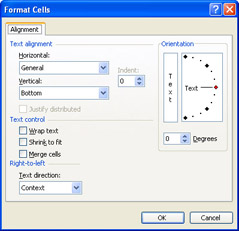
Figure 18-3: You can display the Format Cells dialog box, albeit one tab page at a time.
To show other tabs in the Format Cells dialog box, use any of these constants: xlDialogFormatNumber, xlDialogBorder, xlDialogCellProtection, xlDialogPatterns, or xlDialogFontProperties. Notice that there is no consistency in the naming of these constants.
Return Variables or Execute?
When a dialog box is opened several options are available. If you execute the dialog box, the desired actions of the dialog box will occur. If you are only trying to gather information such as a filename, you should choose another method, such as GetOpenFilename or GetSaveAsFilename. Both methods display their respective dialogs but don't actually open or save the files when the user confirms the dialog box. The methods instead return the complete filename as a variable for use in later code.
The following example uses the GetOpenFilename and GetSaveAsFilename methods to return the name of the selected file:
Sub GetFileName()
FullFileName = Application.GetOpenFilename("Excel files (*.xl*), *.xl*", _
    1, "Custom Dialog Title", , False)
FullFileName = Application.GetSaveAsFilename("DefaultFilename.xls", _
    "Excel files (*.xl*), *.xl*, 1, "Custom Dialog Title")
End Sub
Once the filename has been passed to the variable, it can be used in whichever method you choose. For example, with the filename it would be simple to open the file using the Open method.
Workbooks.Open FullFileName
You can also save the workbook with the new file name using the following line of code:
Workbooks.SaveAs FullFileName
When the users have confirmed the FileOpen dialog or the FileSaveAs dialog, they might have changed the active or current folder. Using the FileOpen and FileSaveAs dialog boxes lets the users choose the current folder and navigate the drives of their computers. This is the easiest method to let users choose the destination for their files.
|
| < Day Day Up > |
|
EAN: 2147483647
Pages: 161