The Sheets and Worksheets Collections
|
| < Day Day Up > |
|
The Sheets and Worksheets Collections
When most users think of a 'sheet' in a workbook, they think of a worksheet, with rows, columns, cells, data, and formulas. However, there are several types of sheets you can have in a workbook. There is the worksheet, of course, but there is also a chart sheet. It's a bit confusing that a worksheet can contain a chart, but when you go through the Chart Wizard, you get the option to put the chart on a separate chart sheet. The other two types of sheets are meant to handle Excel 4 macros; there is one sheet for U.S. macros and another for international macros.
Properties
The Sheets and Worksheets collections have a number of properties in common, but there are a few things you have to watch out for when you work with every sheet in a workbook. Those issues are most pronounced with regard to the Count property, which is the first property you'll encounter in this section.
Count Property
The Count property of the Worksheets collection looks through the named workbook and counts the number of worksheets in the workbook, while the Count property of the Sheets collection reflects the combined number of chart sheets and worksheets in your workbook. You can use the Count property of the Sheets and Worksheets collections to check your workbooks' structure for accuracy before you pass the workbook to another procedure for additional processing.
Sub CheckWorkbooks()
    Do While Worksheets.Count < 12
        ThisWorkbook.Sheets.Add
    Loop
End Sub
You'll find the remainder of this procedure below in the discussion of the Workbook object's Add method.
Name Property
Part of a sheet's public face is its name, which is how the sheet is identified on the tab bar and one way you can identify the sheet in your VBA code. If you want to change the name of a worksheet, you can do that by setting the Name property. For example, if you copy the weekly sales totals to a worksheet at the end of a workbook, you can change the name of that worksheet to Summary using this procedure:
Sub ChangeName()
    Dim strWkshtName As String
    strWkshtName = "Summary"
    Sheets(Sheets.Count).Name = strWkshtName
End Sub
Visible Property
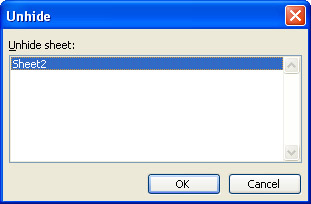
The other frequently used property in the Worksheets and Sheets collections is the Visible property, which reflects whether a particular sheet is displayed on the sheet tab within a workbook. There are three possible values for the Visible property: the xlSheetVisible, xlSheetHidden, and xlSheetVeryHidden Excel constants. When the Visible property is set to xlSheetVisible, the sheet appears on the tab bar and can be edited directly by the user. When the Visible property is set to xlSheetHidden, the sheet isn't represented on the tab bar but the user can display it by clicking Format, Sheet, Unhide and then clicking the name of the sheet in the Unhide dialog box.
Setting the Visible property to xlSheetVeryHidden means that the hidden sheet doesn't appear in the Unhide dialog box and can only be made accessible by using VBA code to change the Visible property to either xlSheetHidden or xlSheetVisible.
Methods
The Sheets collection is home to a wide variety of methods you can use to add, delete, move, copy, and set the sheet's page setup options (margins, headers, footers, and so on).
Add Method
Whenever you want to bring data in from an outside file, you should consider storing the imported data in a new worksheet. To create a new worksheet in an existing workbook, you use the Add method, which has the following syntax:
Sheets.Add(Before, After, Count, Type)
The Before and After parameters are mutually exclusive-which one you use depends on where you want to place the new worksheet in the workbook. The Before and After parameters can take an index value that reflects the position of the sheet in the workbook, a sheet name, or the active sheet (using the ActiveSheet property as the value for the parameter).
For example, if you wanted to place the added worksheet at the front of the workbook, you would set the Before parameter using any of the following statements:
ThisWorkbook.Sheets.Add Before:=Worksheets(1)
ThisWorkbook.Sheets.Add Before:=Sheet1
ThisWorkbook.Sheets.Add Before:=ActiveSheet
The last statement does assume that Sheet1 is the active sheet.
| Note | Unlike normal arrays, which start with an index value of 0 by default, the Sheets and Worksheets collections begin with an index value of 1. Go figure. |
If you want to add more than one worksheet to a workbook, the Visual Basic Editor help system indicates you can set the Count parameter to reflect the number of sheets you want to add. For example, if you wanted to add three sheets after a sheet named March, you would use the following command:
ThisWorkbook.Sheets.Add After:=March, Count:=3
The last parameter you can use with the Add method is the Type parameter, which determines the type of sheet that's added to the workbook. You can use the following four constants:
-
xlWorksheet, which adds a worksheet (the default)
-
xlChart, which adds a chart
-
xlExcel4MacroSheet, which adds an Excel 4 macro sheet
-
xlExcel4IntMacroSheet, which adds an international Excel 4 macro sheet
The xlExcel4MacroSheet and xlExcel4IntMacroSheet constants are included to ensure Excel 2003 is backward compatible with Excel 4.
You might have noticed that there's no direct way to add a sheet to the end of a workbook; however, you can use the Count property of the Sheets or (if there are no other types of sheets in your workbook) Worksheets collection to determine how many sheets are in the workbook and add the worksheet after it. The following code shows one way to do just that:
ThisWorkbook.Sheets.Add After:=Sheets(Sheets.Count)
| Tip | Start with the Right Number of Sheets |
Delete Method
The Delete method is complementary to the Add method; rather than putting additional sheets in your workbook, you can delete any sheet from a workbook. When you use the Delete method from the Sheets collection, you can delete any sheet in the workbook, but if you use the Delete method from the Worksheets collection, you'll be assured of not deleting a chart sheet by accident (and the same is true if you try to delete a worksheet using the Charts collection's Delete method).
The syntax for deleting a sheet follows the familiar pattern of naming the collection from which you want to delete the sheet, naming the sheet using either the sheet's name or its position in the collection, and then invoking the Delete method. As an example, any of the following lines of code would delete the worksheet named Summary, provided it was the fourth sheet of a workbook:
Worksheets("Summary").Delete
Sheets("Summary").Delete
Worksheets(4).Delete
Sheets(4).Delete
You could also delete the active sheet using the ActiveSheet property, as in this statement:
ActiveSheet.Delete
One thing that's important to notice, however, is that the last of the four lines of code listed in the preceding example wouldn't delete the correct sheet if there were a chart sheet anywhere among the first four sheets of the workbook. As an illustration, consider a workbook created for The Garden Company with five sheets, the fourth of which is a chart sheet.
In this workbook, the fourth member of the Worksheets collection is the Summary worksheet, but the fourth member of the Sheets collection is the Q1Sales chart sheet.
| Tip | Delete by Name, Not Position |
When you invoke the Delete method, Excel displays an alert box asking if you're sure you want to delete the worksheet. Of course, the last thing you want to see when you're using an automated procedure is an alert box that requires human intervention for the procedure to continue. You can use the Application object's DisplayAlerts property to turn off alert boxes, however, so you can keep the expected alert box from appearing during a known operation. It's usually a good idea to turn alerts back on, though, so that if something unexpected happens, your procedure won't proceed without you or a colleague ensuring no harm will be done.
Sub DeleteSheet()
    Application.DisplayAlerts = False
    Sheets(1).Delete
    Application.DisplayAlerts = True
End Sub
Move and Copy Methods
Another handy skill when manipulating workbooks with VBA code is to change the position of sheets in a workbook, or to move or copy a sheet to a new workbook. One example of when moving sheets within a workbook would be handy is when you are creating a workbook that will be used in an annual report or another type of presentation. Because those types of reports often have strict formatting guidelines, you might end up moving sheets around to fit the format. You also might need to move or copy a sheet from a workbook into a summary workbook. For example, if a project manager summarized labor and equipment expenditures on a sheet with a known name, you could copy that sheet into a target workbook and use that sheet, not the original, for any processing you needed to do.
Whether you move or copy a sheet depends on whether or not you want to keep the original sheet. Copying a sheet is a nondestructive operation in that the sheet being copied isn't deleted, but moving a sheet does cause the sheet to be deleted from its original location.
The Move and Copy methods let you set the target position of your moved worksheet using either the Before or the After parameter. (If for some reason you try to use both, you'll get an 'expected end of line' error.) For example, the following procedure counts the number of sheets in the existing workbook and moves the sheet named Summary to the end of the workbook:
Sub MoveToEnd()
    Sheets("Summary").Move After:=Sheets(Sheets.Count)
End Sub
If you want to move or copy more than one sheet in a workbook, you can specify an array in the Sheets collection. For example, the following procedure moves the sheets named Summary and PivotTable to the beginning of the workbook:
Sheets(Array("Summary", "PivotTable")).Move Before:=Sheets(1) If you move or copy a sheet without specifying a Before or After parameter, Excel will create a new workbook where the copied sheet is the only sheet in the workbook, regardless of the default number of worksheets included in new workbooks.
PageSetup Object
Regardless of whether you work in Excel through the user interface or using VBA code, the one thing you need to remember is that the data in your workbooks is the most important element of your workbook. Once you're sure the data is entered and summarized correctly, you can focus on how it looks. You'll learn a lot more about formatting data and worksheets in Chapter 10, 'Formatting Excel Objects,' but it makes sense to discuss how to change the layout of your worksheets on the page by using the PageSetup property of the Worksheet object.
The PageSetup property of the Worksheet object actually returns a PageSetup object, which in turn contains a series of properties reflecting the worksheet's positioning, orientation, margins, and level of detail when viewed. Table 7-6 lists a number of the more important properties of the PageSetup object, but you can find a complete listing in the Visual Basic Editor help system.
| Property | Description |
|---|---|
| BlackAndWhite | When set to True, forces a sheet to be printed in black and white. |
| BottomMargin | Determines the distance, in points, between the top of the footer and the bottom of the worksheet. |
| CenterHorizontally | When set to True, centers the worksheet horizontally on the printed page. |
| CenterVertically | When set to True, centers the worksheet vertically on the printed page. |
| FirstPageNumber | Sets the page number assigned to the first printed page. |
| FitToPagesTall | Sets the number of vertical pages on which the worksheet will be printed. Useful for shrinking a too-large worksheet onto a specific number of pages. |
| FitToPagesWide | Sets the number of horizontal pages on which the worksheet will be printed. Useful for shrinking a too-large worksheet onto a specific number of pages. |
| FooterMargin | Determines the distance, in points, between the top of the footer and the bottom of the printed page. |
| HeaderMargin | Determines the distance, in points, between the bottom of the header and the top of the printed page. |
| LeftMargin | Determines the amount of white space to remain between the edge of the page and the leftmost element of the worksheet. |
| Orientation | Determines whether a worksheet is in landscape mode (xlLandscape) or portrait mode (xlPortrait). |
| RightMargin | Determines the amount of white space to remain between the edge of the page and the rightmost element of the worksheet. |
| TopMargin | Determines the amount of white space to remain between the bottom of the header and the topmost element of the worksheet. |
| Zoom | Determines the magnification level of the worksheet view between 10 percent and 400 percent. |
It should be noted that the values for the margin settings are all expressed in terms of points (there being 72 points per inch). You probably don't want to keep that number in your head and perform conversions all the time, so you will want to use the Application.InchesToPoints method to make the conversion for you. All you need to do is put the number of inches in the parentheses of the method and assign that value to the appropriate property. For example, you could set a top margin of three-quarters of an inch using the following code:
ActiveSheet.PageSetup.TopMargin = Application.InchesToPoints(0.75)
Another important aspect of changing how a worksheet is printed is in the proper placement of page breaks. A page break represents the last row or column that will be printed on a page; in most cases, you can let Excel set the page breaks automatically, moving a row or column to the next page only when it would encroach on a margin. If you'd rather specify where page breaks should occur, you can do so by specifying the column to the right of where you want the page break, or the row below where you want the page break.
| Note | Yes, referencing rows and columns is more like the topics you'll find in Chapter 8, 'Ranges and Cells,' but it also makes sense to cover page breaks here with the rest of the printing topics. |
The syntax for setting a manual page break requires you to specify the row or column below or to the right of where you want the break to be placed. For example, if you wanted to set a manual page break above row 30 on Sheet2, you would use the following line of code:
Worksheets("Sheet2").Rows(30).PageBreak = xlPageBreakManual Setting a manual page break to the left of column D on Sheet1, however, would use this code:
Worksheets("Sheet1").Columns("D").PageBreak = xlPageBreakManual To delete a page break, you set the PageBreak property to either of the Excel constants xlPageBreakNone or xlNone, as in the following examples:
Worksheets("Sheet2").Rows(30).PageBreak = xlPageBreakNone
Worksheets("Sheet1").Columns("D").PageBreak = xlNone
You can remove all of the page breaks on a worksheet using the worksheet's ResetAllPageBreaks method:
Worksheets("Sheet1").ResetAllPageBreaks | Tip | Print to Your Specification |
Worksheet Methods
Worksheets are the lifeblood of a workbook, and there are a number of methods you can call to get the most out of your worksheets. Some of these methods are similar to those you'll find with the workbooks, but with subtle distinctions that make them unique to the worksheet. In this section, you'll learn about the following methods:
-
Calculate, which recalculates the results of all formulas in a worksheet
-
Protect, which lets you require users to enter a password to modify specified elements of a worksheet
-
SaveAs, which saves a worksheet as a new workbook
-
Select, which lets you work on more than one worksheet at a time
Calculate Method
The Worksheet object's Calculate method is used to recalculate all of the formulas in a worksheet, which is handy if those formulas draw on data that might have changed since the last time you opened the workbook containing those formulas. The Calculate method's syntax is straightforward; all you need to do is name the worksheet you want to calculate and append the Calculate method, as in the following examples:
Worksheets(1).Calculate
Worksheets("Summary").Calculate
If you want to update the result of every formula in every open workbook, you can add the single method Calculate (short for Application.Calculate) to your VBA code to have Excel recalculate each of those values.
Normally Excel recalculates your formulas whenever you make a change, so you might want to change when Excel recalculates your formulas. Choosing when to recalculate the values of formulas in your worksheets is an inexact science; if you always need the more recent results from formulas that could change from moment to moment, it makes sense to recalculate every time your worksheet changes. Another approach would be to place a command button on a worksheet that your users could click to recalculate the formulas whenever they needed up to date values to make a decision. The difficulty with that approach is when you have a large worksheet that draws data from several other sources. If your network is busy, or if you have literally hundreds of formulas that need to be updated, you might want to create a process that updates the formulas once overnight, bearing in mind that you would want to update each of the source worksheets first to avoid any potential inconsistencies caused by updating the summary worksheet before updating the source worksheets.
You can change when Excel recalculates a worksheet by setting the Application object's Calculate property (yes, it has the same name) to one of the XlCalculate constants. Those constants are:
-
xlCalculationAutomatic, the default value, which causes Excel to recalculate your formulas every time a change is made.
-
xlCalculationManual, which requires a user to press Shift+F9 to recalculate the formulas in the active worksheet.
-
xlCalculationSemiautomatic, which recalculates all formulas in a worksheet, except for those formulas in a table.
If you only want to calculate formulas just before you save a workbook, you can set recalculation to manual and then set the Application object's CalculateBeforeSave property to True, as in the following code:
Application.Calculation = xlCalculationManual
Application.CalculateBeforeSave = True
Protect Method
The first line of defense against changes to a worksheet starts with requiring users to enter a password before they are allowed to open the workbook. The Workbook object's Protect method is somewhat limited, allowing you to protect against unauthorized access to the workbook, to protect against changes to the workbook's structure, or to protect against changes to the size and placement of the workbook's windows. There's quite a bit more going on at the worksheet level, however, and the Sheet and Worksheet objects' Protect methods have correspondingly more options available.
expression.Protect(Password, DrawingObjects, Contents, Scenarios,
 UserInterfaceOnly, AllowFormattingCells, AllowFormattingColumns,
 AllowFormattingRows, AllowInsertingColumns, AllowInsertingRows,
 AllowInsertingHyperlinks, AllowDeletingColumns, AllowDeletingRows,
 AllowSorting, AllowFiltering, AllowUsingPivotTables)
Table 7-7 provides the default values for each of these parameters and describes what is or is not allowed when the options are set to True or False.
| Parameter | Default | Description |
|---|---|---|
| Expression | n/a | A required expression that returns a Worksheet object. |
| Password | n/a | A string that specifies a case-sensitive password for the worksheet or workbook. If this argument is omitted, you can unprotect the worksheet or workbook without using a password. |
| DrawingObjects | False | When set to True, this parameter protects drawing objects from changes. |
| Contents | True | When set to True, protecting the contents of a worksheet protects any locked cells from changes. |
| Scenarios | True | When set to True, the user cannot make changes to scenarios. |
| UserInterfaceOnly | False | When set to True, the user interface is protected, but the user can edit macros. When left blank or set to False, both the user interface and macros are protected. |
| AllowFormattingCells | False | When set to True, users can format any cell on a protected worksheet. |
| AllowFormattingColumns | False | When set to True, users can format any column on a protected worksheet. |
| AllowFormattingRows | False | When set to True, users can format any row on a protected worksheet. |
| AllowInsertingColumns | False | When set to True, users can insert columns into the protected worksheet. |
| AllowInsertingRows | False | When set to True, users can insert rows into the protected worksheet. |
| AllowInsertingHyperlinks | False | When set to True, users can add hyperlinks to a protected worksheet. |
| AllowDeletingColumns | False | When set to True, users can delete columns on the protected worksheet, provided every cell in the column to be deleted is unlocked. |
| AllowDeletingRows | False | When set to True, users can delete rows on the protected worksheet, provided every cell in the row to be deleted is unlocked. |
| AllowSorting | False | When set to True, users can sort the data on the protected worksheet, provided every cell in the sort range is unlocked or unprotected. |
| AllowFiltering | False | When set to True, users can set filters on the protected worksheet and change filter criteria but can't enable or disable an auto filter. |
| AllowUsingPivotTables | False | When set to True, users can use PivotTables on the protected worksheet. |
Another way you can extend a worksheet's protection is to limit which cells the user can select by assigning a value to the EnableSelection property. After you protect a worksheet, you can set the EnableSelection property to any of the following Excel constants:
-
xlNoSelection, which prevents the user from selecting any cells on the sheet
-
xlUnlockedCells, which allows the user to select only those cells whose Locked property is set to False
-
xlNoRestrictions, the default value, which allows the user to select any value
The following code snippet prevents users from selecting any cells on the protected January worksheet:
Worksheets("January").EnableSelection = xlNoSelection | Important | Setting the EnableSelection property has an effect only if the worksheet is protected. |
As with a workbook, you can allow a user to unprotect a worksheet by providing the password. The line of code you use is simply this:
ActiveWorksheet. Unprotect
Excel displays an input box to accept the password for you, so you don't even have to write any additional code to handle the entry.
SaveAs Method
Just as you can save a workbook under a different name or to a different location, you can save an individual worksheet as a separate file using the Worksheet method's SaveAs method.
expression.SaveAs(FileName, FileFormat, Password, WriteResPassword,
 ReadOnlyRecommended, CreateBackup, AddToMru, TextCodepage, TextVisualLayout,
 Local)
The SaveAs method of the Worksheet object is very similar to the same method of the Workbook object, so you can refer to Table 7-3 for details on most of the parameters of the Worksheet object's SaveAs method.
Select Method
At first glance the Select method seems to be the same as the Activate method. The difference between the two methods is that the Activate method only works on one worksheet at a time, whereas the Select method lets you operate on more than one worksheet at a time. As an example using the user interface, you can move two worksheets at a time by clicking the sheet tab of the first worksheet, shift-clicking the second sheet tab, and dragging the sheets as a unit to their new position in the workbook.
| Note | In the case just mentioned, the first worksheet you click would be considered the active worksheet. |
The following code snippet selects the worksheet named Sheet1:
Worksheets("Sheet1").Select If you'd like to select more than one worksheet at a time, you can use an array as the argument for the Select method, as in the following example:
Worksheets (Array ("Sheet1", "Sheet2")).Select In this chapter, you've encountered the most important properties and methods you will use to manipulate Excel workbooks and worksheets. Whether you want to save your workbooks programmatically, change when your formulas are recalculated, or protect your workbooks and worksheets by requiring users to know the password to gain access, you can make your workbooks and worksheets behave as you want them to behave. In Chapter 8, you'll learn how to perform similar tasks with ranges and cells.
|
| < Day Day Up > |
|
EAN: 2147483647
Pages: 161