Preparing Worksheets for Printing
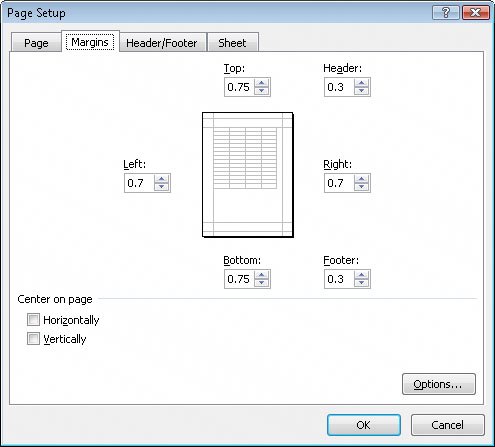
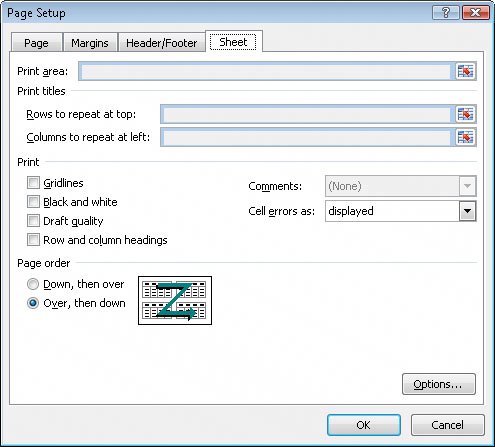
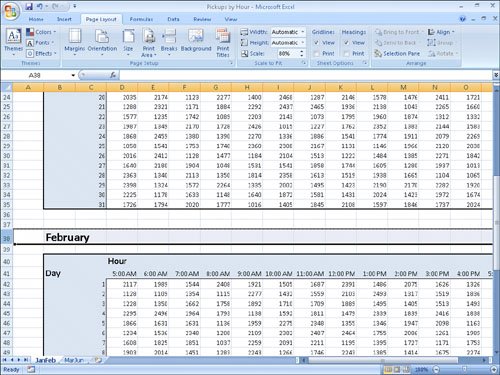
| After you have your data and any headers or footers in your workbook, you can change your workbook properties to ensure that your worksheets display all your information and that printing is centered on the page. One of the workbook properties you can change is its margins, or the boundaries between different sections of the printed page. You can view a document's margins and where the contents of the header, footer, and body appear in relation to those margins in the Print Preview window. 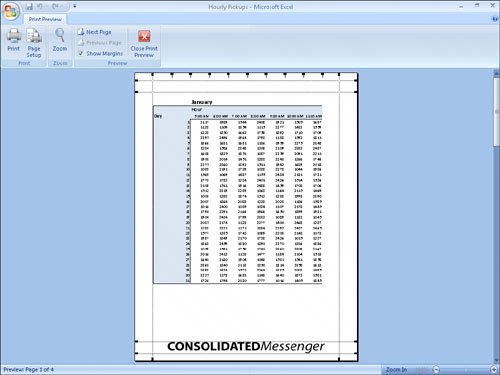 You can drag each margin line to change the corresponding margin's position, increasing or decreasing the amount of space allocated to each worksheet section. Do bear in mind that increasing the size of the header or footer reduces the size of the worksheet body, meaning that fewer rows can be printed on a page. Excel 2007 comes with three margin settings: Normal, Wide, and Narrow. Excel 2007 applies the Normal setting by default, but you can select any of the three options by displaying the Page Layout tab and then, in the Page Setup group, by clicking Margins. If you want finer control over your margins, click Custom Margins to display the Margins tab of the Page Setup dialog box. Another issue with printing worksheets is that the data in worksheets tends to be wider horizontally than a standard sheet of paper. For example, the data in the worksheet in the previous graphic is several columns wider than a standard piece of paper. You can use the controls on the Page Layout tab to change the alignment of the rows and columns on the page. When the columns follow the long edge of a piece of paper, the page is laid out in portrait mode; when the columns follow the short edge of a piece of paper, it is in landscape mode. The following graphic displays the contents of the previous worksheet laid out in landscape mode. 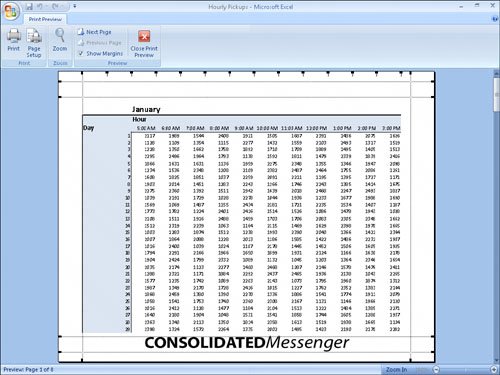 This arrangement is a better fit, but not all the data fits on the printed page. This is where the tools in the Scale to Fit group on the Page Layout tab come to the rescue. You can use the tools in that group to have Excel 2007 reduce the size of the worksheet's contents until the entire worksheet can be printed on a single page. You can make the same changes (and more) by using the controls in the Page Setup dialog box. To display the Page Setup dialog box, click the Page Layout tab and then click the Page Setup group dialog box launcher. Previewing Worksheets Before PrintingYou can view your Excel 2007 worksheet as it will be printed by clicking the Microsoft Office Button, pointing to Print, and then clicking Print Preview. When you do, Excel 2007 displays the active worksheet in the Print Preview window. When the Print Preview window opens, it shows the active worksheet as it will be printed with its current settings. In the lower-left corner of the Print Preview window, Excel 2007 indicates how many pages the worksheet will require when printed and the number of the page you are viewing. Tip You can view the next printed page by pressing the Changing Page Breaks in a WorksheetAnother way to change how your worksheet will appear on the printed page is to change where Excel 2007 assigns its page breaks or the point where Excel 2007 prints all subsequent data on a new sheet of paper. You can do that indirectly by changing a worksheet's margins, but you can do it directly by displaying your document in Page Break Preview mode. To display your worksheet in Page Break Preview mode, on the View tab, in the Workbook Views group, click Page Break Preview. 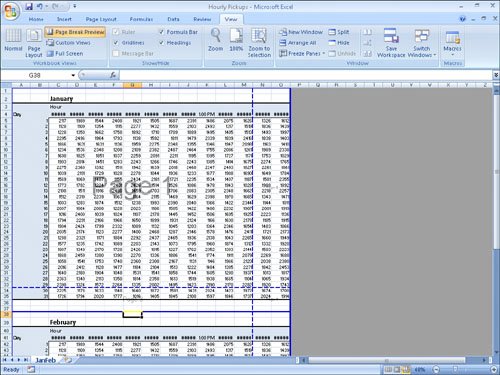 The blue lines in the window represent the page breaks. If you want to set a page break manually, you can do so by displaying your worksheet in Page Break Preview mode and then right-clicking the row header of the row below where you want the new page to start. In other words, if you right-click the row header of row 15 and click Insert Page Break, row 14 will be the last row on the first printed page, and row 15 will be the first row on the second printed page. The same technique applies to columns: if you right-click the column H column header and click Insert Page Break, column G will be the last column on the first printed page, and column H will be the first column on the second printed page. You can also add page breaks without displaying your workbook in Page Break Preview mode. To add a page break while your workbook is open in Normal view, click a row or column header and then, on the Page Layout tab, in the Page Setup area, click Breaks and then click Insert Page Break. The Breaks button menu also enables you to delete a page break or to reset all of your worksheet's page breaks. Important Be sure to right-click a row header or column header when you want to insert a single page break. If you view a workbook in Page Break Preview mode, right-click a cell within the body of a worksheet, and then choose Insert Page Break, Excel 2007 creates both a vertical page break above the selected cell and a horizontal page break below the selected cell. To move a page break, drag the line representing the break to its new position. Excel 2007 will change the worksheet's properties so that the area you defined will be printed on a single page. Tip If you prefer not to display your workbook in Page Break Preview mode, you can insert a page break by clicking a cell, row header, or column header. Then, on the Page Layout tab, in the Page Setup group, click Breaks and click Insert Page Break. Changing the Page Printing Order for WorksheetsWhen you view a document in Page Break Preview mode, Excel 2007 indicates the order in which the pages will be printed with light gray words on the worksheet pages. (These indicators appear only in Page Break Preview mode; they don't show up when the document is printed.) You can change the order in which the pages are printed by displaying the Page Layout tab, clicking the Page Setup group's dialog box launcher to display the Page Setup dialog box, and displaying the dialog box's Sheet tab. On the Sheet tab, selecting the Over, Then Down option changes the order in which the worksheets will be printed from the default Down, Then Over. You might want to change the printing order to keep certain information together on consecutive printed pages. For example, suppose you have a worksheet that holds hourly package pickup information; the columns represent hours of the day, and the rows represent days of the month. If you want to print out consecutive days for each hour, you use Down, Then Over, as shown in the following graphic. Pages 1 and 2 enable you to see the 5:00 a.m. to 11:00 a.m. pickups for the months of January and February, pages 3 and 4 enable you to see the 12:00 p.m. to 5:00 p.m. pickups for the months, and so on. 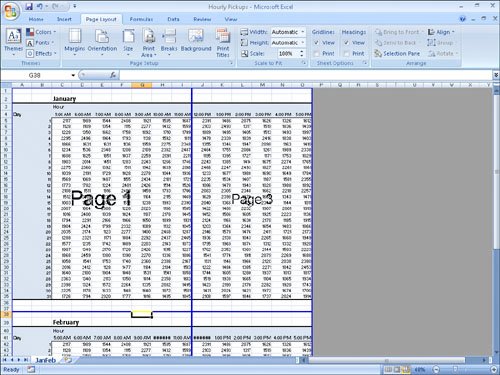 As the next graphic shows, changing the print order to Over, Then Down prints consecutive hours for each day. Pages 1 and 2 enable you to see the 5:00 a.m. to 5:00 p.m. pickups for January, and pages 3 and 4 enable you to see the same pickups for February.  In this exercise, you will preview a worksheet before printing, change a worksheet's margins, change a worksheet's orientation, reduce a worksheet's size, add a page break, and change the page printing order.
USE the Pickups by Hour workbook in the practice file folder for this topic. This practice file is located in the My Documents\Microsoft Press\Excel SBS\Printing folder. OPEN the Pickups by Hour workbook.
CLOSE the Pickups by Hour workbook. |
EAN: 2147483647
Pages: 143
- Structures, Processes and Relational Mechanisms for IT Governance
- An Emerging Strategy for E-Business IT Governance
- Measuring and Managing E-Business Initiatives Through the Balanced Scorecard
- Measuring ROI in E-Commerce Applications: Analysis to Action
- Technical Issues Related to IT Governance Tactics: Product Metrics, Measurements and Process Control