| Some people love the Extract tool. I'm not one of them. If you master all the other selection techniques we've discussed, you'll almost always get a better (and quicker) result than by using Extract. That said, Extract is a viable alternative to channel masks when cutting out complex subjects.. Before we look at the finer points, let's step through the Extract process. Try this on any of your own images with a hairy subject against a low contrast background. 1. | Always begin by duplicating your layer (Command/Ctrl-J) to protect your image. Extract deletes unwanted portions of an image rather than masking them.
| 2. | To access the Extract tool, choose Filter > Extract (Command/Ctrl-Option/Alt-X). Highlight the edges of the subject to be extracted by drawing around it with the Highlighter tool. The default highlight color is green. Change the width of the highlighter according to the type of edge transition. Extract looks for the difference in contrast between pixels in the foreground and background of your selection, so make sure that the highlight overlaps both the foreground and background areas along the edge. Be sure to include any interior areas of transition. The fatter the brush, the more touch-up you'll have to do, although fatter brushes make for easy (and sloppy) selections. If your subject goes to the edges of your canvas, you don't need to outline along the edge. Smart Highlighting varies the width of the highlighter and works best if the edge is well defined. If you go wrong, hold down Option/Alt to toggle to the Eraser tool.
Figure 6.28. The original image (example A), and outlined with the Extract tool Highlighter (example B). 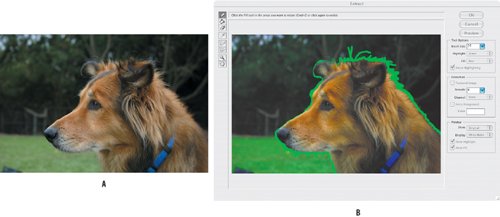
| | | 3. | Once the outline is drawn, switch to the Paint Bucket and click inside the object to fill within your selection. The default Fill color is blue.
Figure 6.29. The subject filled with the Paint Bucket. 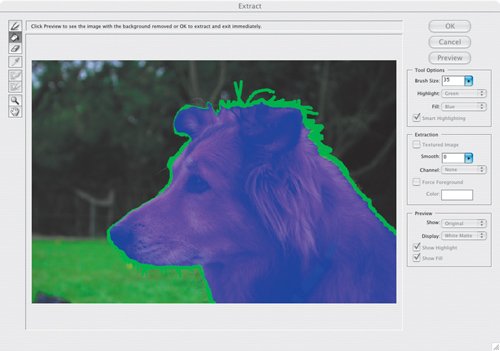
| 4. | Preview. At the bottom right of the Extract window you can select various options to preview the extracted subject against different backgrounds, show the object's highlight or fill, or switch between the original and extracted image.
Figure 6.30. The Extracted subject. 
| | | 5. | Refine and touch up the image using the Cleanup tool and the Edge Touchup tools, which only become available after you click the Preview button. The Cleanup tool subtracts opacity, with multiple passes having a cumulative effect. To restore opacity, hold down Option/Alt. The Edge Touchup tool sharpens the edges of the extracted image by adding opacity to the image or making the background more transparent.
| 6. | Once you're satisfied with the result, click OK to apply the extraction.
|
For best results with Extract, you'll want to take a few extra steps, either with a layer mask or alpha channel. Refining Extracted Edges with a Layer Mask It's worth using the Extract Touchup tools to fix any obvious problems with your extraction, but for fine-tuning you'll also want to use a layer mask. Here's how. 1. | Follow steps 1 through 6 of the previous section, "Extracting Subjects," to duplicate your original layer and make the extraction on the duplicate layer.
| 2. | Load the transparency mask from the extracted layer by Command/Ctrl-clicking the layer thumbnail and turn this selection into a layer mask on the unextracted layer. (If this is a Background layer, Option/Alt double-click its thumbnail to convert it to a normal layer.)
| 3. | Now that it has served its purpose, delete the extracted layer.
| 4. | With the layer mask, use your full repertoire of masking tricks to refine the edgesrestoring any lost parts by painting in white, selectively blurring parts of the edge by painting on the layer mask with the Blur tool, and spreading or choking the mask using Levels or Curves.
|
Figure 6.31. A bright color layer underneath the image layer highlighting any edge problems (example A) and the extracted layer as the basis for the layer mask (example B). 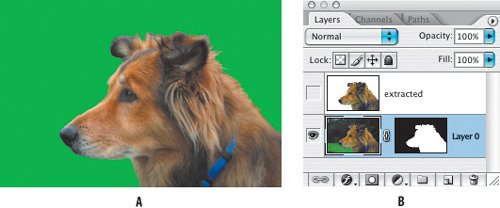
Using Extract with an Alpha Channel Here's a handy technique for combining the precision of the Pen tool with the capabilities of Extract, devised by Russell Brown, the wacky professor of Photoshop. It combines the Extract techniques we have used thus far with an alternative, more accurate, method of highlighting the edge of your subject. Because using the Extract Highlighter tool can be a bit hit or miss, you can get more predictable results if you use an alpha channel derived from a pen path as the basis for your extraction. Figure 6.32. The original tiger image (example A) and the extracted version (example B). 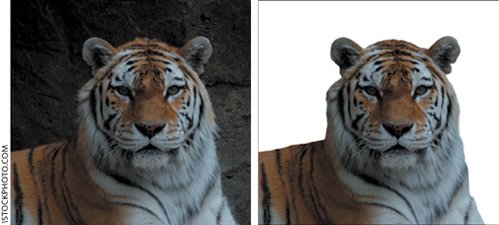
1. | Before we can extract our subject, we need to prepare our image. Draw a pen path around your subject. Double-click the Work Path thumbnail in the Paths palette to save the path.
| 2. | Duplicate your layer (Command/Ctrl-J). It's this duplicate (unextracted) layer to which we will later add a layer mask.
| 3. | Create a new channel (Alpha 1) by clicking the New Channel icon at the bottom of the Channels palette. The new channel will be black. Make your foreground color white, choose your Brush tool and a 20-pixel brush at 50% hardness. With your saved path active, click the Stroke Path with Brush icon at the bottom of the Paths palette.
| 4. | Invert the channel (Command/Ctrl-I). Your channel should now be white with the shape of your subject outlined in black. It is this outline that we will use instead of the Extract Highlighter tools to define the subject.
| | | 5. | Now that the image is prepped, choose Filter > Extract (Command/Ctrl-Option/Alt-X). In the Extract dialog box, choose Alpha 1 from the Channel drop-down menu as your outline and proceed with Extraction as above in "Extracting Subjects," steps 3 through 6.
Figure 6.33. Stroking a path on a new channel (example A), inverting the channel (example B), and then using it as an alternative to the Highlighter tool (example C). 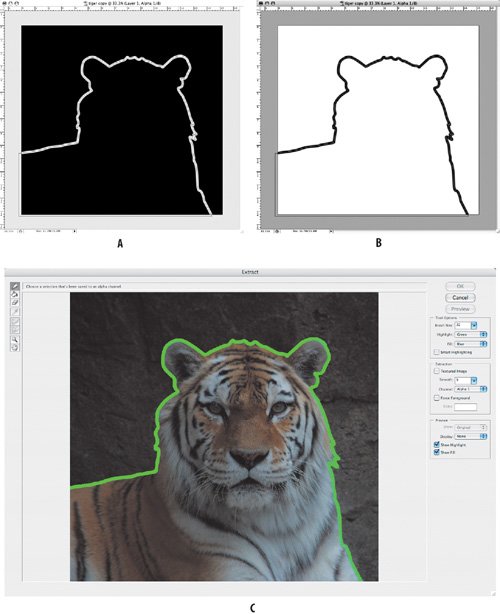
Figure 6.34. The resulting extraction. 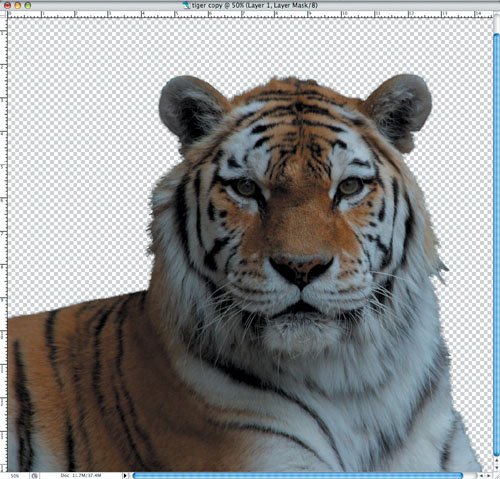
| 6. | Once you're satisfied with the extraction, fine-tune the edges using a layer mask as outlined in steps 2 through 4 of the previous technique, "Refining Extracted Edges with a Layer Mask."
|
|