Combining Soft and Sharp Selection Edges


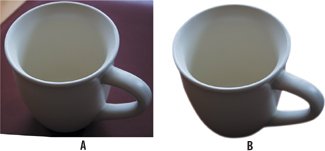
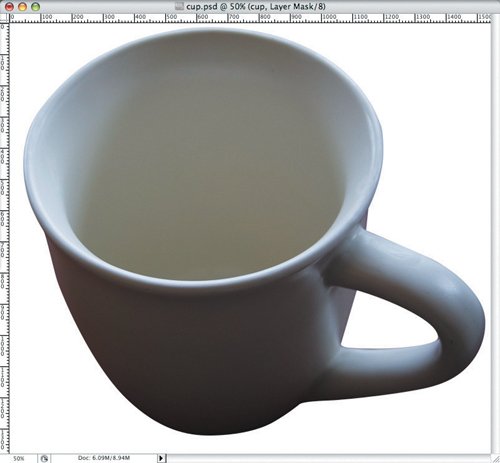
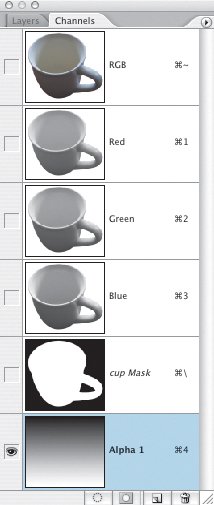
Sometimes one part of your selection edge is softer or sharper than the rest. Layer masks allow you to combine soft and sharp edges in the same selection. In this example, the top of the coffee cup is sharp focus while the base of the cup is in softer focus. To retain this quality in the layer mask we need to vary the softness of the mask edge.

Figure 4.47. The original image with the rim of the cup in sharper focus than the base (example A). The completed cutout image (example B).


1.

Open the Teacup image.

2.

Make a pen path around the cup. Save the work path, then convert the save path to a selection with a feather radius of 0.

3.

With the selection active, click the Add Layer Mask icon at the bottom of the Layers palette. Note: I have set my Transparency Grid settings to None because I find the checkerboard distracting.

4.

Apply a 2-pixel Gaussian Blur to the layer mask to soften the whole selection edge slightly.

5.

Open the Channels palette and click the Create new channel icon at the bottom of the palette. The new channel appears in solid black. Choose your Gradient tool (g) and, using a linear black to white gradient, drag from the top to the bottom of your canvas. This gradient alpha channel serves as the selection in the next step.

Figure 4.48. A layer mask added to the layer. No feathering is yet applied, hence the somewhat jagged edges.


6.

Return to the layer mask and load the gradient alpha channel either by choosing Select > Load Selection or by Command/Ctrl-clicking its thumbnail in the Channels palette. With the selection active, hold down the Option/Alt key and choose Gaussian Blur from the top of the filter menu (at the top because it was the last filter used). Apply a value of about 8 pixelsyour active selection graduates the effect of the filter so that the blurring is strongest at the bottom of the image. As an alternative, if you want to manually soften specific parts of a mask you can paint on the mask using the Blur tool.

The additional blurring has softened the mask towards the bottom of the cup, but it has also spread the selection, introducing some background colors.

7.

To counteract the spread and introduction of background colors, choke the mask by using Levels on the layer mask and moving the Black and Mid point sliders to the right.

Figure 4.49. A gradient alpha channel, which will be used to soften the bottom portion of layer mask.


Adobe PhotoShop Unmasked. The Art and Science of Selections, Layers, and Paths
Adobe Photoshop Unmasked: The Art and Science of Selections, Layers, and Paths
ISBN: 0321441206
EAN: 2147483647
Year: 2004
Pages: 93
Authors: Nigel French

flylib.com © 2008-2017.
If you may any questions please contact us: flylib@qtcs.net