Blending Different Exposures
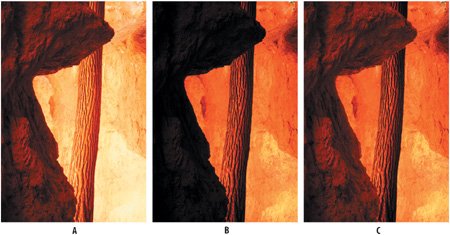
| Layer masks make it possible to combine different exposures of the same image. This is especially useful when you have an image that has deep shadows as well as bright highlights. Figure 4.21. The source images (examples A and B) and the finished composition (example C). This picture of Bryce Canyon contains a very dark foreground shape. The image was scanned from a transparency, and no matter how I tweaked the scanner software, I got one of two unacceptable results: if the scanner software was adjusted to capture the bright values of the background rock and the tree, the foreground shape became a dark blob that held no detail, or if the scanner software was adjusted to capture the foreground, the background became overexposed. The solutions: scan the image twice; or if working with a Camera RAW file, open two versions of the imageone that captures highlight detail, the other that captures shadow detail.
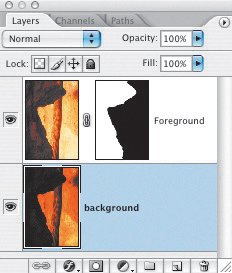
Figure 4.22. The Layers palette showing how the image is constructed.
|

EAN: 2147483647
Pages: 93