Advanced GDI
Advanced GDI+
I kind of like the happy face I created in the last section, so I'll get a little more mileage out of it by using it to demonstrate a few more advanced GDI+ topics: scrollable windows, optimizing, and double buffering. By "advanced," I don't mean difficult—rather, I mean less obvious in how to implement. All three topics aren't that hard to implement.
Scrollable Windows
In the previous chapter on Win Forms, you didn't have to worry about a scrolling window as the Win Form handled it itself. With GDI+, on the other hand, it's up to you to add the necessary two lines in your code to get the scrollable window to work. Yep, you read correctly: two lines of code.
For those of you who aren't sure what a scrollable window is, it's a window that automatically attaches scroll bars to itself when the display information extends beyond its width. You use the scroll bar to shift the display area over so you can view this obscured displayed information.
To enable automatic scroll bars in a form, you need to update the AutoScrollMinSize property for the form:
this->AutoScrollMinSize = Drawing::Size(400, 400);
The size that you need to specify is the smallest area needed to display all the information. In my case, I was a little overzealous on the size so that you can see the scrolling better.
When you add the preceding line to your previous happy face example, you get scroll bars as shown in Figure 11-16, and everything seems hunky-dory.
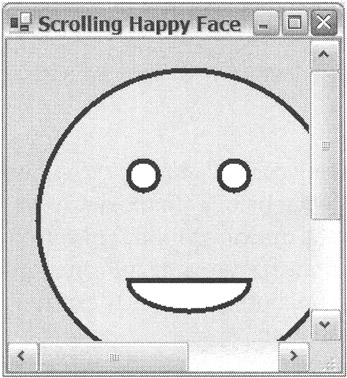
Figure 11-16: A happy face in a scrollable window
Or is it? When you try to scroll the window, you get nothing but garbage, as you can see in Figure 11-17.
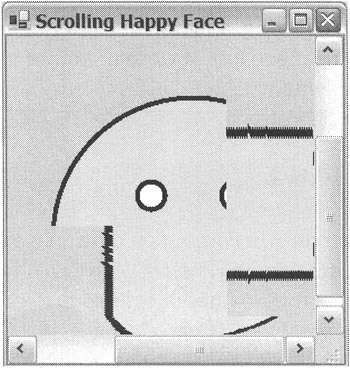
Figure 11-17: A not-so-happy happy face in a scrollable window
What's happening here? Believe it or not, the program is functioning perfectly—just not how you want it to. You can find the problem in the Paint event handler. The following steps show how the current program is working:
-
You click the scroll bar.
-
The window scrolls.
-
The Invalidate event is triggered for the clip area of the newly exposed window.
-
The Paint event handler executes.
-
The newly exposed window is replaced with any display data that belongs in it.
Sounds like it's working correctly to me, except for one minor detail. How does the program know what belongs in the newly exposed clip area? Notice that all the points in each of the drawing routines haven't been notified that the scroll took place. They're still drawing the same information at the same locations. Thus, the window is just repainting the newly exposed clip area with the original and wrong display information.
You have two (at least) ways of solving this problem. You might try adjusting each of the drawing routines by the amount of the scroll so that when they're called they render correctly. This solution isn't so bad when you're dealing with a handful of drawing and filling routines, but it's not good for a large number of routines.
An easier solution is to translate the origin of the Graphics class using the TranslateTransform() method (which I discussed earlier) to reflect the scroll. This solution has the same effect as the previous solution. The best part is that you have to add only one line of code, instead of changing every draw and fill routine. (Told you it would take two lines of code!)
g->TranslateTransform(AutoScrollPosition.X, AutoScrollPosition.Y);
It's also fortunate that the Form class provides a property, AutoScrollPosition, that indicates how much was scrolled.
Listing 11-16 shows the adjusted happy face program to handle scroll bars.
Listing 11-16: A Scrolling Happy Face
namespace ScrollingHappyFace { using namespace System; using namespace System::ComponentModel; using namespace System::Collections; using namespace System::Windows::Forms; using namespace System::Data; using namespace System::Drawing; public __gc class Form1 : public System::Windows::Forms::Form { public: Form1(void) //... protected: void Dispose(Boolean disposing) //... private: System::ComponentModel::Container * components; void InitializeComponent(void) { this->AutoScrollMinSize = System::Drawing::Size(400, 400); this->AutoScaleBaseSize = System::Drawing::Size(6, 15); // Force scrolling // this should actually try to display as much as possible of the // image and not a small portion as this is doing this->ClientSize = System::Drawing::Size(250, 250); this->Name = S"Form1"; this->Text = S"Scrolling Happy Face"; this->Paint += new System::Windows::Forms::PaintEventHandler(this,Form1_Paint); } private: System::Void Form1_Paint(System::Object * sender, System::Windows::Forms::PaintEventArgs * e) { Graphics *g = e->Graphics; g->TranslateTransform(AutoScrollPosition.X, AutoScrollPosition.Y); Pen *b4pen = new Pen(Color::Black, 4); Rectangle rect = Drawing::Rectangle(25, 25, 250, 250); g->FillEllipse(Brushes::Yellow, rect); g->DrawEllipse(b4pen, rect); g->FillPie(Brushes::White, 100, 175, 100, 50, 0, 180); g->DrawPie(b4pen, 100, 175, 100, 50, 0, 180); rect = Drawing::Rectangle(100, 100, 25, 25); g->FillEllipse(Brushes::White, rect); g->DrawEllipse(b4pen, rect); rect = Drawing::Rectangle(175, 100, 25, 25); g->FillEllipse(Brushes::White, rect); g->DrawEllipse(b4pen, rect); } }; } Figure 11-18 shows a happily scrolled happy face.
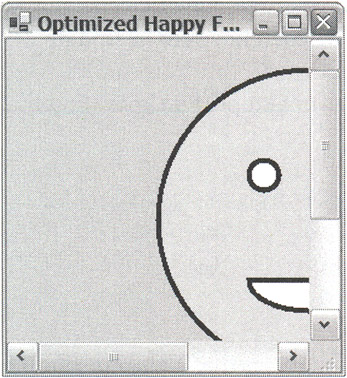
Figure 11-18: The left side of a happy face
Optimizing GDI+
You have many ways to optimize GDI+. This section describes the most obvious and easiest to implement methods.
Did you notice something about your Paint event handler method in the previous example? It executed every line in itself even if it was only replaying a small sliver of the graphic display. Wouldn't it be better and faster if only the parts of the Paint event handler method that need executing were executed? Let's see how you can do this.
The first thing you have to figure out is how to let a draw or fill method know that it needs to be executed.
What do all the draw and fill routines have in common in the preceding example? They all have a bounding rectangle. This rectangle indicates the area that it is supposed to update. Okay, so you know the area each draw or fill method needs to update.
Rectangle Head = Drawing::Rectangle(125, 25, 250, 250); g->FillEllipse(Brushes::Yellow, Head);
Next, you need to know if this area is the same as what needs to be updated on the drawing surface. Remember way back near the beginning of the chapter where I wrote that the PaintEventArgs parameter provides two pieces of information: the Graphics and the ClipRectangle? This clip rectangle is the area that needs to be updated.
Drawing::Rectangle ClipRect = pea->ClipRectangle;
You now have two rectangles: one that specifies where it will update and another that specifies where it needs to be updated. So by intersecting these two rectangles, you can figure out if the draw routine needs to be executed, because when the intersection is not empty you know that the draw or fill needs to be executed.
if (!(Rectangle::Intersect(ClipRect, Head)).IsEmpty) { //...Execute draw or fill method } The neat thing about this is that if you surround every draw and fill method with this comparison, when the Paint event handler is executed, only the draw or fill methods that need to be executed are.
There is one more wrinkle, though. The clip area is based on the client area and not the scroll area. This sounds familiar, doesn't it? So you have to adjust the clip area by the negative of AutoScrollPosition.
ClipRect.Offset(-AutoScrollPosition.X, -AutoScrollPosition.Y);
Why negative? You're doing the exact opposite of what you did in the previous example. This time you're moving the object on the drawing surface and keeping the drawing surface still. In the previous example, you kept the objects still and moved the drawing surface (well, it's not really doing this but it's easier to picture this way).
Listing 11-17 shows the scrollable happy face program with this optimization.
Listing 11-17: An Optimized Scrollable Happy Face
namespace OptimizedHappyFace { using namespace System; using namespace System::ComponentModel; using namespace System::Collections; using namespace System::Windows::Forms; using namespace System::Data; using namespace System::Drawing; public __gc class Form1 : public System::Windows::Forms::Form { public: Form1(void) { Head = Drawing::Rectangle(125, 25, 250, 250); Mouth = Drawing::Rectangle(200, 175, 100, 50); LEye = Drawing::Rectangle(200, 100, 25, 25); REye = Drawing::Rectangle(275, 100, 25, 25); b4pen = new Pen(Color::Black, 4); InitializeComponent(); } protected: void Dispose(Boolean disposing) //... private: System::ComponentModel::Container * components; private: Drawing::Rectangle Head; private: Drawing::Rectangle Mouth; private: Drawing::Rectangle LEye; private: Drawing::Rectangle REye; private: Pen *b4pen; void InitializeComponent(void) { this->AutoScaleBaseSize = System::Drawing::Size(6, 15); this->AutoScroll = true; this->AutoScrollMinSize = System::Drawing::Size(400, 400); this->BackColor = System::Drawing::Color::Green; this->ClientSize = System::Drawing::Size(250, 250); this->Name = S"Form1"; this->Text = S"Optimized Happy Face"; this->Paint += new System::Windows::Forms::PaintEventHandler(this,Form1_Paint); } private: System::Void Form1_Paint(System::Object * sender, System::Windows::Forms::PaintEventArgs * e) { Graphics *g = e->Graphics; Drawing::Rectangle ClipRect = e->ClipRectangle; ClipRect.Offset(-AutoScrollPosition.X, -AutoScrollPosition.Y); g->TranslateTransform(AutoScrollPosition.X, AutoScrollPosition.Y); if (!(Rectangle::Intersect(ClipRect, Head)).IsEmpty) { g->FillEllipse(Brushes::Yellow, Head); g->DrawEllipse(b4pen, Head); if (!(Rectangle::Intersect(ClipRect, Mouth)).IsEmpty) { g->FillPie(Brushes::White, Mouth, 0, 180); g->DrawPie(b4pen, Mouth, 0, 180); } if (!(Rectangle::Intersect(ClipRect, LEye)).IsEmpty) { g->FillEllipse(Brushes::White, LEye); g->DrawEllipse(b4pen, LEye); } if (!(Rectangle::Intersect(ClipRect, REye)).IsEmpty) { g->FillEllipse(Brushes::White, REye); g->DrawEllipse(b4pen, REye); } } } }; } Notice that in the code I threw in one more optimization in OptimizedHappyFace.exe. The Paint event handler method doesn't draw the mouth or eyes if the head doesn't need to be painted. I can do this because the mouth and eyes are completely enclosed within the head, so if the head doesn't need painting, there's no way that the mouth or eyes will either.
Double Buffering
Double buffering is the technique of using a secondary off-screen buffer to render your entire screen image. Then, in one quick blast, you move the completed secondary buffer onto your primary on-screen form or control.
Using double buffering speeds up the rendering process and makes image movement much smoother by reducing flickering. Let's give the happy face some life and let it slide repeatedly across the form.
Unbuffer Method
The first example in Listing 11-18 shows how you can implement this without double buffering. (There are other ways of doing this—some of them are probably more efficient.) There is nothing new in the code. You start by creating a Timer and telling it to invalidate the form each time it is triggered. Then you render the happy face repeatedly, shifting it over to the right and slowing it by changing the origin with the TranslateTransform() method. When the happy face reaches the end of the screen, you reset the happy face back to the left and start again.
Listing 11-18: Sliding the Happy Face the Ugly Way
namespace SingleBuffering { using namespace System; using namespace System::ComponentModel; using namespace System::Collections; using namespace System::Windows::Forms; using namespace System::Data; using namespace System::Drawing; public __gc class Form1 : public System::Windows::Forms::Form { public: Form1(void) { X = -250; // Preset to be just left of window InitializeComponent(); } protected: void Dispose(Boolean disposing) //... private: System::ComponentModel::IContainer * components; private: System::Windows::Forms::Timer * timer1; private: Single X; // Actual x coordinate of Happy face void InitializeComponent(void) { this->components = new System::ComponentModel::Container(); this->timer1 = new System::Windows::Forms::Timer(this->components); // // timer1 // this->timer1->Enabled = true; this->timer1->Interval = 10; this->timer1->Tick += new System::EventHandler(this, timerl_Tick); // // Form1 // this->AutoScaleBaseSize = System::Drawing::Size(6, 15); this->ClientSize = System::Drawing::Size(500, 300); this->Name = S"Form1"; this->Text = S"Sliding Happy Face"; this->Paint += new System::Windows::Forms::PaintEventHandler(this,Forml_Paint); } private: System::Void Forml_Paint(System::Object * sender, System::Windows::Forms::PaintEventArgs * e) { Graphics *g = e->Graphics; // Move image at end of line start from beginning if (X < ClientRectangle.Width) X += 1.0; else X = -250.0; g->TranslateTransform(X, 25.0); // redraw images from scratch Pen *b4pen = new Pen(Color::Black, 4); Drawing::Rectangle Head = Drawing::Rectangle(0, 0, 250, 250); g->FillEllipse(Brushes::Yellow, Head); g->DrawEllipse(b4pen, Head); Drawing::Rectangle Mouth = Drawing::Rectangle(75, 150, 100, 50); g->FillPie(Brushes::White, Mouth,0,180); g->DrawPie(b4pen, Mouth, 0, 180); Drawing::Rectangle LEye = Drawing::Rectangle(75, 75, 25, 25); g->FillEllipse(Brushes::White, LEye); g->DrawEllipse(b4pen, LEye); Drawing::Rectangle REye = Drawing::Rectangle(150, 75, 25, 25); g->FillEllipse(Brushes::White, REye); g->DrawEllipse(b4pen, REye); } private: System::Void timer1_Tick(System::Object * sender, System::EventArgs * e) { // Move the image Invalidate(); } }; } When you run SingleBuffering.exe, you will see a rather ugly, flickering happy face sort of sliding across the screen. If you have a superpowered computer with a great graphics card, then the flickering may not be that bad, or it may be nonexistent. My computer is on the average side, and it still looks kind of pathetic.
Double Buffer Method
I change as little of the original code as possible in the double buffering example in Listing 11-19, which should enable you to focus on only what is needed to implement double buffering.
Listing 11-19: Sliding a Happy Face Double Buffer Style
namespace DoubleBuffering { using namespace System; using namespace System::ComponentModel; using namespace System::Collections; using namespace System::Windows::Forms; using namespace System::Data; using namespace System::Drawing; public __gc class Form1 : public System::Windows::Forms::Form { public: Form1(void) { dbBitmap = 0; dbGraphics = 0; X = -250.0; // Preset to be just left of window InitializeComponent(); this->SetStyle(ControlStyles::Opaque, true); } protected: void Dispose(Boolean disposing) //... private: System::Windows::Forms::Timer * timer1; private: System::ComponentModel::IContainer * components; private: Bitmap *dbBitmap; private: Graphics *dbGraphics; private: Single X; // Actual x coordinate of Happy face private: void InitializeComponent(void) { this->components = new System::ComponentModel::Container(); this->timer1 = new System::Windows::Forms::Timer(this->components); // // timer1 // this->timer1->Enabled = true; this->timer1->Interval = 10; this->timer1->Tick += new System::EventHandler(this, timer1_Tick); // // Form1 // this->Resize += new System::EventHandler(this, Form1_Resize); this->Paint += new System::Windows::Forms::PaintEventHandler(this,Form1_Paint); this->AutoScaleBaseSize = System::Drawing::Size(6, 15); this->ClientSize = System::Drawing::Size(500, 300); this->Name = S"Form1"; this->Text = S"Sliding Happy Face"; } private: System::Void Form1_Paint(System::Object * sender, System::Windows::Forms::PaintEventArgs * e) { // Move image at end of line start from beginning if (X < ClientRectangle.Width) { X += 1.0; dbGraphics->TranslateTransform(1.0, 0.0); } else { X = -250.0; dbGraphics-> TranslateTransform(-(ClientRectangle.Width+250), 0.0); } // Clear background dbGraphics->Clear(Color::White); // redraw image from scratch Pen *b4pen = new Pen(Color::Black, 4); Drawing::Rectangle Head = Drawing::Rectangle(0, 0, 250, 250); dbGraphics->FillEllipse(Brushes::Yellow, Head); dbGraphics->DrawEllipse(b4pen, Head); Drawing::Rectangle Mouth = Drawing::Rectangle(75, 150, 100, 50); dbGraphics->FillPie(Brushes::White, Mouth,0,180); dbGraphics->DrawPie(b4pen, Mouth, 0, 180); Drawing::Rectangle LEye = Drawing::Rectangle(75, 75, 25, 25); dbGraphics->FillEllipse(Brushes::White, LEye); dbGraphics->DrawEllipse(b4pen, LEye); Drawing::Rectangle REye = Drawing::Rectangle(150, 75, 25, 25); dbGraphics->FillEllipse(Brushes::White, REye); dbGraphics->DrawEllipse(b4pen, REye); // Make the buffer visible e->Graphics->DrawImageUnscaled(dbBitmap, 0, 0); } private: System::Void Form1_Resize(System::Object * sender, System::EventArgs * e) { // Get rid of old stuff if (dbGraphics != 0) { dbGraphics->Dispose(); dbGraphics = 0; } if (dbBitmap != 0) { dbBitmap->Dispose(); dbBitmap = 0; } if (ClientRectangle.Width > 0 && ClientRectangle.Height > 0) { // Create a bitmap dbBitmap = new Bitmap(ClientRectangle.Width,ClientRectangle.Height); // Grab its Graphics dbGraphics = Graphics::FromImage(dbBitmap); // Set up initial translation after resize (also at start) dbGraphics->TranslateTransform(X, 25.0); } } private: System::Void timer1_Tick(System::Object * sender, System::EventArgs * e) { // Move the image Invalidate(); } }; } As the technique's name suggests, you need an extra buffer. Creating one is simple enough:
dbBitmap = new Bitmap(ClientRectangle.Width, ClientRectangle.Height);
You have not covered the Bitmap class. But for the purposes of double buffering, all you need to know is that you create a bitmap by specifying its width and height. If you want to know more about the Bitmap class, the .NET Framework documentation is quite thorough.
If you recall, though, you don't call draw and fill methods from a bitmap—you need a Graphics class. Fortunately, it's also easy to extract the Graphics class out of a bitmap:
dbGraphics = Graphics::FromImage(dbBitmap);
Now that you have a Graphics class, you can clear, draw, and fill it just like you would a form-originated Graphics class:
dbGraphics->FillEllipse(Brushes::Yellow, Head); dbGraphics->DrawEllipse(b4pen, Head);
So how do you implement a double buffer? The process is pretty much the same as for a single buffer, except that instead of drawing to the display device directly, you draw to the buffer. Once the image is complete, you copy the completed image to the display device. Notice you copy the image or buffer and not the graphic.
e->Graphics->DrawImageUnscaled(dbBitmap, 0, 0);
The reason double buffering is faster than single buffering is because writing to memory is faster than writing to the display device. Flickering is not an issue because the image is placed in its complete state onto the screen. There is no momentary delay, as the image is being built in front of your eyes.
Listing 11-19 shows the changes needed to implement double buffering. I don't claim this is the best way to do it. The goal is to show you what you need to do using GDI+.
Let's take a look at some of the changes that were needed. I already mentioned the building of a bitmap, so I'll skip that.
The first difference is that you have to handle the resizing of the form. The reason you must do this is because the secondary off-screen buffer needs to have the same dimensions as the primary on-screen buffer. When a form is resized, the primary buffer changes size, therefore you need to change the secondary buffer.
Notice also that you dispose of the Graphics class and the Bitmap class. Both of these classes use a lot of resources between them, and disposing the old one before the new releases those resources. You need to check to make sure they have been initialized, because the first time this method is run they have not been initialized. Also, when the form is minimized you get rid of the buffer, so when the form is expanded you need to build the buffer again.
this->Resize += new EventHandler(this, Form_Resize); //... void Form_Resize(Object *sender, EventArgs *ea) { // Get rid of old stuff if (dbGraphics != 0) { dbGraphics->Dispose(); dbGraphics = 0; } if (dbBitmap != 0) { dbBitmap->Dispose(); dbBitmap = 0; } if (ClientRectangle.Width > 0 && ClientRectangle.Height > 0) { // Create a bitmap dbBitmap = new Bitmap(ClientRectangle.Width,ClientRectangle.Height); // Grab its Graphics dbGraphics = Graphics::FromImage(dbBitmap); // Set up initial translation after resize (also at start) dbGraphics->TranslateTransform(X, 25.0); } } | Caution | You need to assign the Resize event handler before you set the size of the form. If you don't, the Resize event handler won't be called the first time to initialize dbBitmap and dbGraphics. |
The next difference is an important one. It is the setting of the style of the form to opaque. What this does is stop the form from clearing itself when it receives Invalidate().
SetStyle(ControlStyles::Opaque, true);
There is no need to clear the on-screen buffer because the off-screen buffer will overwrite everything on the on-screen buffer. All the clearing of the onscreen buffer does is momentarily leave the screen empty before the off-screen buffer writes to it, which produces a flicker.
| Caution | If you forget to set the style to opaque, your image will flicker. |
The last difference that I haven't already discussed is the TranslateTransform() changes. Notice that you translate by one each time and not by "X". The reason for this is that the same Graphics class stays active the entire time this program is running (unless the screen in resized). The same translation matrix is being used, so you only need to increment by one. When you reach the end of the screen, you need to translate all the way back in one big jump.
if (X < ClientRectangle.Width) { X += 1.0; dbGraphics->TranslateTransform(1.0, 0.0); } else { X = -250.0; dbGraphics->TranslateTransform(-(ClientRectangle.Width+250), 0.0); } Figure 11-19 shows DoubleBuffering.exe sliding a happy face across the form. Unfortunately, this still image doesn't show much of the sliding.
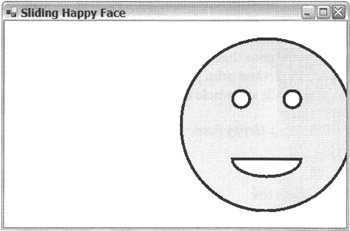
Figure 11-19: The sliding happy face
EAN: 2147483647
Pages: 169