The Menu
I finish the discussion of .NET Framework Form controls with the menu. Though it's not really a control, because it isn't derived from the Control class, you implement a menu in the exact same way. Like a control, the menu is inherited from the Component class, so it inherits all the Component's functionality. The menu (as just mentioned) doesn't inherit from the Control class—in its place is the abstract Menu class.
Menu Basics
The creation of menus requires two classes: MainMenu and MenuItem. The MainMenu class and its members handle all the functionality associated with the bar that runs across the top of the form. You will usually not use many of MainMenu's members, except maybe the following two:
-
GetForm() is a method that returns a pointer to a Form object that contains the menu. It will return null if the menu is not contained within a Form.
-
MenuItems is a MenuItemCollection object that represents all the MenuItem objects associated with the menu. The default is null or no menu items exist in the menu.
The MenuItem class, with its associated properties, handles all the entries that make up the menu. Here are some of the more common properties:
-
Checked is a Boolean that represents whether a check mark appears next to the menu item. The default is false, which means it won't display the check mark.
-
Enabled is a Boolean that represents whether the menu item is enabled. The default is true, which means it can be accessed.
-
Index is a zero-based Int32 that represents the index of the current menu item within its parent menu.
-
Parent is a Menu object that represents the parent menu of the current menu item.
-
RadioCheck is a Boolean that represents whether to display a radio-style check mark or a standard check mark. Note that no logic is provided to handle radio-style check marks. This property simply changes the image. You need to code the radio logic yourself.
-
Shortcut is a Shortcut enum that represents the shortcut keystroke associated with the menu item. The default is Shortcut:: None, which associates no shortcut.
-
ShowShortCut is a Boolean that represents whether the shortcut is displayed. The default is true.
-
Text is a String that represents the text to display for the menu item.
The steps involved in creating a menu are not difficult, especially if you're creating a static menu with the GUI design tool. On the other hand, laying out and keeping track of all the MenuItems for a runtime built menu can be a royal pain in the...(hmmm, I'm not allowed to say that, am I?). You'll start learning how to create a menu by hand by taking a look at the simplest menu (that actually does something) that you can create (see Listing 10-11). It is a MainMenu with two MenuItems. In truth, you could create a menu with one MenuItem, but then it would be a button in a menu's cloak and not a menu.
Listing 10-11: The Simplest Menu
namespace SimpleMenu { using namespace System; using namespace System::ComponentModel; using namespace System::Collections; using namespace System::Windows::Forms; using namespace System::Data; using namespace System::Drawing; public __gc class Form1 : public System::Windows::Forms::Form { public: Form1(void) { InitializeComponent(); // Create MenuItem exitItem = new MenuItem(); exitItem->Text = S"E&xit"; exitItem->Click += new EventHandler(this, menuItem_Click); // Create Root MenuItem and submenu items fileMenu = new MenuItem(); fileMenu->Text = S"&File"; fileMenu->MenuItems->Add(exitItem); // Create MainMenu and add root menuitem mainMenu = new MainMenu(); mainMenu->MenuItems->Add(fileMenu); // Add MainMenu to Form Menu = this->mainMenu; } protected: void Dispose(Boolean disposing) //... private: MainMenu *mainMenu; private: MenuItem *fileMenu; private: MenuItem *exitItem; private: System::ComponentModel::Container * components; void InitializeComponent(void) { this->components = new System::ComponentModel::Container(); this->Size = System::Drawing::Size(300,300); this->Text = S"A simple Menu"; } private: void menuItem_Click(Object *sender, EventArgs *e) { if (sender == exitItem) { Application::Exit(); } } }; } As you can see from the preceding code, the process of creating a menu is simply to create and then add MenuItems to a root MenuItem:
// Create MenuItem exitItem = new MenuItem(); exitItem->Text = S"E&xit"; exitItem->Click += new EventHandler(this, menuItem_Click); // Create Root MenuItem fileMenu = new MenuItem(); fileMenu->Text = S"&File"; // Add MenuItem to Root MenuItem fileMenu->MenuItems->Add(exitItem);
Add the root MenuItem to the MainMenu:
mainMenu = new MainMenu(); mainMenu->MenuItems->Add(fileMenu);
Finally, add the MainMenu to the Form:
Menu = this->mainMenu;
All this is pretty straightforward. Figure 10-13 shows what SimpleMenu.exe looks like when you execute it.
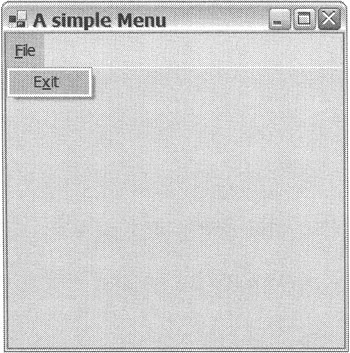
Figure 10-13: A simple menu
A menu handles events in a similar fashion as the button. The menu triggers click events for each MenuItem. You need to create an event handler to handle these events. You may have noticed in the example that you verify the MenuItem that generated the event. In the simple menu, as previously, this is a little redundant, but in larger menus you will probably have many MenuItems handled by the same handler. This checking of which MenuItem is how you go about processing each MenuItem uniquely. If this isn't clear, the next example expands on the concept a bit, which should make things clearer.
Oh, by the way, if you don't know, the Application::Exit() method stops execution of your program.
More Menu Features
Okay, you have the basics of the menu. Let's take a look at a menu (see Listing 10-12) that is more feature-rich, though still small in size. This example has two root menus, multiple sub-MenuItems, and nested sub-MenuItems.
Listing 10-12: A More Elaborate Menu
namespace ElaborateMenu { using namespace System; using namespace System::ComponentModel; using namespace System::Collections; using namespace System::Windows::Forms; using namespace System::Data; using namespace System::Drawing; public __gc class Form1 : public System::Windows::Forms::Form { public: Form1(void) { InitializeComponent(); // Create "This" MenuItem file_do_this_Item = new MenuItem(); file_do_this_Item->Text = S"Thi&s"; file_do_this_Item->Click += new EventHandler(this, menuItem_Click); // Create "That" MenuItem file_do_that_Item = new MenuItem(); file_do_that_Item->Text = S"Tha&t"; file_do_that_Item->Click += new EventHandler(this, menuItem_Click); // Create "Other Thing" MenuItem file_do_other_Item = new MenuItem(); file_do_other_Item->Text = S"Othe&r Thing"; file_do_other_Item->Click += new EventHandler(this, menuItem_Click); // Create "DO" MenuItem file_do_Item = new MenuItem(); file_do_Item->Text = S"&Do"; // Add sub MenuItems file_do_Item->MenuItems->Add(file_do_this_Item); file_do_Item->MenuItems->Add(file_do_that_Item); file_do_Item->MenuItems->Add(file_do_other_Item); // Create "Exit" MenuItem file_exit_Item = new MenuItem(); file_exit_Item->Text = S"E&xit"; file_exit_Item->Click += new EventHandler(this, menuItem_Click); // Create "File" MenuItem file_Menu = new MenuItem(); file_Menu->Text = S"&File"; // Add Sub MenuItems file_Menu->MenuItems->Add(file_do_Item); file_Menu->MenuItems->Add(new MenuItem(S"-")); // <- Separator file_Menu->MenuItems->Add(file_exit_Item); // Create "About" MenuItem help_about_Item = new MenuItem(); help_about_Item->Text = S"&About"; help_about_Item->Click += new EventHandler(this, menuItem_Click); // Create "Help" MenuItem help_Menu = new MenuItem(); help_Menu->Text = S"&Help"; // Add Sub MenuItems help_Menu->MenuItems->Add(help_about_Item); // Create MainMenu main_Menu = new MainMenu(); // Add Sub MenuItems main_Menu->MenuItems->Add(file_Menu); main_Menu->MenuItems->Add(help_Menu); // Add MainMenu to Form Menu = this->main_Menu; } protected: void Dispose(Boolean disposing) //... private: MainMenu *main_Menu; private: MenuItem *file_Menu; private: MenuItem *file_do_Item; private: MenuItem *file_do_this_Item; private: MenuItem *file_do_that_Item; private: MenuItem *file_do_other_Item; private: MenuItem *file_exit_Item; private: MenuItem *help_Menu; private: MenuItem *help_about_Item; private: System::ComponentModel::Container * components; void InitializeComponent(void) { this->components = new System::ComponentModel::Container(); this->Size = System::Drawing::Size(300,300); this->Text = S"A Less Simple Menu"; } private: void menuItem_Click(Object *sender, EventArgs *e) { if (sender == file_exit_Item) { Application::Exit(); } else if (sender == help_about_Item) { MessageBox::Show(S"Main Menu v.1.0.0.0"); } else { MessageBox::Show(S"Another MenuItem"); } } }; } Figure 10-14 shows what ElaborateMenu.exe looks like when you execute it.
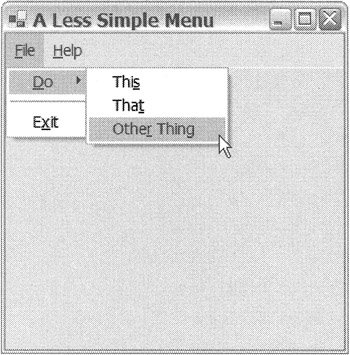
Figure 10-14: A more elaborate menu
The first thing you may notice is that there's a lot of code there for such a small menu. Now think about your favorite applications and how big their menus are. Because there's so much code, you'll probably end up building most of your menus using the GUI design tool, even if it's just to template them out if you plan to ultimately build your menus at runtime.
First, creating a menu hierarchy is similar to the tree hierarchy you looked at earlier. MenuItems can be added to another MenuItem. (You already saw this, by the way, when you added MenuItems to the root MenuItem.) Adding a MenuItem to another MenuItem builds the hierarchy:
file_do_this_Item = new MenuItem(); file_do_this_Item->Text = S"Thi&s"; file_do_this_Item->Click += new EventHandler(this, menuItem_Click); //...Other Sub MenuItems file_do_Item = new MenuItem(); file_do_Item->Text = S"&Do"; file_do_Item->MenuItems->Add(file_do_this_Item); file_do_Item->MenuItems->Add(file_do_that_Item); file_do_Item->MenuItems->Add(file_do_other_Item);
Something you may want to notice is that there's no handling of the Click event on a MenuItem that adds other MenuItems. The event is not sent, so handling it does nothing.
To create a separator, simply create a MenuItem with a hyphen (-) as a parameter.
file_Menu->MenuItems->Add(new MenuItem(S"-")); // <- Separator
Managed C++ garbage collection comes in handy in a little trick that I use with menu separators. Notice that I add them to the parent MenuItem without creating a variable to store it in. You can't do anything with a separator, so there's no reason to keep track of it. That's the garbage collector's job.
A Radio-Checked ContextMenu
Menus don't always appear from the top of the form. Sometimes they drop down from buttons or appear when you right-click items. This type of menu is called a context menu.
Implementing a context menu is not much different than implementing the standard main menu. The only real difference is that you replace the MainMenu class with the ContextMenu class. And you attach the menu to the ContentMenu property of the control or Form.
Check marks on the ContextMenu (or the MainMenu, for that matter) are not handled automatically. Instead, you have to do a little work of your own, and I stress little. Listing 10-13 shows the implementation of a ContextMenu attached to a form. It also shows how to implement a radio-checked menu.
Listing 10-13: A Radio-Checked Menu
namespace RadioMenu { using namespace System; using namespace System::ComponentModel; using namespace System::Collections; using namespace System::Windows::Forms; using namespace System::Data; using namespace System::Drawing; public __gc class Form1 : public System::Windows::Forms::Form { public: Form1(void) { InitializeComponent(); // Default first menu item as checked checkMenuItem = menuItem1; checkMenuItem->Checked = true; } protected: void Dispose(Boolean disposing) //... private: System::Windows::Forms::MenuItem * menuItem1; private: System::Windows::Forms::MenuItem * menuItem2; private: System::Windows::Forms::MenuItem * menuItem3; private: System::Windows::Forms::ContextMenu * contextMenu; private: System::ComponentModel::Container * components; private: MenuItem *checkMenuItem; // The holder of the check mark private: void InitializeComponent(void) { this->contextMenu = new System::Windows::Forms::ContextMenu(); this->menuItem1 = new System::Windows::Forms::MenuItem(); this->menuItem2 = new System::Windows::Forms::MenuItem(); this->menuItem3 = new System::Windows::Forms::MenuItem(); // // contextMenu // System::Windows::Forms::MenuItem* __mcTemp__1[] = new System::Windows::Forms::MenuItem*[3]; __mcTemp__1[0] = this->menuItem1; __mcTemp__1[1] = this->menuItem2; __mcTemp__1[2] = this->menuItem3; this->contextMenu->MenuItems->AddRange(__mcTemp__1); // // menuItem1 // this->menuItem1->Index = 0; this->menuItem1->RadioCheck = true; this->menuItem1->Text = S"Item one"; this->menuItem1->Click += new System::EventHandler(this, menuItem_Click); // // menuItem2 // this->menuItem2->Index = 1; this->menuItem2->RadioCheck = true; this->menuItem2->Text = S"Item Two"; this->menuItem2->Click += new System::EventHandler(this, menuItem_Click); // // menuItem3 // this->menuItem3->Index = 2; this->menuItem3->RadioCheck = true; this->menuItem3->Text = S"Item Three"; this->menuItem3->Click += new System::EventHandler(this, menuItem_Click); // // Form1 // this->AutoScaleBaseSize = System::Drawing::Size(6, 15); this->ClientSize = System::Drawing::Size(292, 270); this->ContextMenu = this->contextMenu; this->Name = S"Form1"; this->Text = S"ContextMenu - Right Click Form"; } private: void menuItem_Click(Object *sender, System::EventArgs *e) { // Uncheck Original checked MenuItem checkMenuItem->Checked = false; // Set the check menu to the selected MenuItem checkMenuItem = dynamic_cast<MenuItem*>(sender); // Check the new MenuItem checkMenuItem->Checked = true; } }; } Most of the preceding code was autogenerated by the design tool as I created this example using the Menu design tool. Using the Menu design tool is pretty self-explanatory. The only tricky thing (at least for me) is making sure you drag the correct menu control to the design form and that you select the correct menu when you are editing (especially if the menus are similar). If you are creating a main menu, then you need to drag the MainMenu control. If you are creating a context menu (as you are in the preceding code), then you need to drag the ContextMenu control. After that, the steps for building a menu are virtually the same for all menus. All you have to do is type in the menu item text in place and then add event handlers.
You don't need to add much code to handle the radio check mark. First, you need an extra MenuItem to hold a pointer to the currently checked menu item:
MenuItem *checkMenuItem; // The holder of the check mark
Next, you assign to this menu item then actual MenuItem that will start off with the check. Then, check the MenuItem:
checkMenuItem = menuItemOne; checkMenuItem->Checked = true;
Finally, in the Click event of the menu, uncheck checkMenuItem, assign the checkMenuItem with the currently selected MenuItem, and then check the checkMenuItem:
checkMenuItem->Checked = false; checkMenuItem = dynamic_cast<MenuItem*>(sender); checkMenuItem->Checked = true;
I did warn you that there wasn't much to it. Figure 10-15 shows what the preceding example code looks like when you execute it.
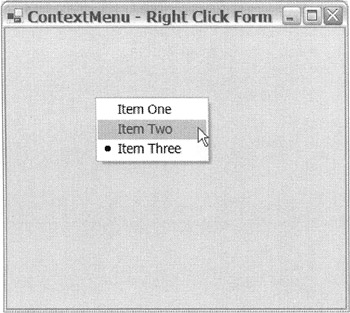
Figure 10-15: A radio-checked menu
EAN: 2147483647
Pages: 169