Web Photo Gallery
| Web Photo Gallery is a surprisingly deep feature. It creates a home page with thumbnail images and a gallery page for each image, or a frame-based page that combines scrolling thumbnails with a single larger gallery image. Some of the styles offer a feedback option where visitors to the page can check Approved or Other, or email feedback. Figure 9-18 shows the different sections of the Web Photo Gallery dialog box. Figure 9-18. Web Photo GalleryGeneral settings 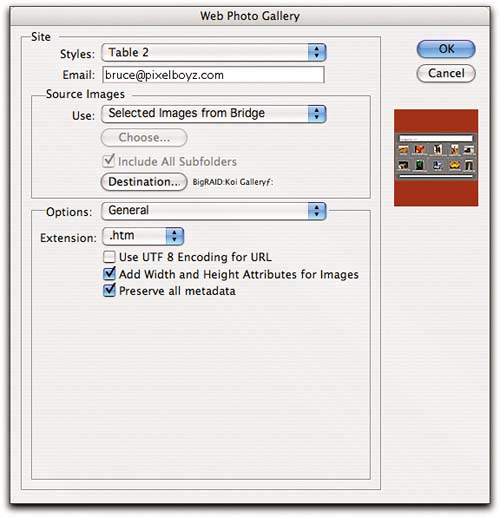 Banner settings 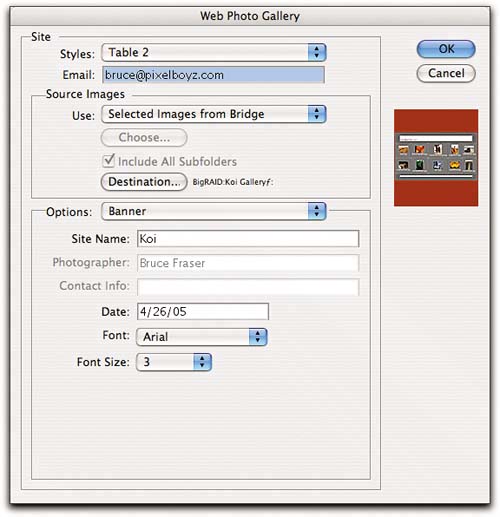 Large image settings 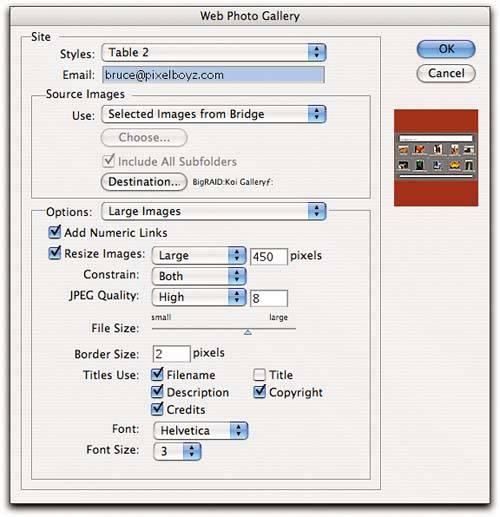 Thumbnails settings
Custom colors settings 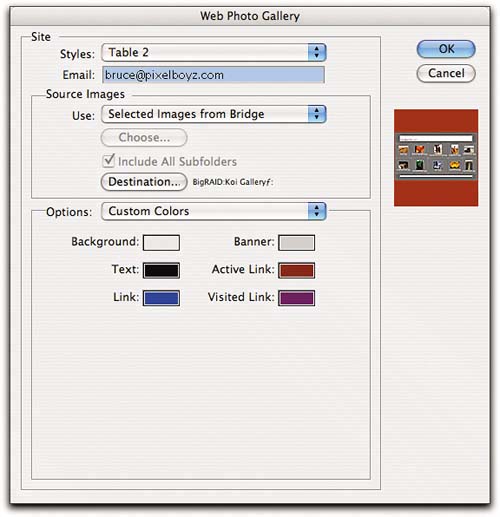 Security settings 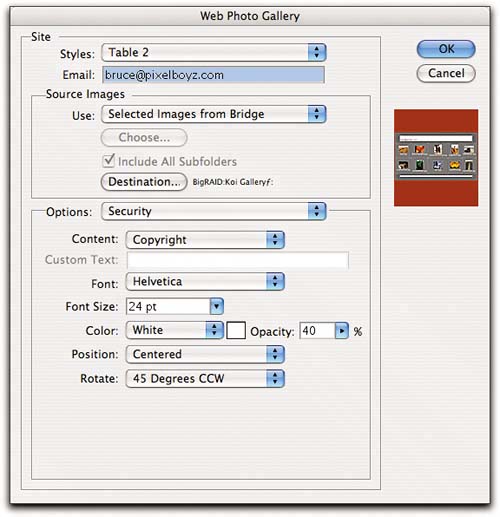 The Site section lets you choose a style for the gallery from the Style menu (the appearance of each style is reflected in the thumbnail that appears below the main control buttons) and enter an email address for receiving feedback. The Source Images section lets you choose a folder or Selected Images from File Browser as source. It's also, somewhat confusingly, where you specify the destination folder. All the styles produce the following:
The files and folders produced by Web Photo Gallery always have these names, so the only way to differentiate between different galleries is by the enclosing folder name. Hence it's always a good idea to create a new, empty folder and use it as the destination. The remainder of the dialog box is devoted to the Options panels, of which there are six.
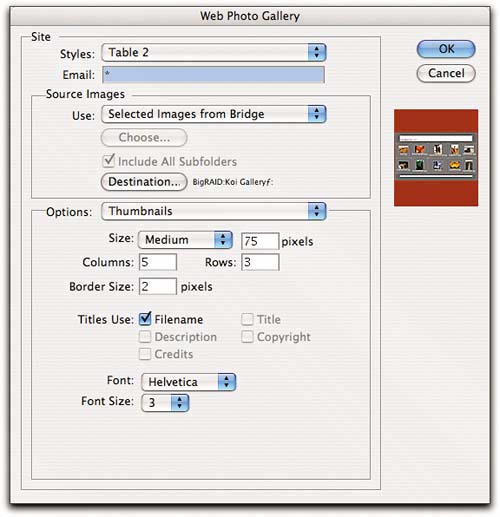
Not only do the options that are actually available vary depending on the style chosen, sometimes options that seem to be available don't actually do anything. Pages created with Web Photo Gallery probably won't win any design awards, but the feature does provide an easy way to make simple web galleries. Figure 9-19 shows the thumbnail page and an image page created using the settings shown in Figure 9-18. Figure 9-18. Web Photo Gallery resultThe index page  An image page 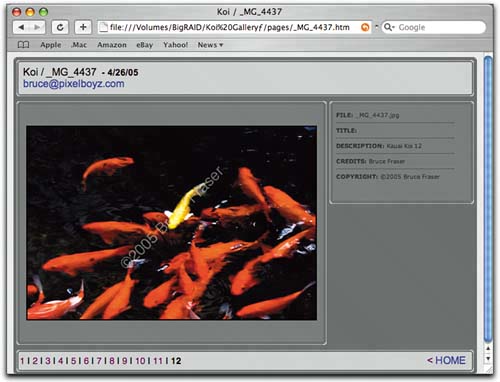 If the preset layouts don't do what you need, you can create custom layouts using the presets as templates. You'll need to be comfortable editing HTML, which I confess I am not. But if you are, you'll find a folder corresponding to each of the preset styles in Applications/Adobe Photoshop CS/Presets/Web Photo Gallery (Mac) or Program Files\Adobe\Photoshop CS\Presets\Web Photo Gallery (Windows). Inside each folder you'll find five .htm files.
None of these filenames can be changed, so if you want to edit an existing style, duplicate the entire folder of the style you want to edit and work on the files in the duplicate folder. When you're done, rename the duplicate folder to the style name you want. |
EAN: N/A
Pages: 112
- Key #3: Work Together for Maximum Gain
- Beyond the Basics: The Five Laws of Lean Six Sigma
- Making Improvements That Last: An Illustrated Guide to DMAIC and the Lean Six Sigma Toolkit
- The Experience of Making Improvements: What Its Like to Work on Lean Six Sigma Projects
- Six Things Managers Must Do: How to Support Lean Six Sigma