The Preview Controls
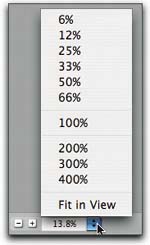
| Two sets of controls affect the preview image. The Zoom buttons and the Zoom level menu control the size of the preview image, while the Preview, Shadows, and Highlights checkboxes affect its content. Zoom Level menuThe Zoom Level menu lets you choose a zoom level for the image previewzoom in to check fine details, zoom out to see the global effects of your adjustments on the image (but go back and reread the earlier tip, "Use Keyboard Shortcuts for Fast Navigation"they really are much faster). See Figure 4-11. Figure 4-11. Zoom controls
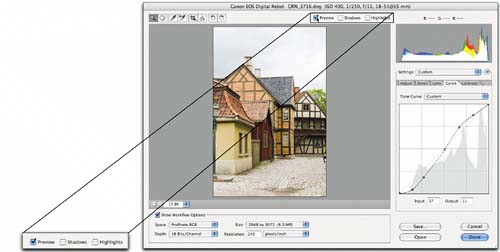
Preview, Shadows, and Highlights checkboxesThe functionality of the Preview checkbox (press P) has changed in Camera Raw 3.0it applies only to the current editing tab, toggling between its current settings and those that were in effect when you opened the image. It has no effect on changes you've made in other tabs. The old functionality is still availableto see the settings that applied before you opened the image, toggle between Image Settings and Custom on the Settings menusee Figure 4-12. Figure 4-12. Toggling previewsThe Preview checkbox toggles the settings in the current editing tab, in this case, Curve.
For a before-and-after of all the edits you've made since opening the image in Camera Raw, choose Image Settings from the Settings menu to see the settings that were in effect when you opened the image, and Custom to see the current settings from all the editing tabs.
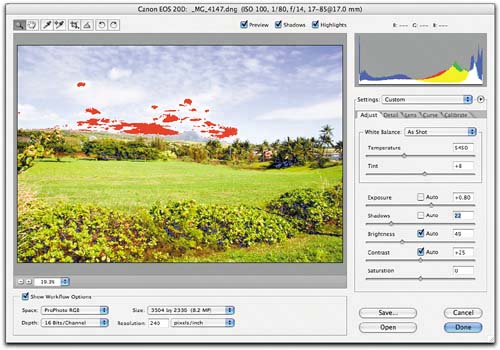
The Shadows and Highlights checkboxes (press Ufor underexposed and Ofor overexposed, respectively) provide a quick way to check for shadow and highlight clipping. These are most useful for a quick check on the state of the imagesee Figure 4-13. For a more nuanced clipping display that's more useful when you're actually making adjustments, you can hold down the Option/Alt key while dragging the Exposure or Shadows slider. See "The Adjust Tab," later in this chapter for more detail on clipping and clipping displays. Figure 4-13. Shadows and Highlights clipping displayThe Shadows and Highlights checkboxes show highlight clipping in red, and shadow clipping in blue.
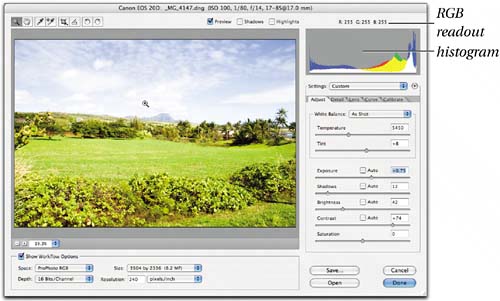
Tip Use Keyboard Shortcut for Shadow Clipping. While the highlight clip is visually obvious, the dark blue overlay of the shadow clip is often less so. Pressing U to toggle the Shadows clipping on and off makes it much easier to see. The Histogram and RGB ReadoutThe histogram and the RGB readout provide information about the current state of the image. The histogram displays the histograms of the red, green, and blue channels that will be created by the current conversion settings, not the histogram of the raw image (which would look strange since digital cameras capture at linear gammaall the image data would be scrunched over to the left). The histogram lets you check exposurea white spike at both ends indicates clipping of shadows and highlights because the scene dynamic range was more than the camera could capture, space at both ends of the histogram indicates that you've captured the entire scene dynamic range, and a white spike at one end shows that you may need to adjust the Exposure or Shadows slider to avoid clipping. A colored spike at either end may indicate gamut clipping, or tonal clipping in one or two channelssee Figure 1-7 in Chapter 1, Digital Camera Raw. If the clipping disappears when you set the Space in the Workflow Settings to ProPhoto RGB, you can be certain that it's showing gamut clipping from a smaller output space. A red, green, or blue spike indicates color clipping in that channel. A cyan spike indicates clipping in both green and blue, a magenta spike indicates clipping in both red and blue, and a yellow spike indicates clipping in both red and green, so with a very little practice, the histogram can show you at a glance exactly what's happening to your endpoints at the current image settings. See Figure 4-14. Figure 4-14. The histogram and the RGB readoutThe RGB readout shows the values of the pixels under the cursor. The histogram is a bar chart that displays the relative pixel count at different levels. It's mostly useful for checking exposure and clipping.
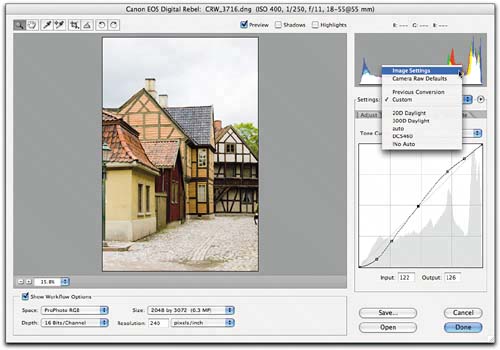
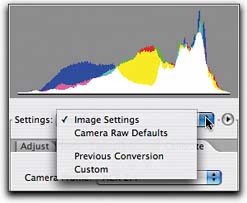
Clipping isn't always bad, and if the scene dynamic range exceeds that of the camera, it's inevitable. If you see one- or two-channel clipping at the shadow end when the Space is set to ProPhoto RGB, you're probably driving the color into science-fiction territory, so check the setting of the Saturation slider. If an image contains no white objects, though, you may see single-color clipping at the highlight end, even in ProPhoto RGB. The RGB readout shows the RGB values that will result from the conversion at the current settingsit shows the RGB value for the pixel under the cursor. The RGB readout always reads 5-by-5 screen pixels at zoom levels of 100% or less, so it may give different values at different zoom levels. When you fit the entire image into Camera Raw's preview, you're sampling an average of a fairly large number of pixelsthe exact number depends on both the camera's native resolution and the size you've chosen from the Size menu in the workflow controls (see "Camera Raw Workflow Controls," later in this chapter). At zoom levels greater than 100%, the sample size is always 5 x 5 actual image pixels. The Settings MenuThe Settings menu lets you apply any saved Camera Raw settings (see Figure 4-15). The items that always appear are Image Settings, Camera Raw Default, Previous Conversion, and Custom. Figure 4-15. The Settings menu
Image SettingsImage Settings indicates that you've previously applied edits to the image. If you're working on an image, choosing Image Settings will show you the settings that were in effect before you started editing. If the image is brand-new and has never been edited, Image Settings is the same as the next item, Camera Raw Default. Camera Raw DefaultsCamera Raw Defaults is what it saysit's the default setting that applies to all images unless and until you override them. If you find that the shipping default settings aren't to your liking, you can set your own Camera Raw Defaults for each supported camera model, or if you get yourself in a mess by doing so, you can return Camera Raw to the shipping default settings using the appropriate commands from the Camera Raw menusee the next section, "The Camera Raw Menu." Previous ConversionChoosing Previous Conversion applies the settings from the last image you opened in Camera Raw to the current image. This is somewhat useful for editing a series of similar images, but there are better ways to do sosee "Filmstrip Mode" in Chapter 5, Hands-On Camera Raw, and "Apply Camera Raw Settings" in Chapter 6, Adobe Bridge. CustomCustom denotes the current settings you're applying in Camera Raw. As previously mentioned in "The Preview Controls," earlier in this chapter, you can toggle between Image Settings and Custom to compare your current edits with the ones that were in effect when you opened the image in Camera Raw. You can also save your own custom settings as presets, which then become available from this menu. It's easy to overlook the mechanism for doing so, though, because it lives on the Camera Raw menu, which besides being one of the most important of the static controls, is also (for reasons unknown) unlabeled. |
EAN: N/A
Pages: 112