| To use a Color object, you must first create it using the Color class constructor. Here's the syntax for creating a new Color object: var myColor:Color = new Color(shirt_mc);
The script creates a new instance of the Color class named myColor and associates it with a movie clip instance named shirt_mc. 
You can create the object anywhere. The constructor accepts one parameter: the path to the movie clip it should modify. If you want to create a Color object with ActionScript from within a movie clip that will reference itself, you would use this as the path. For example, this script: var myColor:Color = new Color(this);
creates a new instance of the Color object on the movie clip instance that contains this script. NOTE As with any class instance, you can create many instances of the Color class in a single project and associate them with various timelines, providing you with dynamic control over the color of many instances simultaneously.
The most common Color object method is setRGB(), which changes the color of the movie clip instance specified as the parameter when the object was created. Here's an example of one use of setRGB(): var myColor:Color = new Color(shirt_mc); myColor.setRGB(0xFF3300);
The script creates a new Color object named myColor and then uses the setRGB() method to change the color of the shirt_mc movie clip instance to red. This method accepts a parameter (0x) followed by the hex value for a color. The 0x parameter is a reserved character combination that tells Flash that a hexadecimal number follows. The number system we're accustomed to using is called base 10, which means 10 numbers are used for all values (0 through 9). In other words, all other numbers (28; 6,403; 496; 300, 439; and so on) can be described using a combination of these 10. Hexadecimal numbers, in contrast, are base 16, which means their values are expressed using numbers and letters: 0 through 9, and A through F. Using this method, you can create hexadecimal values of 00 to FF, with 00 being a base 10 value of 0, and FF a base 10 value of 255. 
However, you don't absolutely have to know hex values to describe certain colors when using the setRGB() method. Instead, if you know the RGB value of a color, you can convert it to a hexadecimal value dynamically using the Number class and the parseInt() function we'll cover this topic in the next exercise (though we won't cover it in detail). In this exercise you'll create a simple interactive scene in which you'll be able to change the color of a clown's hair using several buttons. Open Clown1.fla in the Lesson04/Assets folder. The content has already been created and placed on the stage, so we can focus on the ActionScript involved in changing the color of a movie clip. The main timeline has four layers: Actions, Background, Clown Hair, and Buttons. The Clown Hair layer contains a movie clip instance named hair_mc. You will be changing the color of this instance with ActionScript. The Buttons layer contains five circular, colored buttons. These buttons have instance names based on their respective colors: red_btn, green_btn, blue_btn, yellow_btn, and rainbow_btn. You'll be adding ActionScript to the first frame of the main timeline, which will change the color of the hair_mc movie clip when any of the five buttons is clicked.
With the Actions panel open, select Frame 1 of the main timeline and add the script: red_btn.onRelease = function() { var hairColor:Color = new Color(hair_mc); hairColor.setRGB(0xCC0000); };
This script assigns a callback function to the onRelease event of the red_btn instance. The callback function (lines 2 and 3) tell Flash to create a new Color object named hairColor when this button is released and to associate that object with the hair_mc movie clip instance. This function also uses the setRGB() method to change the color of this Color object (hence the hair_mc movie clip instance) to CC0000, which is the hex value for the red in the middle of the button.
On the same frame, below the script added in the preceding step, add this script: yellow_btn.onRelease = function() { var hairColor:Color = new Color(hair_mc); hairColor.setRGB(0xFFCC00); };
This script is identical to the script used to assign the onRelease callback to the red button, except for the color value used in the setRGB() method, the value of which is the hex value for the yellow in the middle of the button. When a user clicks the yellow button, it will execute this callback and the clown's hair will turn yellow.
With Frame 1 still selected, add this script to the bottom of the current script: green_btn.onRelease = function() { var hairColor:Color = new Color(hair_mc); hairColor.setRGB(0x009900); };
The hex value for green is 009900 and is used in the setRGB() method in the same manner as in the two preceding scripts.
Add a similar script for the blue_btn instance: blue_btn.onRelease = function() { var hairColor:Color = new Color(hair_mc); hairColor.setRGB(0x336699); };
As with the three other buttons, this script creates a Color object that it uses to change the color of the hair_mc movie clip instance. 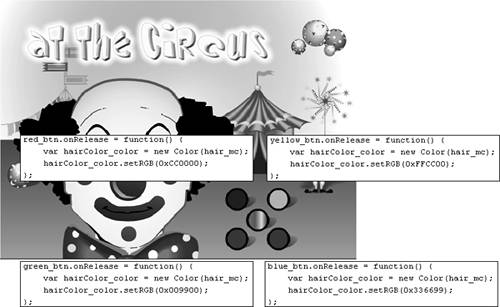
Now it's time to test your work.
Choose Control > Test Movie. Click the four buttons to view the color changes. Every time you click one of these buttons, Flash creates a new Color object and associates it with the hair_mc movie clip instance. The setRGB() method available to Color objects is then used to change the color of that instance. NOTE Although in this exercise a Color object is created on each button, an object needs to be created only once after which it exists as part of the timeline. Any changes to that object can be made by using methods available to that object. Now let's use ActionScript to change the clown's hair color to a random color.
Close the test movie to return to the authoring environment. With the Actions panel open, select Frame 1 and add this script to the end of the current script: rainbow_btn.onRelease = function() { var R:Number = random(256); var G:Number = random(256); var B:Number = random(256); var colorHexString:String = R.toString(16)+G.toString(16)+B.toString(16); var colorHex:Number = parseInt(colorHexString, 16); var hairColor:Color = new Color(hair_mc); hairColor.setRGB(colorHex); };
There are two ways to describe a color programmatically: with its RGB (red, green, blue) value or with its hex value. There are three separate RGB values, each of which can have a numeric value between 0 and 255. The RGB value of red, for instance, is R=255, G=0, B=0. The corresponding hex value (for the same color of red) is FF0000. The idea behind the first five lines of this script is to generate a random RGB value, convert it to a hex value, then use that value in the setRGB() method at the bottom of the script. Lines 2, 3, and 4 of the script create variables R, G, and B, whose values are random numbers between 0 and 255. The next line of ActionScript uses the toString() method of the Number object to convert a base 10 number to a base 16 string value. Let's assume, for example, that when this script is executed, the following R, G, and B values will be generated: R = 45 G = 202 B = 129
The next line of the script says to convert the value of R to a base 16 value, then convert it to a string, and then do the same thing with G and B. Using the plus (+) operator to put the converted values together, the variable colorHexString will have a string value of "2DCA81". This needs to be converted to a hex number (same value as the string value, without the quotes) to use the setRGB() method. To do this, you use the parseInt() function. The last two lines of the script create a new Color object pointing to the hair_mc movie clip instance and then change its color to the random value just created.
NOTE This script can randomly generate more than 16 million possible colors. Choose Control > Test Movie, and click the rainbow-colored button several times. The hair_mc movie clip instance changes randomly. You can even modify this technique to randomly generate colors within a certain range.
Close the test movie and save your work as Clown2.fla. You should now be able to easily change the color of any movie clip instance at any time.
|