| Validating numbers is not much different from validating strings, which we've already discussed. In this exercise, we'll create one last validation function to validate the data entered into the zip_ti instance. To be a valid five-digit zip code, the entered data must meet the following two requirements: TIP When validating numbers, you may need to call for the number entered to be more or less in value than another number which by now you should be able to do easily!
Open validate5.fla. We will continue building on the project from the last exercise.
With the Actions panel open, select Frame 1 on the Actions layer and add the following function definition at the end of the current script: function validateZip() { if (zip_ti.text.length != 5 || isNaN(zip_ti.text) == true) { errors.push("Please enter a valid zip."); zip_ti.setStyle("color", 0x990000); } }
When called, this function checks that the data entered into the zip_ti instance meets two conditions regarding length and type the validation points we defined at the beginning of this exercise. The conditional statement here states that if the zip_ti instance does not contain five characters, or if it consists of text (rather than numbers), the text in the zip_ti instance should be styled as red and the following text string should be pushed into the errors array: "Please enter a valid zip."
NOTE If you need to refresh your understanding of isNaN(), review the information in the "Validating Strings" exercise earlier in this lesson. Add the following function call just below the validateState() function call in the validateForm() function: validateZip();
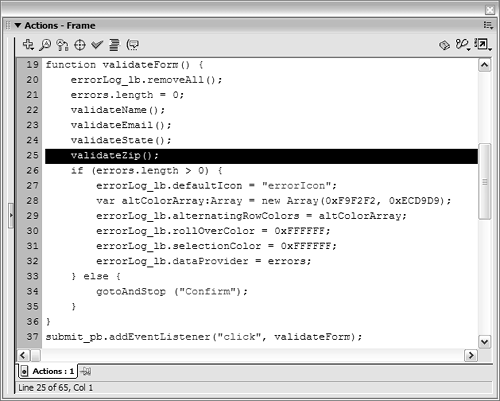
This is a call to the function we just defined. Placing this function call here adds zip code validation capability to the main validateForm() function. This function call is placed just above the statement that checks the length of the errors array because that function is able to push error messages into the array, thus affecting its length and the way this statement is evaluated. In the end, if validateName(), validateEmail(), validateState(), or validateZip() finds errors, the corresponding messages will be displayed in the errorLog_lb instance.
Choose Control > Test Movie to test the project up to this point. Enter an invalid zip code in the zip_ti instance to see what the validation process turns up. Clicking the Clear button resets the visual and data elements in the scene. As you've probably noticed when testing the application, the text in the TextInput instances remains red from the point at which an error is found in a particular instance until the application is shut down or moves to the Confirm label as the result of an error-free form submission. In addition, the haloGreen color used by the components just doesn't suit our design. In the next couple of steps, we'll add some cosmetic improvements to our application so that a TextInput instance that contains red text (as the result of an error found there) is updated to contain black text whenever the user subsequently clicks inside the text box. We'll also change the theme color of components to a light blue.
Close the test movie to return to the authoring environment. With the Actions panel open, select Frame 1 of the Actions layer and add the following script: function resetColor(eventObj:Object){ eventObj.target.setStyle("color", 0x000000); } name_ti.addEventListener("focusIn", resetColor); email_ti.addEventListener("focusIn", resetColor); state_ti.addEventListener("focusIn", resetColor); zip_ti.addEventListener("focusIn", resetColor);
The first part of the script contains a function named resetColor(). The remaining lines set up the TextInput instances in our application to call the resetColor() function when any of the text boxes is given focus. As you learned in Lesson 10, "Scripting UI Components," when a function is called as the result of being registered as an event listener, the function is passed an Event object containing two properties: target and type. The target property identifies the target path of the component instance that calls the function. As a result of this script, when the user clicks in the email_ti instance, it is given focus and the resetColor() function is called. The single action inside the function uses the target property of the Event object (which in this case would have a value of _level0.email_ti) to reference the component instance that calls the function, and the setStyle() method to set that instance's text color to black.
Add the following script at the end of the current script: _global.style.setStyle("themeColor", 0xBDDDEB);
This sets the overall theme color of all component instances in our application to light blue.
Choose Control > Test Movie to test our cosmetic improvements to the project. As you interact with the interface, you'll see how the last two scripts we added improve the overall look of our application.
Close the test movie to return to the authoring environment, and save this file as validate6.fla. We'll build on this file in the following exercise.
|