Section 5.1. Alerts
5.1. AlertsThe first four settings relate to alerts and responses to alerts. The Notification Command Format , the Alert Resolution State, and the Custom Alert Field global settings work in concert with the event, performance, and alert rules in the rule groups. These settings set the default behavior of an alert, or modify the default information that is included in an alert at the time of its creation. All data that is included in an alert can be used in the Operator console to build filters for custom views. 5.1.1. Notification Command FormatWhen you configure responses in alert rules, you have the option to send a message to a notification group (see Figure 5-2). Here, the Network Administrators notification group has been selected. Figure 5-2. Alert rule notification response options One way to communicate with a notification group is to run an executable and pass application- and alert-specific fields to it. This is done on the Command Format tab (see Figure 5-3). You can either define a custom command format for any particular alert rule or use the default command format. The default command format is set at the global level. When you select the Notification Command Format tab in the Global Settings container, you see the configuration page shown in Figure 5-4. The intended use for this feature is to call third-party paging applications. This feature would be used, for instance, if your MOM 2005 installation does not have access to an SMTP-based paging service or SMTP server for email, but you still need to send alerts to operators in addition to displaying them in the Operator console. Figure 5-3. Alert rule notification response options Command Format tab Figure 5-4. Global Settings Notification Command Format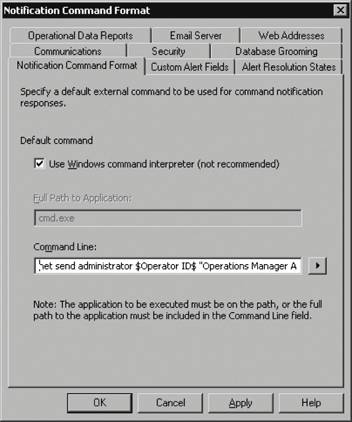 One way to do this is to install a third-party paging program on the management server. When an alert is raised and the alert rule is configured to send out a message to a notification group, this option will launch the paging application to create the message and send it out via a direct attached modem or shared modem pool. When sending notifications out via modem, be aware that in the event of a notification flood, the modem may not be able to keep up with the number of notifications from MOM. In this case, make sure that only the most critical notifications are going out to reduce the load. The best way to use this feature is to explicitly call an executable that is designated in the Full Path to Application text box. That means that you can only pass options to the executable that it understands. In addition to the executable parameters, event and alert fields can also be passed. Note that you will only receive the number of characters that the paging program supports. Sending a page is not the only use, however, for the Notification Command Format. You can call any executable from here through the Windows command interpreter, as shown in Figure 5-4. For example, you might want to send a network notification to an operator who is logged onto the network, via the net send command. To do this, you need to check the "Use Windows command interpreter" box. This will pass the command line that you enter to cmd.exe. This is the exact same thing as typing the command-line syntax at a command prompt with the addition of MOM-specific variables. Constructing the parameters string in the Command Line text box is simple. It consists of a combination of plain text for every notification and variables that are replaced with alert- or event-specific data at the time the notification is generated. The variable fields are delineated with a dollar sign ($) bracketing them. The plain text is simply written out. You don't have to know all of the possible event and alert fields. The right-facing arrow to the right of the Command Line box (see Figure 5-5) branches into a list of alert fields and event fields. Select the variable you want to insert into the Command Line string and it is placed at the insertion point. For example, if you want to use net send, which depends on the Windows messenger service and Windows Internet Naming Service (WINS) running in your environment, you would select the Windows command interpreter and construct a command line that looks like this: Send $Operator ID$ "Operations Manager Alert on $Source Domain$\$Source Computer$: $Description$ (view with $Alert URL$)"
Figure 5-5. Alert fields that are available for inclusion in the command-line parameters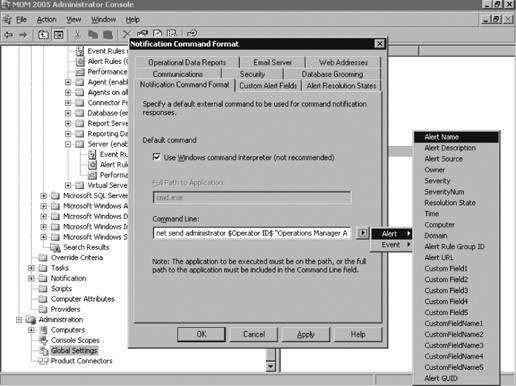 When the alert fires off, it will generate a pop-up message like the one shown in Figure 5-6. Figure 5-6. Messenger pop-up notification of an Agent heartbeat failure alert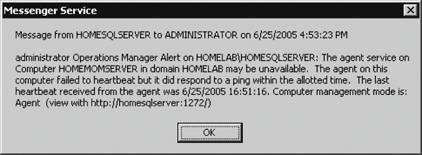 It is a good idea to confirm what will be included in a notification message, no matter what transport you have chosen. The following example uses the MOM Agent heartbeat failure alert by following these steps:
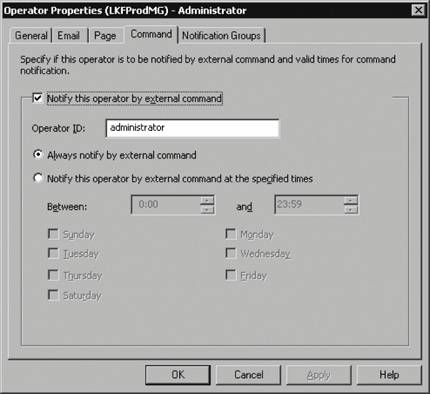
Figure 5-9. Choosing to send an alert to a notification group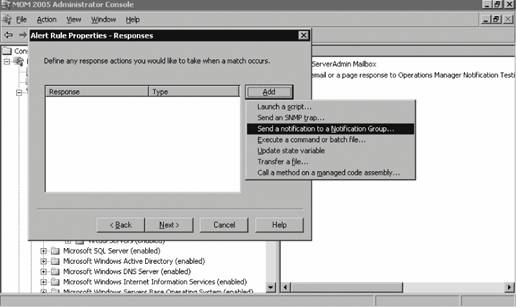 Click Next to bring up the Alert Rule Properties - General page, where you give the new alert rule a name (Figure 5-10). In this example, it is named NotificationTestRule. Click Finish. To complete testing, log on as the operator account, which was added to the Network Administrators notification group, on any machine on the network (the messenger service must be enabled on both the management server and the computer you are logged onto). Then, on any of the agent-managed servers on the network, stop the MOM service and wait for the pop-up to appear. 5.1.2. Email ServerThe Email Server tab in the Global Settings is where you indicate the SMTP server that all of the management servers in the management group communicate with when sending notifications. This tab consists of five fields:
5.1.3. Alert Resolution StatesAlert resolution states are covered in the "The Life of a MOM 2005 Alert" section in Chapter 1. But to refresh, all alerts exist in one of several resolution states:
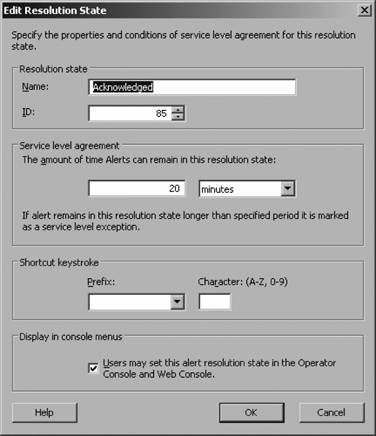
By default, when an alert first appears in the Operator console, its resolution state is always set to New. MOM times how long an alert is in any resolution state. When that time exceeds the value configured in the service-level agreement for that resolution state, the alert will then appear in the service-level Exceptions Alert view in the Operator console. This allows a company to track their ability to meet service-level agreements. You can modify the default settings, shown in Figure 5-11, and even delete them (except for the New and Resolved states). The most common modification made is to change the service-level agreement time period to suit your environment. The resolution states themselves are useful only if your support structure breaks down into these four levels. If your environment alerts are only sent to the Windows administrators, who then open a support case with an external vendor, then there is no need for the alert resolution states. You can delete the unnecessary alerts, or leave them and not use them, at your discretion. In addition, you can create new alert resolution states that suit your environment. Figure 5-11. Default values for alert resolution states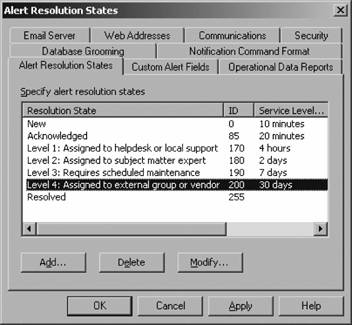 When you select an alert state from the list and click Modify, you'll see the Edit Alert State dialog box, shown in Figure 5-12. An alert resolution state contains five fields :
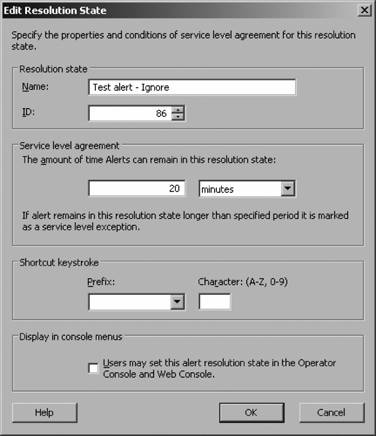
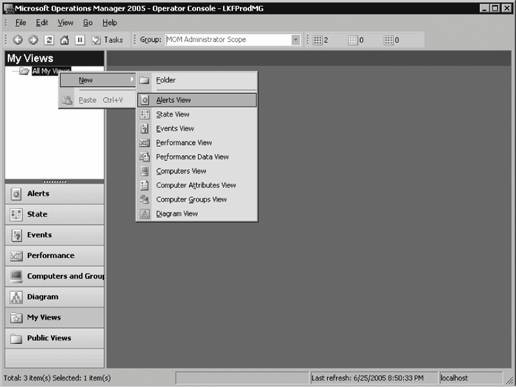
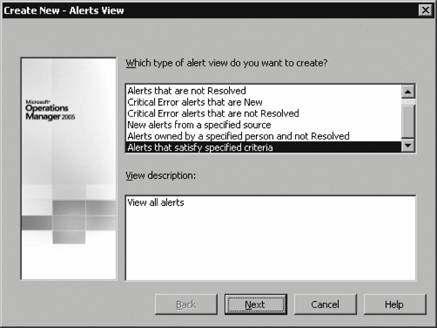
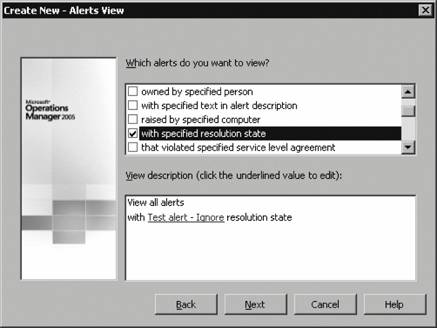
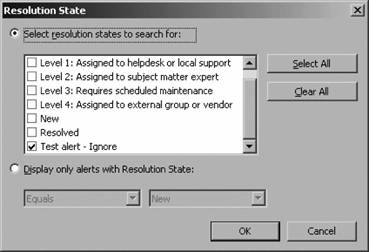
For example, to build a custom alert view in the My Views node in the Operator console, you could build a filter using this non-visible alert resolution state value to populate the view. This is particularly useful for alerts that you want to see in the Operator console, but do not require action. For example, the alert generated by the Test End to End Monitoring task in Chapter 3 confirmed that the round-trip communication from the management server to the agent was working. The following is how a Custom Alert view is built:
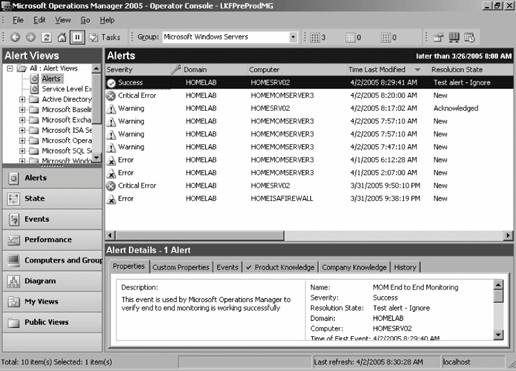
Figure 5-20. Custom view filtering for the "Test alert - ignore" resolution state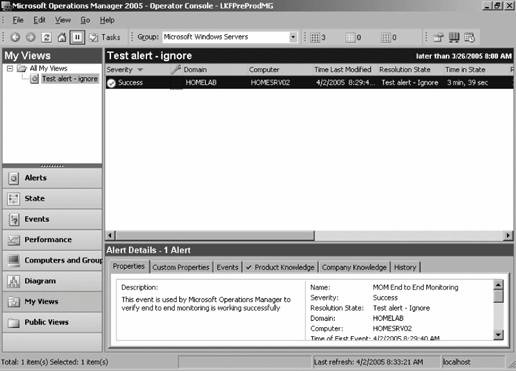 5.1.4. Custom Alert FieldsEach alert has five custom fields that enable you to modify the information embedded in an alert when it is created. At the global level, you can provide names for these fields. At the event and performance rule levels, you can populate the content of the named field much like the Notification Command Format command-line string is populated with text and variables. Out-of-the-box, a generated alert only shows about half of the available fields in an alert object. One of the fields that is not present by default is the Event Number. Ordinarily, to find out which event is associated with an alert, you need to navigate to the Events tab in the Details pane. To find the details of that event, such as the event number, open the associated event. An easier way to include this data in a generated alert is to name one of the custom alert fields with an appropriate name, like Event Number (see Figure 5-21), at the global level. Apply the change and then commit the configuration change on the management packs object in the Administrator console. Figure 5-21. Renaming Custom field 1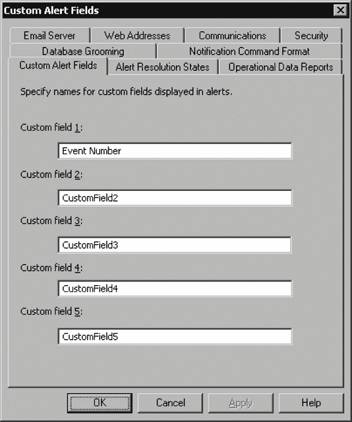 To have this value included as a field in an alert, open the event or performance rule and click the Custom Fields button as shown in point 1 in Figure 5-22. Figure 5-22. Adding values to the custom fields of an event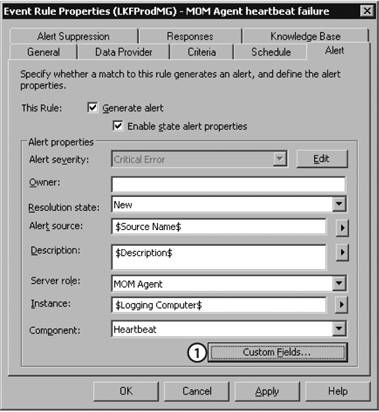 This brings up the Custom Fields page, where the value of that custom field is set to the $Event Number$, as shown in Figure 5-23. The $Event Number$ value is one of many values available, including Full Event Number, Event type, Message DLL, Source Name, Provider Name, Provider type, Description, and so on. For a complete listing of fields that are available for alerts, refer to the MOM SDK. The full list is available when you click on the right-facing arrow button pictured in Figure 5-23 to the right of the $Event Number$ text box. Once the configuration changes are set, all future alerts generated by that rule will include the $Event Number$ value. You can see this in the Operator console in the Alert Details pane for the alert. One last note about custom fields: you are not restricted to using the MOM 2005 alert variables, you can add plain text as well. In Figure 5-23, the value could have been constructed to read "The event number is $Event Number$." When the MOM Agent heartbeat alert is generated, the text reads "The event number is 21284," as shown in point 1 in Figure 5-24. Figure 5-23. Adding the event number parameter to CustomField1, renamed Event Number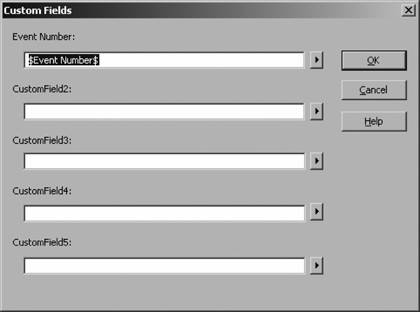 Figure 5-24. Concatenating plain text and alert variables into a custom field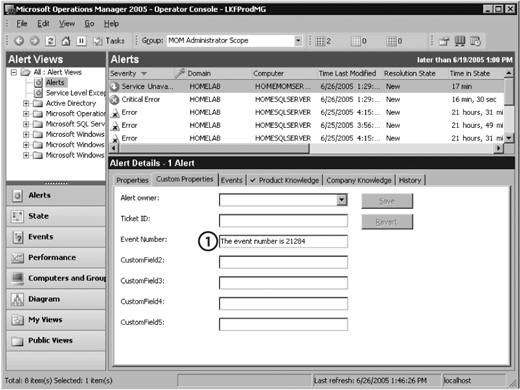 |

 Operations Manager 2005
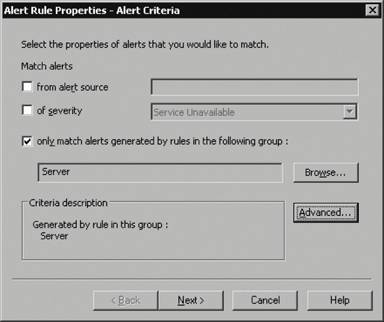

 Operations Manager 2005
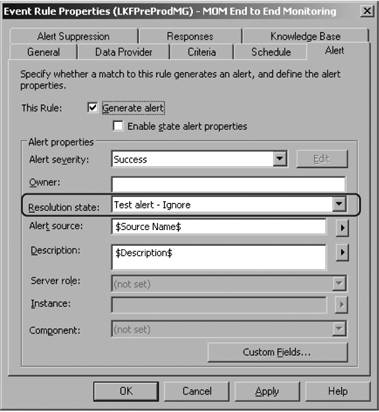
EAN: 2147483647
Pages: 107