Managing Accounts
| The most common use of the CMC is to manage user accounts. Although this chapter provides a review of managing user accounts, this should always be combined with an effective user-management strategy appropriate for your organization. For example, managing users is best accomplished through an effective group inheritance model, where object restrictions are never assigned to individual users, but rather to groups. When users are placed as members within those groups, they inherit the restrictions of the group. Often a single system of record, such as an LDAP or Active Directory system, establishes one set of users and groups that the entire organization and all software can use, greatly speeding user administration. Note Rights are not assigned to users or groups, but to the objects within BusinessObjects Enterprise themselves (Reports, Documents, Connections, Universes and Folders). This is explained later in the chapter. This section reviews all the various components that factor into account management, which includes users and groups. Managing UsersTo access BusinessObjects Enterprise resources, a physical end user must possess a username. Upon initial installation, by default, BusinessObjects Enterprise creates the Administrator user and the Guest user only. The Guest account is a generic account meant for use in a scenario where certain global reports contain public information that could be accessed by anyone using BusinessObjects Enterprise. Without an assigned username, a user can log on only as an administrator (if they know the password) or a guest (provided the Guest account remains enabled). Note The Administrator and Guest accounts are required for proper system functionality. The Guest account can be disabled by the system administrator; however, it should not be deleted. All BusinessObjects Enterprise permissions ultimately originate from, or apply to, individual user accounts/usernames. In light of this, one of the most important aspects of system administration is the creation of new user accounts or mapping accounts from the system of record. Whether adding one user or several hundred, the Central Management Console makes this process fast and intuitive. To begin adding new users, click the New User icon displayed on the main CMC screen (see Figure 27.3). Figure 27.3. The initial CMC page for adding a new user.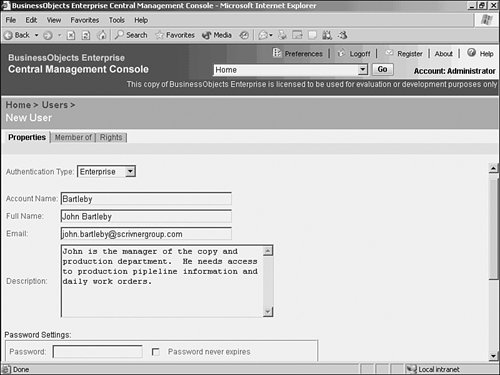 In the Account Name field, enter a unique name that the user enters to log on to BusinessObjects Enterprise. Generally, usernames are entered as a single word in lowercase (for example, Ed for Ed Conyers). If the BusinessObjects Enterprise administrator prefers, the username can contain mixed-case letters as well as spaces. BusinessObjects Enterprise is not case sensitive to usernames. Next, enter the user's proper name in the Full Name field. The full name can contain mixed-case letters and spaces. A freeform text description can be included. The administrator can provide the user's e-mail address that is used when a report or document object is directed to the user's e-mail account. More details on this function are covered in Chapter 24, "Using InfoView." The BusinessObjects Enterprise administrator can also specify a password in the Password Settings dialog; however, it's not necessary because users can be forced to change their passwords the first time they log on. Checking Password Never Expires exempts the username from the BusinessObjects Enterprise global password expiration rules (discussed later in this chapter). Selecting User Cannot Change Password prevents end users from changing their passwords in the future. The Connection Type radio buttons enable the BusinessObjects Enterprise administrator to indicate whether the username will capture a concurrent user license or a named user license when logged in to BusinessObjects Enterprise. A concurrent user license is not absorbed unless the user is logged in to BusinessObjects Enterprise. After the user's session ends, a default of 20 minutes, the concurrent license is released. This means that another user within BusinessObjects Enterprise can log in to BusinessObjects Enterprise and use the concurrent license. A named license is relinquished only when the username is deleted or changed to use a concurrent license. An in-depth discussion of license keys is covered later in this chapter in the Authorization section of the CMC. After the required information for creating a new user is provided, click the OK button at the bottom of the screen. The new user is created. The screen will refresh and the view will enable the Membership and Rights tabs, as well as expose alias information. After the User Properties screen has been reloaded, two new options appear at the bottom of the page. The Authentication setting enables you to specify whether the user's password validation will be processed by BusinessObjects Enterprise, LDAP, Windows NT, Active Directory, or even perhaps a system such as SAP via the BusinessObjects Enterprise Solution Kit for SAP. By default, BusinessObjects Enterprise handles authentication internally. The Account Is Disabled option disables an account without deleting it. Although the account can always be enabled again in the future, this is useful for employees who might take a leave of absence from the company. In addition to the Properties of a user, two additional pages provide Membership and Rights settings for the user. These pages are accessible by clicking on the respective tabs at the top of the User screen. The Membership settings, accessed by clicking on the Member Of tab, allow administrators to add users to existing groups that have been established in the BusinessObjects security model. These groups might have been set up manually within the system or imported from an external system such as a LDAP server. Although this is an effective way of granting users group membership, this is a less common use of users and groups in an Enterprise system. In the primary Membership screen, the groups membership currently assigned to the user are listed with a description of the group itself. To assign membership to a group, click on the Member Of button in the upper-right corner of the User Membership screen. The screen will now display two lists. The list on the left contains all available groups of which the user is not a member. The list on the right contains all groups of which the user is currently a member. The administrator can move any group from one list to the other. After the membership lists are set, clicking OK returns the view to the primary Membership screen. Regardless of what changes were made in the lists, clicking Cancel discards any changes and returns to the primary Membership screen. The Rights tab at the top of the User screen can confuse a new administrator into thinking that he can grant the user whose profile he is viewing certain system rights. Actually the opposite is true! The Rights tab, which appears on almost every object in BusinessObjects Enterprise, supports the Delegated Administration paradigm, which enables different users to administer different portions of one BusinessObjects Enterprise system. Use the tab to specify which users or groups have access to this object; in this case to the particular user you are viewing. If you only enable access to this user's profile for the Administrators group, a user who is not a member of the Administrators group logging onto the CMC will not see the user at all. In this way you can have administrators in different departments or functional areas do their own system maintenance without seeing the information of other groups or departments. A list of all the users in the system, including the BusinessObjects Enterprise administrator, can be accessed by selecting Users from the CMC drop-down menu (see Figure 27.4). Figure 27.4. All user-management functions are accessible from the Users screen.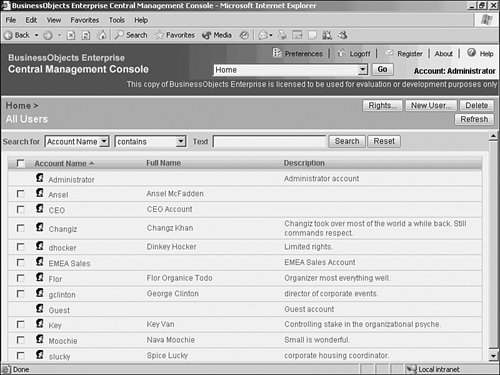 From the Users screen, you can search the list of account names or account descriptions for exact values or partial values, either inclusive or exclusive. Additionally, you can edit an existing username, add a new user, or delete an existing user. To delete a username, place a check mark in the corresponding box on the right side of the screen. You can select more than one username. After a minimum of one username has been selected in this manner, click the Delete button at the top of the screen. The Central Management Console then prompts to confirm deletion of the user account. The built-in Administrator and Guest accounts can not be selected to prevent inadvertent deletion. There is a Rights icon as well; again, this is to specify which user/group has the rights to see this portion of the administrative console. Managing GroupsA user group is a collection of BusinessObjects Enterprise users with one or more logical characteristics in common. For example, the users in the Marketing department should be grouped together based on the fact that they all belong to the same business division. Because these users work together, they are more likely to share the same reports. Creating groups such as marketing enables the system administrator to globally assign permissions to a broader audience. Groups are useful for classifying users according to their job function and report needs. In most cases, it's advisable to create a series of logical user groups to reduce the complexity of managing permissions in BusinessObjects Enterprise. Tip Globally managing permissions for user groups is significantly less complex than trying to manage permissions for each individual user. However, there might be situations in which it's desirable to make an exception to a group's security policy for a minimum number of users within that group. BusinessObjects Enterprise has the flexibility to make object restriction exceptions on a user-by-user basis. BusinessObjects Enterprise contains two default user groups:
The Administrators GroupThe Administrators group is for system administrators only. Users who belong to this group have full, unrestricted access to BusinessObjects Enterprise, including the capability to manage servers using the CMC. Administrators can run any report and access any report folder. Use discretion when adding users to this group. The Everyone GroupThe Everyone group contains all users by default. When new users are created, they are automatically enrolled in the Everyone group. The Everyone group is useful for globally setting permissions for all BusinessObjects Enterprise users. Note In previous versions of the product, there was a third default group called New Sign-up Accounts. This functionality is still available, but has been disabled by default. Creating New User GroupsTo create a new user group, click the Groups icon on the home CMC page and then click the New Group button in the upper-right corner of the primary groups page (see Figure 27.5). Figure 27.5. Creating new user groups is a fundamental system administration task. It's often helpful to seek input from business users when formulating user group names and hierarchies.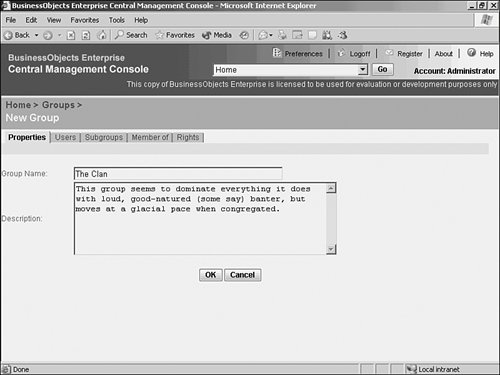 In the Group Name field, enter the group name exactly as it should appear in BusinessObjects Enterprise. The group name field accepts upper- and lowercase, spaces, and punctuation. A freeform text description is optional and limited to 256 characters. After the required information has been provided, click OK to create the group. After clicking OK, the group creation screen should momentarily reload. The OK and Cancel buttons are replaced with the Update and Reset buttons. This indicates that the group was created successfully. The BusinessObjects Enterprise administrator now has access to three new tabs at the top of the screen: Users, Subgroups, and Member Of, as shown in Figure 27.6. Figure 27.6. After the group has been created, additional options are available via the tabs at the top of the screen.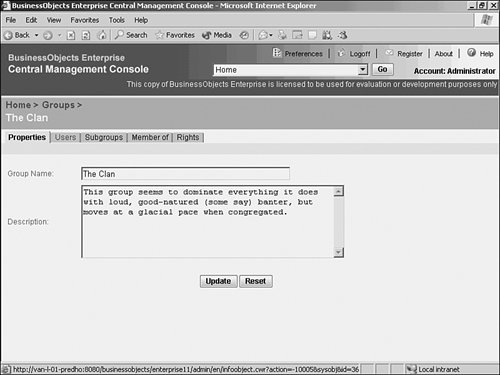 Adding Users to a GroupCreating a group name is the first step in configuring a new group. By default, the new group does not contain any users. You must click the Users tab to add users to the group (see Figure 27.7). Figure 27.7. Initially, the Users tab is empty. New users can be added to the group by clicking on the Add/Remove Users button.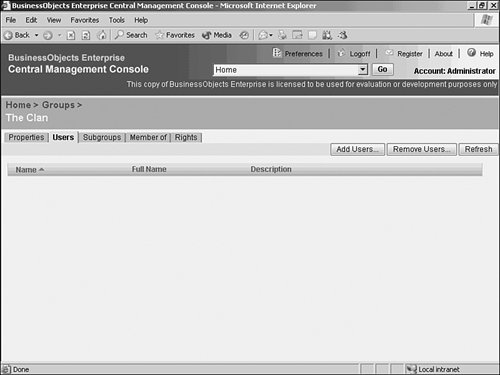 The Users tab does not contain any users initially. To add users to the new group, click the Add Users button at the top of the screen. A list of all BusinessObjects Enterprise users appears on the left side of the screen, as shown in Figure 27.8. Highlight the users to add to the group. You can select several, noncontiguous names by holding down the Ctrl key when clicking. After the desired usernames are highlighted, click the Add button (">") to verify the selection. Highlighted users are moved from the Available list to the Users list. When satisfied with the selections, click OK to commit, as shown in Figure 27.8. Figure 27.8. All BusinessObjects Enterprise users appear in the list box on the left.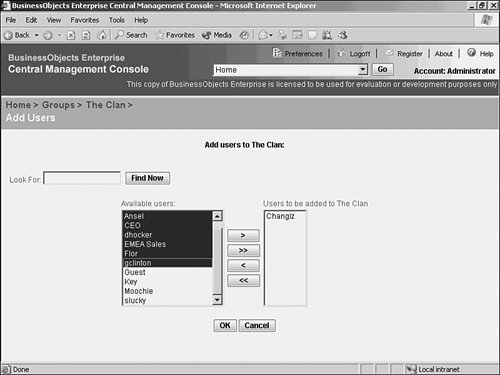 To select a range of users, click the topmost username in the desired range. Then, while holding down the Shift key, click the bottom username in the range. All users between the top and bottom names are selected. To add all available users or to remove all users from the currently selected group, use the >> and << buttons respectively. The Look For feature allows the administrator to reduce the list of available users to a subset of all users in the system. This is particularly helpful when the system contains a large number of users. The search function will find any occurrences that match the search string in part or entirely. Figure 27.9. Any changes to the group membership are not committed until the BusinessObjects Enterprise administrator clicks OK. The CMC returns to the Users tab after the changes have been committed. The Users tab immediately reflects the membership of the group, as shown in Figure 27.10. Keep in mind that BusinessObjects Enterprise enables a single user to be a member of multiple groups, so it's possible for users to belong to other groups, such as the Everyone group. Figure 27.10. The new group now contains several users.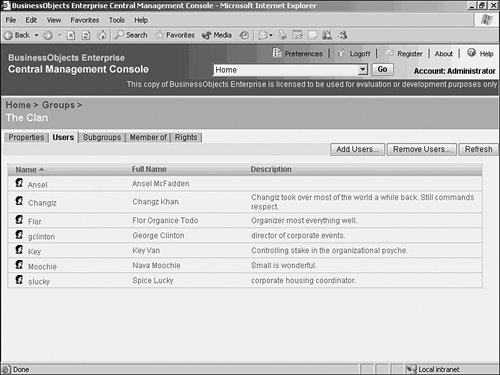 Creating SubgroupsIn addition to adding individual users to a group, the administrator can add subgroups to a group. As the name implies, a subgroup is a child of the parent group. Subgroups can be used to further define user roles and permissions at a more detailed level. A top-level group can contain several subgroups, and those subgroups can also contain subgroups, as Figure 27.11 shows. The benefit is that permissions need not be applied at a user level, even though they can be. Even if an individual user's needs might seem unique, there is always the distinct possibility that someone else could come along with similar requirements. Creating subgroups minimizes individual user permission/restriction management. Figure 27.11. The Subgroups tab identifies any child groups that belong to the current parent group.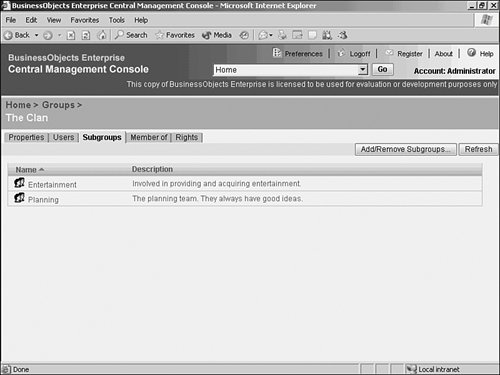 Click the Subgroups tab to add new subgroups. Click the Add/Remove Subgroups button to designate a new subgroup. The Add/Remove Subgroups page works just like the Add or Remove Users screen with the exception that there is no Look for functionality. All available groups are listed in the list box on the left. To be clear, a subgroup is not a special kind of group, but rather an ordinary group that has a hierarchical relationship established with another group. Like parent or top-level groups, subgroups are created by using the New Group option on the main CMC screen. If a subgroup needs to be created (that is, it doesn't exist yet), you need to create the new subgroup in the same manner as other groups would be created, from the New Groups screen. Figure 27.12 shows a list of groups where the intended subgroup has already been defined. Figure 27.12. SubGroupOne has already been created and you can move this into a parent group. (The name can be anything"SubgroupOne" is used to clarify the relationship in this text.)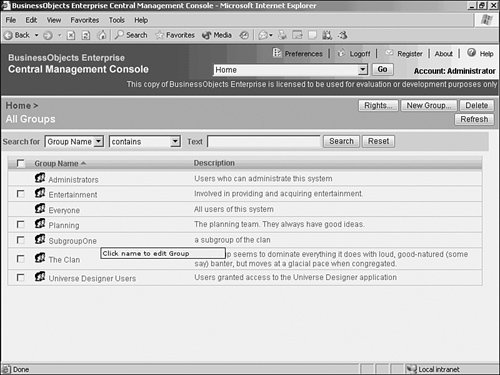 Note Any group can also be a subgroup. This can get a bit messy with respect to restrictions because overlapping inherited security can be confusing. Try to keep things streamlined by using naming conventions and inherited permissions. This lowers administrative cost and Total Cost of Ownership. Add the subgroups to the parent group and click OK to commit the change to the system database (see Figure 27.13). The CMC returns to the subgroup listing screen, which now reflects the new subgroups. Figure 27.13. The subgroup SubgroupOne is added to two existing subgroups.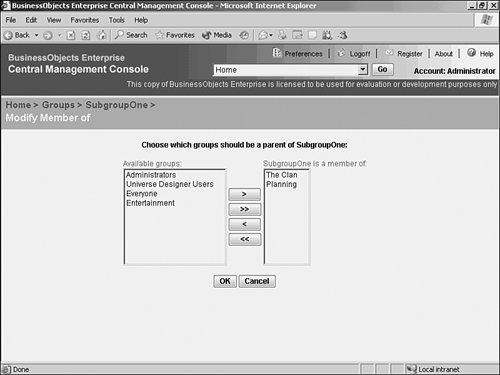 This particular subgroup tree is only one level deep. It's possible to create subgroups of subgroups for more granular management of users. For example, a few regional subgroups (East, Central, and West) could be added to the North America Sales subgroup. To do this, you only need to click the name of the subgroup, and then repeat the preceding steps to add another subgroup. |
EAN: 2147483647
Pages: 365