Using the Visual Basic Editor
3 4

When you press Alt+F11 or open a code module, the Visual Basic Editor opens. Figure 20-6 shows the Crafts database in the Visual Basic Editor, open to the first event procedure of the fsubPublishersAddNew form. The main features of the Visual Basic Editor window (which is the same in all Microsoft Office applications that support VBA) are described in the following sections.
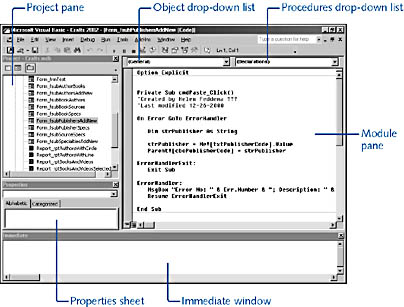
Figure 20-6. Use this window to work on VBA code.
Project Pane
The Project pane (top left in Figure 20-6) is a tree-type display of the modules and other objects in an Access database project. In Access, there are usually only two folders: Microsoft Access Class Objects, which contains form and report class modules, and Modules, which contains standard modules. If you’ve written class modules to define custom objects, they’ll be in a Class Modules folder.
note
Access uses the word project for two different types of objects, which can cause confusion. A project can be a collection of code in an Access database or a front end to a SQL Server database (an ADP file). Be sure that you don’t confuse the two. Microsoft Project uses the word in yet another way.
Properties Sheet
The properties sheet (middle left in Figure 20-6) lists the properties of the selected object. In other Office applications, the properties sheet is genuinely useful for working with UserForms, but because Access has its own forms, the properties sheet has only a few uses in the Visual Basic Editor window, one of which is changing the name of a module.
Code Window
The code window (right side of Figure 20-6) displays the code in the selected module. At the top of the window are two drop-down lists. The Object drop-down list (on the left) lets you select an object that has event procedures for which you can write code. Figure 20-7 shows the list displayed.
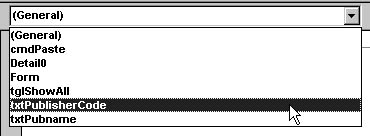
Figure 20-7. You select an object for writing event procedures from the Object drop-down list.
After you’ve selected an object, the Procedures drop-down list (on the right in Figure 20-6) will list the available event procedures for that object. The events that already have procedures will appear in boldface, as you can see in Figure 20-8. (Here, the Click event has a procedure.)
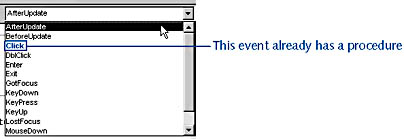
Figure 20-8. The Procedures drop-down list offers a selection of event procedures for the selected object.
When you select a new event procedure, a code stub is inserted into the module, with any arguments needed. The code stub for a text box’s BeforeUpdate event procedure is shown here:
Private Sub txtPublisherCode_BeforeUpdate(Cancel As Integer) End Sub
You can now type in the statements you want to execute when the event fires, between the Private Sub and End Sub lines.
Object Browser
The Object Browser (shown in Figure 20-9) isn’t open by default; you open it by pressing F2 or by clicking the Object Browser button on the toolbar.

Figure 20-9. The Object Browser lets you select an object library to investigate.
The Project/Library drop-down list at the top left of the Object Browser lets you choose a library to investigate. The Search Text combo box lets you enter text to search for; search results are displayed in the Search Results pane in the middle of the window. The Classes pane displays the classes (objects and enumerations) in the selected library, and the Members pane shows the members of the selected class.
Immediate Window
The Immediate window (the bottom pane in Figure 20-6) shows the text written by Debug.Print statements in your code, usually for debugging purposes.
tip - Find Help on a property or method
To find help on a property or method, locate it in the Object Browser, and then click the yellow question mark on the Object Browser toolbar to open context-specific Help. This method is generally easier than to trying to find the topic in HTML Help.
Options Dialog Box
When you use the Visual Basic Editor Code window, you can get help from IntelliSense, which in Access modules consists of three features that can be turned on or off in the Visual Basic Editor window’s own Options dialog box. (Choose Tools, Options; the Options dialog box will open to the Editor tab, as shown in Figure 20-10.)
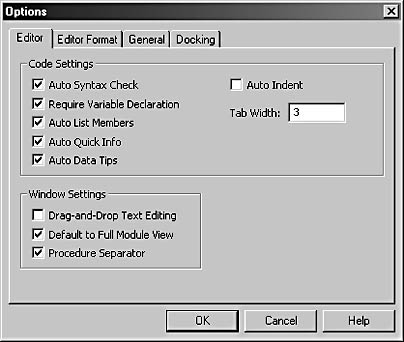
Figure 20-10. The Editor tab of the Options dialog box lets you select code writing options.
The options on the Editor page are as follows:
Code Settings
- Auto Syntax Check. Checks syntax after you enter a line of code. This feature can be annoying because you can’t leave the incorrect line of code until you fix the error. I recommend leaving this option cleared. (Incorrect syntax will still be highlighted in red.)
- Require Variable Declaration. Adds the Option Explicit statement to general declarations in any new module so that explicit variable declaration (early binding of variables) is required. Highly recommended.
- Auto List Members. Displays a list of available properties, methods, or other language elements available for the statement at the current insertion point.
- Auto Quick Info. Displays information about functions and their parameters as you type.
- Auto Data Tips. Displays the value of the variable over which your cursor is placed. (Available only in Break mode.)
- Auto Indent. Indents all lines of code at the location where the first line of code was tabbed.
- Tab Width. Sets the tab width. You can specify between 1 and 32 spaces; the default is 4 spaces.
Window Settings
- Drag-and-Drop Text Editing. Lets you drag and drop elements within the current code and from the Code window into the Immediate or Watch windows; works the same as in Word documents.
- Default To Full Module View. Sets the default state for new modules to show procedures in the Code window as a single scrollable list or dividedinto separate procedures. Doesn’t change the way currently open modules are viewed.
- Procedure Separator. Displays or hides separator bars between procedures in the Code window.
The Editor Format tab of the Options dialog box (shown in Figure 20-11) lets you select the font and color. I suggest leaving the colors as specified and selecting the Fixedsys (Western) font for maximum readability.
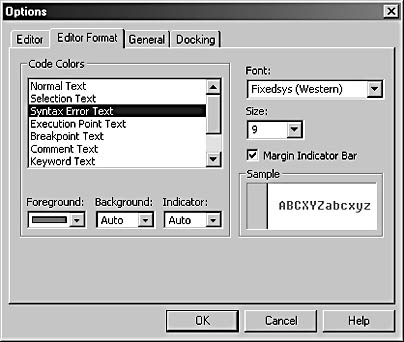
Figure 20-11. The Editor Format tab of the Options dialog box lets you set the font and color for text in the Visual Basic Editor window.
The General tab of the Options dialog box (shown in Figure 20-12) has some options for UserForms (which aren’t applicable in Access) and some options for error handling and compilation (which you can generally leave as they are).
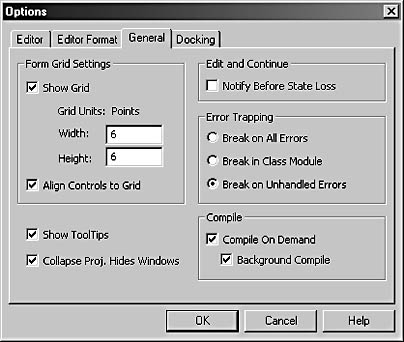
Figure 20-12. The General tab of the Options dialog box provides some error handling and compilation options.
The Docking tab of the Options dialog box (shown in Figure 20-13) lets you specify which of the windows and panes can be docked. A window is docked when it’s anchored to the edge of the main application window or to the edge of another docked window within the main application window. A docked window is generally more visible and easier to work with than windows that aren’t docked.
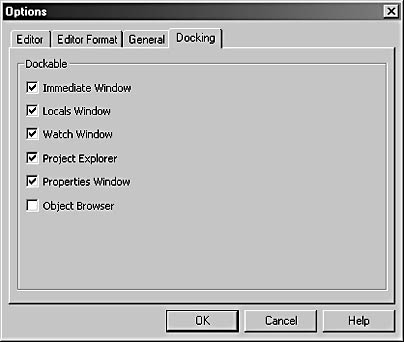
Figure 20-13. Use the Docking tab to dock the windows in the Visual Basic Editor.
EAN: 2147483647
Pages: 172