Importing and Linking Using the Interface
3 4
The following sections give step-by-step instructions for importing or linking data in the most widely used formats. You can use the same general techniques to import data from or link to data in the other supported formats.
As mentioned, whether you should import or link data depends on whether you want to permanently move the data to Access and don’t need to work with it in the original program in the future or whether you need to continue working with the data in the other program. Depending on the type of data to be imported or linked, the import procedure will differ significantly.
Importing Data from an Access Database
When you import data from another Access database, you’re importing a table. If the table you’re importing is a local table (a table saved on your computer’s hard drive), the import procedure creates a new table, identical to the original one, in the current database. If you import a linked table, you create a new link to the same data source to which the original table was linked.
To import one or more tables from another Access database, follow these steps:
tip - Import a single table or object
To quickly import a single Access table (or other database object) into the current database, open both databases to the Database window, and simply drag the table from one database to the other. A copy of the object is created in the target database.
- In the Database window under Tables, click New. The New Table dialog box will appear, as shown in Figure 16-2.
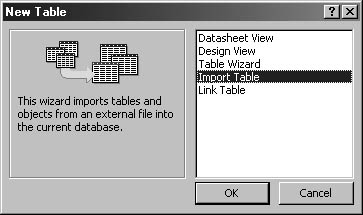
Figure 16-2. You start the import process in the New Table dialog box.
- Select Import Table and click OK. The Import dialog box will open. (See Figure 16-3.) The Microsoft Access (*.mdb; *.adp; *.mda; *.mde; *.ade) option is the default selection in the Files Of Type drop-down list.
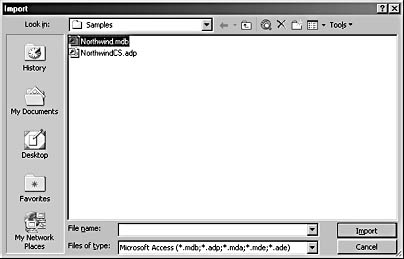
Figure 16-3. The Import dialog box offers a selection of databases for importing.
- Navigate to the folder in which the target database is located, select the database containing the table or tables you want to import, and click Import. The Import Objects dialog box will open to the Tables tab, as shown in Figure 16-4.
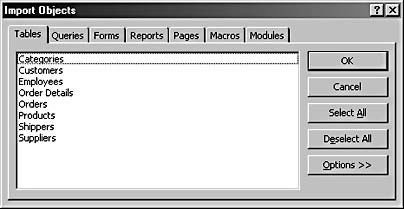
Figure 16-4. The Import Objects dialog box allows you to select the table or tables you want to import.
- Select the table(s) you want to import, and click OK to complete the process.
tip
To select more than one table to import, use the usual Windows hot keys (Ctrl+click and Shift+click), or click Select All to select all the tables at once.
If the table being imported has the same name as a table already in the current database, you won’t receive a warning message or a dialog box asking you to confirm that you want to overwrite the existing table. Instead, the imported table will be given a trailing number, starting with 1. For example, if you import a table named Employees into a database that already has an Employees table, the imported table will be named Employees1. Importing another table named Employees will create an Employees2 table, and so on.
InsideOut
If you want the imported table to replace an identically named table, you can prevent your imported tables from having numbers appended to their names. Before you do the import, rename any tables that have the same names as the tables to be imported—for example, you can give them a leading dash to move them to the top of the Database window. You can then delete the original tables after you verify that the imported tables are OK.
Linking to Data in an Access Database
Linking to data in an Access database enables you to use information stored in another database that you’ve already created. For example, suppose you want to link your Suppliers database to your overall inventory database so that you can see the latest inventory data and update it as needed. You can link to the Inventory table so that you can update the price or number of items in stock when you order an item from a supplier. Making the changes in a linked table guarantees that the changes are made to the source table—in this case, the Inventory table—so you won’t have to worry about updating it separately and possibly having outdated information in the Suppliers database.
To create a link to a table in one of your Access databases, follow these steps:
- In the Database window under Tables, click New. The New Table dialog box will appear (as shown earlier in Figure 16-2).
- Select Link Table, and click OK. The Link dialog box will open with Microsoft Access (*.mdb; *.mda; *.mde) as the default selection in the Files Of Type drop-down list, as shown in Figure 16-5.
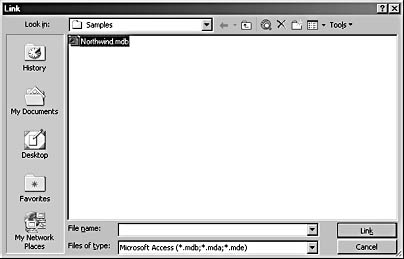
Figure 16-5. Select a database containing tables to link.
- Navigate to the folder where the target database is located, and select the database containing the table(s) you want to link.
- Click Link to open the Link Tables dialog box. (See Figure 16-6.) Unlike the Import Objects dialog box, which you can use to import all sorts of database objects, the Link Tables dialog box has only one tab, Tables. This is because you can link only to tables in another database, not to other database objects. Select the table or tables you want to link to, and then click OK.
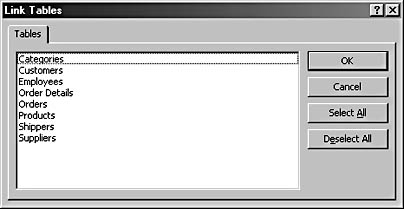
Figure 16-6. You select the table or tables you want to link to in the Link Tables dialog box.
Figure 16-7 shows the linked Suppliers table in the Database window. The arrow to the left of the table’s icon indicates that it’s a linked table.
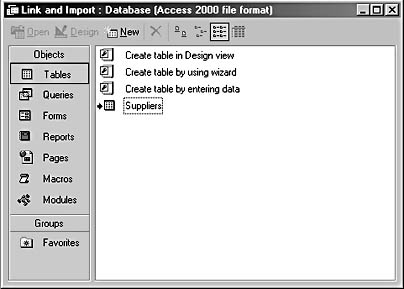
Figure 16-7. The arrow indicates that the Suppliers table is a linked table.
tip - Rename linked tables
You can rename linked tables just as you can rename local tables. Select the table you want to rename and press F2 (or right-click the table name and click Rename), and then edit the table name and press Enter. The linked table (technically, the link) will be renamed in the current Access database, without changing the name of the source table or other file in the source database. Note that if you’re working in a multi-user environment, you need to be sure that all users have closed the table before you rename it.
Linking to Databases That Contain Linked Tables
When you look at tables in the Database window, you see arrow icons indicating which tables are linked to external data. When you import a table, however, linked tables in the target database are listed along with local tables in the Import Tables dialog box, without a distinctive icon, so you can’t tell which tables in the source are linked. If you import a linked table, you’re creating a table that’s linked to the original data source, which might not be what you intend.
Access is smart enough to exclude linked tables from the list of tables available for linking in the Link Tables dialog box, so you don’t have to worry about linking to a linked table in another database. If you’re trying to link to a table in another database and don’t see its name listed in the Link Tables dialog box, it might be a linked table.
If you know that the source database contains linked tables, you can either open that database and look at the tables in the Database window to see which ones are linked, or you can use the Documenter in the source database (choose Tools, Analyze, Documenter) to document all the tables in the database for reference when you link to tables in this database. The linked tables are identified on the Attributes line, which will read something like this for a linked table:
Attributes: Linked Connect: ;Database=D:\NDSL Data.MDB
Importing Data from an Excel Worksheet
If you’ve been tracking data in an Excel worksheet, you can easily import the information into an Access database. You might do this, for example, to incorporate the information you store in an Excel spreadsheet that tracks your spending patterns with the companies in your Suppliers data table.
When you import data from an Excel worksheet using the Access interface, you use the Import Spreadsheet Wizard, which guides you through the import process.
InsideOut
Excel worksheets often contain titles and explanatory text above columns of data or totals below columns of numbers, which might cause unwanted results when you use the imported data in a form or report, and in some cases might even prevent the import entirely. To ensure a clean import, always trim the worksheet to just the data and column headings or prepare a named range that includes only the data cells to import.
To import data from an Excel worksheet, follow these steps:
- Choose File, Get External Data, Import. The Import dialog box will appear.
- In the Files Of Type drop-down list, select Microsoft Excel (*.xls), as shown in Figure 16-8.
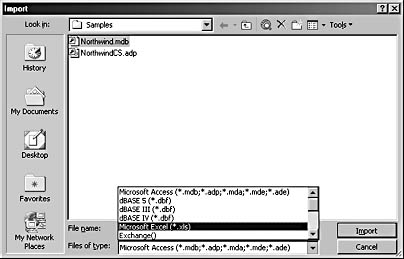
Figure 16-8. You select the import format in the Import dialog box.
- Navigate to the folder containing the Excel worksheet or workbook you want to import, select the file, and then click Import. The Import Spreadsheet Wizard will launch, offering you a choice of displaying worksheets or named ranges in the selected workbook file, as shown in Figure 16-9.
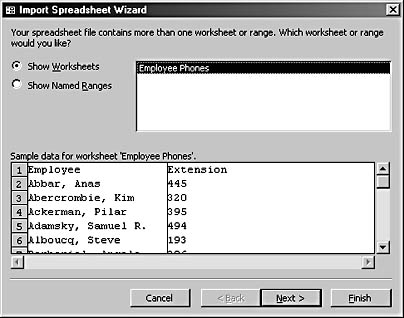
Figure 16-9. The first page of the Import Spreadsheet Wizard lets you choose between displaying worksheets or named ranges in the workbook file.
- Click the option you want, and then click Next.
note
An entire XLS file is a workbook (except in very early versions of Excel), and each workbook contains one or more worksheets. When you select a workbook for importing or linking, you’re given a choice of which worksheet in the workbook to import or link to. If you need to import or link to several worksheets from one workbook, you must import or link to each one separately. Each worksheet becomes an imported or a linked table in the Access database. - If you want the first row in the spreadsheet to be used as column headings, select the First Row Contains Column Headings check box. Click Next.
- Access needs to know where you want to store the Excel data. If you want to import the data into a new table, leave In A New Table selected. If you want to add the data to an existing table, click that option and select the table. Click Next.
tip
If you haven’t prepared an Access table that matches exactly the column headings in the Excel worksheet, select In A New Table because importing to an existing table won’t work unless there’s an exact match between columns and fields. - On this page of the wizard, you tell Access how to work with each field you’re importing, as shown in Figure 16-10. In the Field Name text box, enter a name for the field. You can select the Do Not Import Field (Skip) check box if you don’t want to import the selected field. The Indexed drop-down list lets you specify that you don’t want to index the selected field, that you want to index the field and allow duplicate data entries, or that you want to index the field but reject duplicate entries. Excel data types are usually converted to the appropriate Access data type, but if not, you might be able to use the Data Type drop-down list to change the data type of the field. (If the Data Type drop-down list is disabled, only one data type is available for the selected field.) Click Next.
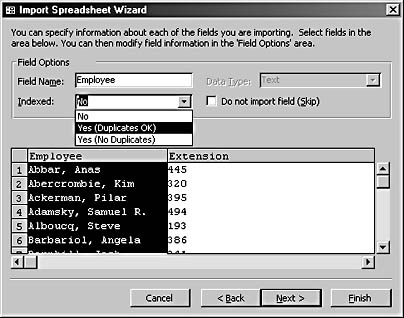
Figure 16-10. You set field options to tell Access how you want to work with incoming data.
- The wizard lets you make several selections related to setting a primary key, as shown in Figure 16-11. The default setting of Let Access Add Primary Key will add a new AutoNumber field as the primary key. You can also select an existing field as the primary key (select the field from the drop-down list) or opt to have no primary key. Click Next.
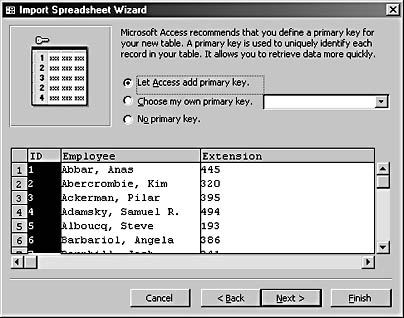
Figure 16-11. You can set a primary key for a table of imported Excel data or choose not to have a primary key.
Troubleshooting - My primary key selection produces an error message
The field you select as the primary key must contain unique data (that is, a different value in every record); otherwise, you’ll get an error message like this one:
Error creating primary key on field 'EmployeeName’
This error might occur because, for example, the same employee name is found in two rows of the Excel worksheet. The simplest way to avoid this problem is to not set a primary key during the import process. Instead, import the data unindexed, and then clean up the duplicate values in Access by deleting duplicate records or by putting a different value in the field in the duplicate record. Then index the key field in the Access table.
- On the final wizard page, you can specify the name of the new table, as shown in Figure 16-12. The default name is the name of the worksheet. If you want to use a wizard to analyze your imported data or want to open Help, select the appropriate check box. To complete the import, click Finish.
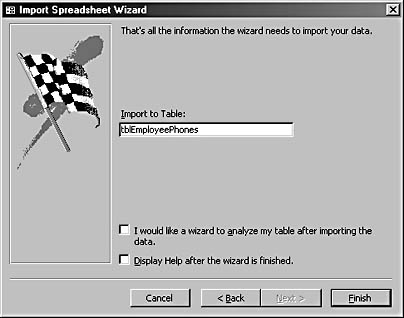
Figure 16-12. You name the table of imported Excel data on the final page of the wizard.
Figure 16-13 shows the new table in Datasheet view.
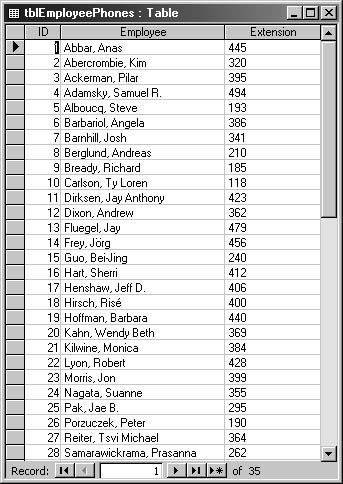
Figure 16-13. The new table containing data imported from Excel looks like this in Datasheet view.
Using the Table Analyzer
If you’re relatively new to creating and working with tables in Access, you might find it helpful to work with the Table Analyzer the first few times you import tables. (Because you can’t change the structure of linked tables, the Table Analyzer is useful only for imported tables.) The Table Analyzer is a wizard that walks you through the process of testing and improving the organization and format of your data. To start theTable Analyzer, select the I Would Like A Wizard To Analyze My Table After Importing The Data check box on the last page of the Import Spreadsheet Wizard.
Linking to Data in an Excel Worksheet
You might want to create a link to the data in your Excel worksheet instead of importing the data to your current Access table. Linking ensures that the data in the spreadsheet will reflect any modifications made in your Access table, and vice-versa. The process for linking to data in Excel worksheets is similar to the process for importing data from worksheets.
To link an Access table to data in a named range of an Excel worksheet, follow these steps. (Named ranges are useful for selecting only the data for linking or importing, excluding titles, totals, and explanatory material.)
note
For more detailed information about working with named ranges in Excel, see Microsoft Excel Version 2002 Inside Out (Microsoft Press, 2001).
- Choose File, Get External Data, Link Tables. The Link dialog box will appear.
- In the Files Of Type drop-down list, select Microsoft Excel (*.xls).
- Navigate to the folder containing the Excel workbook you want to link to, select the workbook file, and click Link. The Link Spreadsheet Wizard will launch.
- Select Show Named Ranges, and then select the named range you want to use. Click Next.
- Select the First Row Contains Column Headings check box if applicable. There are no options for setting a primary key or index when linking to an Excel worksheet as there are when you’re importing. Click Next.
- Enter the name of the linked table. Click Finish. The imported data will be placed in a linked table.
tip
If you want to be able to tell that the new table is linked to Excel data whenever you see its name in a list, prefix the table name with a tag such as txls.
Importing Data from Outlook
The Import dialog box has a selection for importing data from Outlook, but importing various types of Outlook data into Access is somewhat limited, especially if you use custom Outlook items. If you use the interface to import data from Outlook items, you’re limited to a fairly small selection of built-in fields. That might be all you need, however, if you don’t need to import data from custom fields.
To import data from Outlook, follow these steps:
- Choose File, Get External Data, Import. The Import dialog box will appear.
- In the Files Of Type drop-down list, select Outlook().
- The Import Exchange/Outlook Wizard will start, offering a choice of Address Books and Personal Folders. Expand the Personal Folders selection to see your Outlook folders. Select the folder you want to import data from, as shown in Figure 16-14, and click Next.
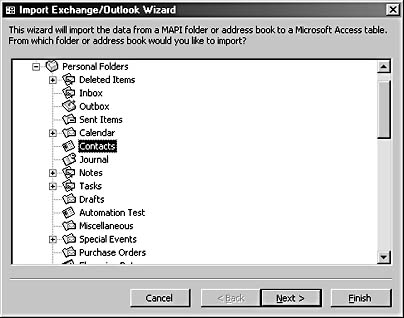
Figure 16-14. In the Import Exchange/Outlook Wizard, you select a folder of Outlook data to import.
- The wizard lists the fields you can import. In our example, the list displays the Contact fields you can import (which is a subset of all the built-in Contact fields), as shown in Figure 16-15. Leave the In A New Table option selected, and click Next.

Figure 16-15. A list of fields you can select is displayed in the wizard.
- You can use the next page of the wizard (shown in Figure 16-16) to select each column in turn and change its data type, and to set an index. Generally, however, it’s best to leave these options as is. You can also select the Do Not Import Field (Skip) check box to leave a field out of the import. Click Next.
- The next page offers the usual import option group of choices related to setting a primary key. For this example, I recommend selecting No Primary Key or letting Access create an AutoNumber primary key because Outlook Contacts doesn’t have a built-in field available in the wizard that contains guaranteed unique data. Click Next.
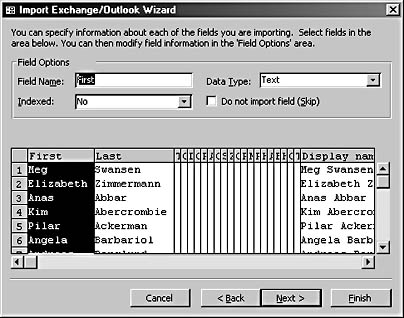
Figure 16-16. You set data type and indexing options for fields on this page of the wizard.
- On the final wizard page, enter the name of the Access table that will contain the data. You also have the option of checking a check box to open a wizard for analyzing the imported data or checking a check box to open Help. Click Finish to start importing the Outlook contacts into the Access table.
Figure 16-17 shows a portion of the table of imported contacts.
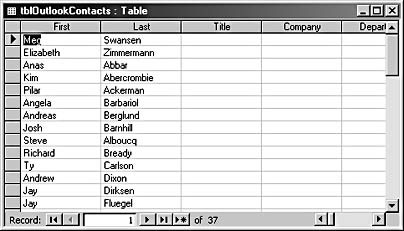
Figure 16-17. This Access table contains imported Outlook contacts.
The table of imported Outlook contacts will contain the most commonly used name and address fields and will thus be quite useful for most purposes.
Troubleshooting - Important fields are missing when I import Outlook tasks or appointments
If you import tasks or calendar appointments from Outlook using the Import Exchange/Outlook Wizard, several crucial fields will be missing from the table of imported data. Even if you select all the fields available for import, a table of imported tasks will lack the crucial Subject field, and even though it will have Start Date and End Date fields, they will all be blank. A table of imported appointments will fare a little better: It will contain the Subject field but will lack the Start Time and End Time fields.
If you need to import tasks or appointments from Outlook, it’s best to skip using the interface and instead use VBA code, which lets you import from all the built-in fields as well as custom fields.
See the section "Importing and Linking Data Using VBA Code," for a description of using VBA code to import fields.
Linking to Data in Outlook
In addition to helping you import Outlook data into Access tables, the Import Exchange/Outlook Wizard also lets you link to Outlook data. Just choose File, Get External Data, Link Tables to open the Link dialog box, and follow steps 1 through 3 as outlined in the previous section. The Link Exchange/Outlook Wizard doesn’t allow you to select fields, so after you select the folder to link to in step 3, the wizard will take you directly to the final wizard page. The final page of the Link Exchange/Outlook Wizard has one check box that’s different from the final page of the Import Exchange/Outlook Wizard. This check box gives you the option of having the wizard store your Messaging Application Programming Interface (MAPI) profile name with your linked table. This option is useful if you have multiple Outlook profiles set up, so the link will know which profile to use.
A table of linked Contact data is useful because it contains the most commonly used Contact fields and lets you keep your contacts up to date in both Access and Outlook (as long as you don’t use custom fields). You can also run the Mail Merge Wizard to prepare Word letters to send to Outlook contacts using the linked Access table as the data source. (See Chapter 17, "Exporting Data from Access," for more information about using the Mail Merge Wizard.) Linked Tasks and Appointments tables are less useful because of the omission of some crucial fields.
caution
In my experience, when you add a new Outlook contact to a Contacts folder that is linked to an Access table, the new contact is also created in the linked table. But the reverse is not the case: Creating a new record in the linked Access Contacts table doesn’t create a new Outlook contact item.
Importing Text Data
You can import data from text files into an Access table, but not all text files are suitable for data import. To be useful for importing, the data in a text file must be in delimited or fixed-width format. Delimited text files use a character (typically a comma or tab) to separate data fields and another character (usually a double quotation mark) as a text qualifier. Fixed-width text files arrange data in columns of specific widths, using spaces to pad each field to the required width.
Troubleshooting - I want to import data from a text file that isn’t in fixed-width or delimited format
If the data in the text file is in a fairly regular format, you might be able to clean it up in Word before importing. To create a delimited file, use search and replace to ensure that every record ends with a hard carriage return (represented in Word searches as the special character ^p) and that fields are separated by an appropriate separator (usually a comma). Also make sure that each text field is enclosed in double quotation marks to prevent problems with quotation marks in the data.
If the text file is closest to the fixed-width format, change to a fixed-width font such as Courier New, and make sure that the columns of data line up, adding or deleting spaces as needed.
After you do the cleanup, save the text file in Plain Text (*.txt) format from Word, giving it the CSV extension for a delimited file or the TXT extension for a fixed-width file. You should then be able to import the file into Access. If you regularly import text files that need cleanup, you can write VBA code to automate the cleanup process, using components of the Word object model.
Comma-Delimited File Import
To import data from a comma-delimited text file, follow these steps:
- Choose File, Get External Data, Import. The Import dialog box will open.
- In the Files Of Type drop-down list, select Text Files (*.txt; *.csv; *.tab; *.asc).
- Navigate to the folder in which the comma-delimited file is located, select the file, and click Import.
- The Import Text Wizard will open, with the Delimited option preselected, as shown in Figure 16-18. Click Next.
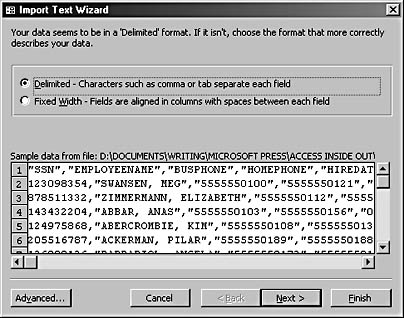
Figure 16-18. The Delimited option is preselected on the first page of the Import Text Wizard.
- You can designate the first row as field names, and you can choose your delimiter and text qualifier. For this example, use the comma as the delimiter character and the double quotation mark as the text qualifier, as shown in Figure 16-19. You can also change both characters if needed. Click Next.
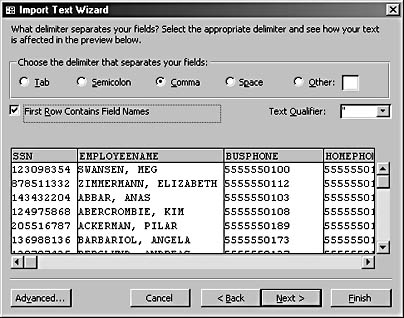
Figure 16-19. Specify the field name and delimiter options.
- Choose between creating a new table or storing the imported data in an existing table, which has to be prepared in advance with matching field names. (See Figure 16-20.) Click Next.
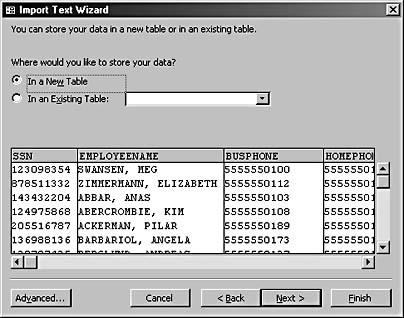
Figure 16-20. Choose to either create a new table or store your data in an existing table.
- If the text file doesn’t have field names in the first row, enter the field names and change the data types as needed by clicking the down arrow and choosing the data type you want from the drop-down list. (See Figure 16-21.) Click Next.
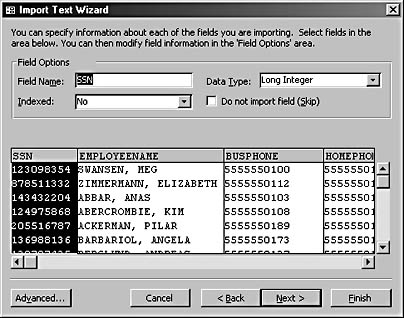
Figure 16-21. Enter field names and specify the data type.
- Now you need to make choices about the primary key for your table. You can opt to have Access choose the primary key for you, you can select the field to use as a primary key, or you can decide not to use a primary key. Make your choice, and click Next.
- Type the name you want to assign to the imported table, and click Finish.
Fixed-Width Text File Import
To import data from a fixed-width text file, follow these steps:
- Choose File, Get External Data, Import. The Import dialog box will open.
- In the Files Of Type drop-down list, select Text Files (*.txt; *.csv; *.tab; *.asc).
- Navigate to the folder in which the fixed-width file is located, select the file, and click the Import button.
- The Import Text Wizard will open with the Fixed Width option preselected. Click Next.
- Adjust the field breaks if needed by dragging the dividers to the desired location. (See Figure 16-22.) Click Next.
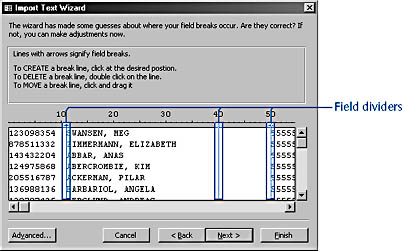
Figure 16-22. The wizard allows you to adjust the field borders for a fixed-width file.
- Choose between storing the imported data in a new table or in an existing table. As with the other import formats, it’s best to select a new table unless you have prepared a table in advance that exactly matches the field names in the text file. Click Next.
- Name each field. Unlike with some other import types, you don’t have the option to use the first row as column headings. Click Next.
- Set a primary key, and then click Next.
- Specify the name of the table, and then click Finish.
Linking to Text Data
If you’ve created a text file containing data that’s regularly updated, you can create a link in Access that gives you access to the information but also ensures that the Access data stays current with any updates made to the text file. The process for linking to text files is virtually identical to that for importing from text files. The only difference is that you choose File, Get External Data, Link Tables to start the process. However, working with linked text file tables (both fixed-width and delimited) has limitations. For example, you can’t delete or update data in a linked fixed-width table, although you can add new records to the text file.
Importing Data from Non-Microsoft Applications
Years ago, dBASE was the top database for personal computers, but it lost its leading position by delaying the move to Microsoft Windows. Even though it isn’t used much anymore, the dBASE format still has its uses, especially as an output choice when exporting data from an application whose files can’t be directly imported into Access (such as Microsoft Works). The following sections give examples of importing several types of non-Microsoft data into Access tables. Linked tables of non-Access data can’t be updated, nor can records be added or deleted, but they’re useful when you need a table of read-only data for reference purposes.
dBASE
Follow these steps to import data from a dBASE DBF file:
- Click New on the Tables tab of the Database window, select Import Table in the New Table dialog box, and click OK. The Import dialog box will open.
- Navigate to the folder containing the dBASE file you want to import, select the file, and then select the appropriate dBASE format from the Files Of Type drop-down list.
- Click Import to import the file. A dialog box indicating a successful import will appear. Click Close.
note
Paradox is another relational database program that was popular in the years before Access really took off. Importing a Paradox file into an Access table is an almost identical process to importing a dBASE file. In the Files Of Type drop-down list in the Import dialog box, select the Paradox (*.db) format, and then click Import. The data will be imported into your Access table.
Lotus 1-2-3
To import data from a Lotus 1-2-3 spreadsheet, follow these steps:
- On the Tables tab of the Database window, click New. In the New Table dialog box, select Import Table to open the Import dialog box.
- Navigate to the folder containing the Lotus spreadsheet file you want to import, and select the file. From the Files Of Type drop-down list, select Lotus 1-2-3 (*.wk*).
- The Import Spreadsheet Wizard will open. It will have fewer selections than for importing Excel worksheets. On the first page, the First Row Contains Column Headings check box is the only option. Select this, and click Next.
- You can choose to create a new table or store the Lotus data in an existing table. (An existing table must be prepared in advance with matching fields.) Click Next.
- On this wizard page, you can rename fields (if desired), set an index on a field, or exclude a field from the import. Click Next.
- Choose your preferred primary key (if desired). You can let Access add a primary key, choose a primary key from the data fields, or choose not to have a primary key. (Figure 16-23 shows the AccountNo field being selected as the primary key field.) Click Next.
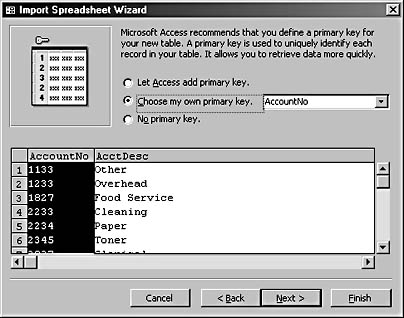
Figure 16-23. Select a primary key for the table.
- Specify the table’s name, and click Finish. The data will be imported as specified.
Importing and Linking with ODBC
Open Database Connectivity (ODBC) is a data exchange standard that enables you to work with information across a variety of applications and platforms. Many of the choices available through the ODBC selection (dBASE, Excel, and Access) have their own selections in the Import dialog box (where years ago they were available only through ODBC), but you can also import data through ODBC from formats that currently lack their own import formats, such as Microsoft SQL Server and Microsoft Visual FoxPro.
tip
To link an Access front-end database to tables in a SQL Server back end, you can use the Upsizing Wizard. For information about doing this, see Appendix E, "Upsizing to SQL Server."
Follow these steps to import a table from a SQL Server database:
- Choose File, Get External Data, Import to open the Import dialog box.
- In the Files Of Type drop-down list, select ODBC Databases(). The Select Data Source dialog box will open, as shown in Figure 16-24.
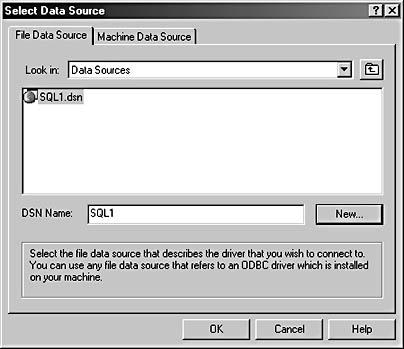
Figure 16-24. In the Select Data Source dialog box, you select an ODBC data source for importing.
- On the File Data Source tab, select a previously created SQL Server data source file and click OK.
- In the Import Objects dialog box (shown in Figure 16-25), select one or more tables to import, and then click OK to start the import.
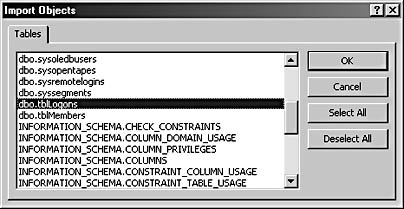
Figure 16-25. In the Import Objects dialog box, you select a SQL Server table to import.
Linking to dBASE and Paradox databases can give you added flexibility—and more data to work with—as you gather, organize, compare, and contrast data that gives you a picture of your business or organization. The process of linking to these formats is virtually identical to that for importing from them; the only difference is that you choose File, Get External Data, Link Tables to start the process. (Lotus spreadsheets don’t have the Link option.)
Working with linked dBASE or Paradox files has limitations, however. You can’t edit, delete, or update data in a linked dBASE or Paradox file, so this option is useful only if you need a read-only table of data. This might be the case when one or more of the following conditions is true:
- Your old data is archived in dBASE or Paradox files.
- The current data is stored in an Access database.
- You need to see the old data when comparing results over the years.
- You need to modify only current Access data.
EAN: 2147483647
Pages: 172
- Operations Security
- Business Continuity Planning and Disaster Recovery Planning
- Legal, Regulations, Compliance, and Investigations
- Appendix D The Information System Security Engineering Professional (ISSEP) Certification
- Appendix E The Information System Security Management Professional (ISSMP) Certification