Organizing Outlook Items
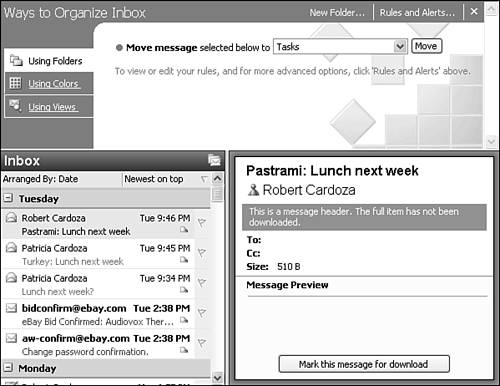
| The Advanced Find dialog box enables you to search for specific items and display them in the Advanced Find dialog. But sometimes you just want to display the items in your Inbox with a little more organization than they currently have. You don't need to create a custom view, you can create organized views of your Outlook items using the Organize feature. To access Outlook's Organize feature, select Tools, Organize to display the Organize pane as shown in Figure 22.20. Figure 22.20. The Organize pane enables you to use folders, colors, and views to organize your items.
NOTE Previous versions of Outlook included the Organize button on the toolbar. Outlook 2003 removes the button from the toolbar. You'll either need to add the button back on the toolbar or launch Organize from the Tools menu. The Organize feature is really a graphical way to access rules, automatic formatting, and views. You can also access Outlook's junk mail features. Organizing Email MessagesThe Organize pane has three options. You can organize Outlook items using folders, using colors, or using views. Organizing using folders is really a simple interface into Outlook rules. You can move any selected messages in your Inbox to another folder by selecting the folder in the drop-down marked Move Message Selected Below To. Choose your folder and click Move. Outlook 2003 does not allow you to use the Organize pane to move all messages from a specific person to a specific folder. You'll have to click the Rules and Alerts button on the top of the Organize Pane to create such a rule.
Using Color to Organize Outlook ItemsYou can also organize your email messages by color. This feature is an easy-to-use interface to the Automatic Formatting feature available within a view. Select Using Colors on the left of the Organize pane to display Figure 22.21. Figure 22.21. You can use colors to make your email easy to locate.
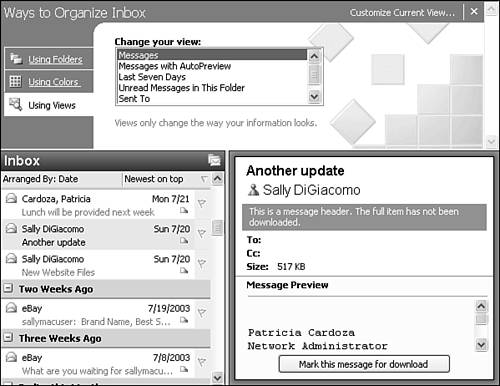
You can choose to color messages from a recipient in 16 different colors. You can choose to have messages from your boss appear in red or messages from your sister appear in blue. You can also choose to color messages sent only to you in a separate color. Using colors to organize your Inbox can help you see at a glance which messages you need to respond to right away and which messages can wait until you're out of that meeting you're going to. For additional options for customizing your view using colors, click the Automatic Formatting button in the upper-right corner of the Organize pane. NOTE You can use the Organize function in any folder. However, the options you choose are active only for the particular folder you're viewing at the time. For example, if you're viewing the Inbox folder when you create your Organize by Color rule, emails in other folders won't inherit the same colors as messages in your Inbox. The third option in the Organize pane is using views, as shown in Figure 22.22. This option gives you a quick way to select a new view. Just click the view you need and the view will be applied automatically. You can also click the Customize Current View button in the upper-right corner of the Organize pane for more view options. Figure 22.22. Use this pane to select a new view.
|
 For more information about rules and alerts,
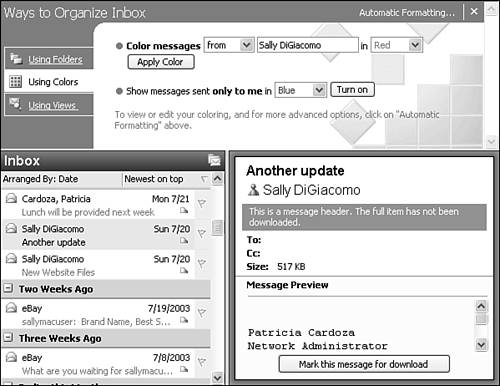
EAN: 2147483647
Pages: 426