Using FTP
|
| < Day Day Up > |
|
When you've added your Web server information to your site definition, you may connect to your Web server and transfer files from your local root folder on your computer to a remote root folder on the Web server. The Host Directory field provides the path to the remote root folder.
A mirrored structure between the local and remote folders is ideal and makes the most of Dreamweaver's FTP features. Mirroring means setting up a structure that compares folder to folder. For example, let's say that your Web files must live in a folder named wwwroot on your Web server. An index page placed in that folder would be your homepage. To mirror the local and remote folders, your local root folder would be equal to wwwroot. If you have more than one site, you can place different sites in different folders. In that case, the host directory path provided in a site's definition would reflect the matching root folder to be found on your Web server, as shown in Figure 45-8.
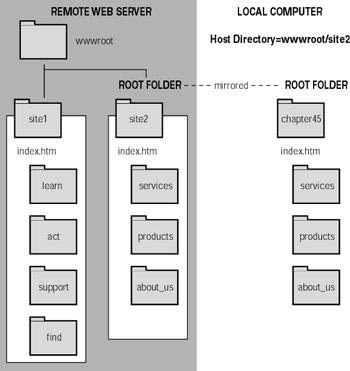
Figure 45-8: The host directory indicates the remote root folder, which ideally should mirror the structure of the local root folder.
| Tip | You cannot specify a folder in the host cirectory path that doesn't exist on the Web server. This often perplexes new FTP users; how do you connect, if you cannot specify the folder? The trick is to build a site that you will use to administer your Web server access at the top or root level. Connect and use the same right-click (Control+click) method used to add new folders to your local site to add new folders to your remote directory. Then change the host directory path for your site definition to include the new folders. |
Connecting to the Web server
Because Windows and Macintosh versions of Dreamweaver's Site panel (window) are different, using the FTP client varies a bit, too. There are several ways to work with the Site panel when uploading or downloading files:
-
For the integrated workspace (Windows only) click the Expand/Collapse button at the top right of the Site panel (Figure 45-9) to expand the docked panel so that it reveals the Remote and Local sides.
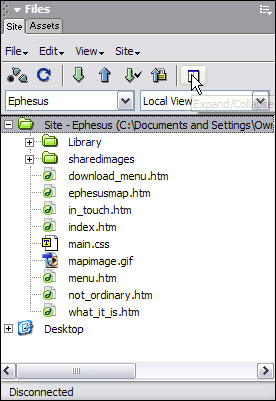
Figure 45-9: Expand the Site panel. -
For the floating workspace or for Macintosh systems, click the small white arrow (Figure 45-10) found at the bottom left of the Site window to expand and reveal the Remote and Local sides of the window.
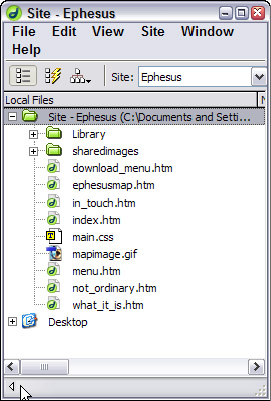
Figure 45-10: Click the arrow to expand the Site window.
Click the Connect icon to access the Remote server for OS or workspace. Figure 45-11 shows a connected site and the list of remote files and folders on the Web server. These root folders are mirrored.
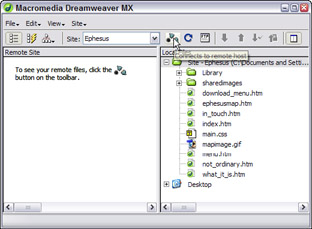
Figure 45-11: Connecting to the Web server reveals the mirrored Web files and folders.
Put and get files or folders
When you move a file or folder from the local root to the remote Web server, you are putting the file or folder. When the direction is the opposite, you are getting files or folders. There are several ways to put or get files:
-
You may use the Put and Get arrow icons from the expanded or collapsed Site panel (window). First select a file, folder, or the entire site (root folder); then click Put to move the files to the Web server.
-
You may put or get the current document by clicking the File Management icon in the document bar to access menu options, as shown in Figure 45-12.

Figure 45-12: File Management Put and Get options -
You may choose Site ® Put (or Get) to upload the current active document, as shown in Figure 45-13.
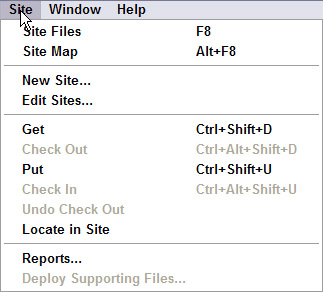
Figure 45-13: Put or get the current document using the Site menu.
When you put a file that is contained within a subfolder of the local root folder, Dreamweaver builds the matching structure to maintain the relative location of the file within the site.
| Tip | You can also drag a file, a folder, or a selection of files and/or folders to any folder accessible to you on the Web server. A small + icon appears next to the cursor when you drag your selection to a remote folder. |
Synchronizing site files
A Sychronize option is available in the Site menu that you can use to move newer files in either direction (put and get). It works by comparing the modification dates for files on the Web (remote) server and the local computer. Your options (Figure 45-14) are
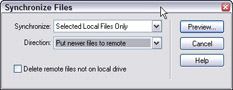
Figure 45-14: Synchronize dialog box
-
Synchronize — Selected Local Files or Entire Site
-
Direction — Put Newer Files to Remote; Get Newer Files From Remote; or Get and Put Newer Files (both directions)
When you click Preview to start the synchronization process, you a log of files (Figure 45-15) that Dreamweaver will put or get, depending on the choices you made. You may uncheck any file and click OK to start the put or get or both.
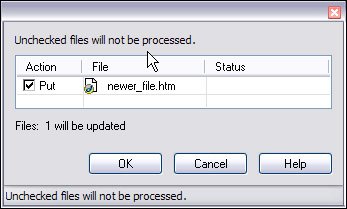
Figure 45-15: A preview of the proposed synchronization
| Caution | Some Web server software prevents Dreamweaver from getting the actual time, in which case Dreamweaver may either disable the Synchronization feature (grayed out in the Site menu options) or actually give false information about the status of a file. Servers using Serve U FTP software will not work with Dreamweaver's synchronization unless the host disables the option to use all lowercase for files and directories in the setup. |
|
| < Day Day Up > |
|
EAN: 2147483647
Pages: 491