| The first step of learning how to effectively use text in a Flash document is to add some basic static text to the Stage. In this exercise, you will add static text to the FLA file. The character outlines are embedded in the file, so you can use any font on your computer system, and it is visible to the site's visitors. 1. | Open bookstore6.fla from the TechBookstore folder, and save it as bookstore7.fla.
Alternatively, you can open bookstore6.fla from lesson02/start and save it as bookstore7.fla.
| 2. | Add a new layer for static text and rename it page names. Insert a layer folder and name it text.
Select the graphics layer folder and insert a new layer above it. Rename the layer to page names. With the new layer selected, click Insert Layer Folder at the bottom of the Layers pane, and name the new folder text. Drag the page names layer into the text folder.
| 3. | Extend the main document Timeline to 70 frames.
The various "pages" for the Tech Bookstore will be organized along the main document Timeline. Each of these pages will include a static text field, including the name of the page.
Note Although this procedure is not necessarily considered a best practice, it's quite okay for a learning application. In the real world, your different "pages" will be different SWF files loaded into the interface with a user interaction. You will learn how to do that in a later lesson, but for now, the goal is to get used to text, and practice using the Timeline at the same time. Click on Frame 70 of the labels layer (only that frame should be highlighted). Now hold down Shift and select Frame position 70 of the background layer. By pressing down Shift, you are highlighting Frame 70 across all the layers, so you can extend each layer to that point in time at once. Press F5 on your keyboard or select Insert > Timeline > Insert Frame to extend all your layers to 70 frames.
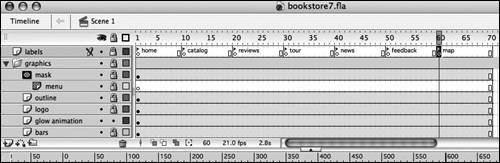
| 4. | Organize the layers to form the website's pages.
First, you need to add some keyframes to the labels layer that will represent each of the different parts of the Tech Bookstore website. Select Frame 10 of the labels layer and press F6 to insert a keyframe. Continue to insert keyframes at Frames 20, 30, 40, 50, and 60. Each of these keyframes is labeled with the title of the section.
You already have a frame label in Frame 1 of the labels layer. To add the others, start by selecting Frame 10 on the labels layer, type catalog into the <Frame Label> text field in the Property inspector, and press Enter. Leave the Label type at Name. Repeat this process for the next five keyframes on the label layer, entering reviews, tour, news, feedback, and map.
 | 5. | Select the Text tool and change the font properties in the Property inspector.
Select the Text tool from the Tools panel and maximize the Property inspector.
Select Static from the Text Type drop-down list. Then select Arial from the Font drop-down list and select 12 for font size. Click the Text (fill) color box and enter #666666 into the Hexadecimal field above the palette. Click the Bold button so the text appears boldface. Click the Align Right button on the Property inspector to right-justify the text field. All the other settings can remain at the default settings. In the Font Rendering Method drop-down list, select Anti-alias for readability. Your Property inspector should match the settings in the following figure.
 | 6. | Add the page name text to each area of the bookstore site using static text.
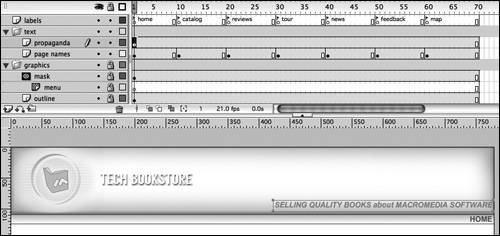
Now you need to create the text field on the Stage. The page names are placed on the far right of the bar graphic that sits beneath the title area.
 Select Frame 1 on the page names layer. Remember that the text is right-aligned in the text field. Therefore, click the Stage where you want the text to end. Type HOME into the text field and select the Selection tool from the Tools panel after you finish. Select the text field you just created and move it to where you want all the page names on other pages to appear. Select Frame 1 on the page names layer. Remember that the text is right-aligned in the text field. Therefore, click the Stage where you want the text to end. Type HOME into the text field and select the Selection tool from the Tools panel after you finish. Select the text field you just created and move it to where you want all the page names on other pages to appear.
Tip You can create text fields in two different ways. If you want your text field to expand as you type into it, simply click the Stage and start typing. A white circle at the upper-right corner of the field depicts an expanding text field. If you want to set your text field to a fixed width, click the Stage and drag the Text tool to your desired width. A white square at the upper-right corner of the field depicts a fixed-width text field. Both of these handles also can be used to resize the field. The frames in the page names layer should extend right up to Frame 70 because you added the layer after you extended the Timeline. Select Frame 10, which is labeled catalog, and insert a keyframe by pressing F6. Continue by inserting keyframes at each labeled frame: 20, 30, 40, 50, and 60.
Now you need to add the actual page names to each page because every one of them says HOME! Go to Frame 10 and double-click the page name. The text returns to an editable state, so you can change the text from HOME to CATALOG. Make sure that you do not move this text field on the Stage or any text properties, so it remains consistent and aligned with all of the other text fields.
Repeat this step for all the other pages, giving them the same name (in all caps) as the frame labels you created in Step 4. All you need to do is double-click the text field and edit HOME to the name of the current label.
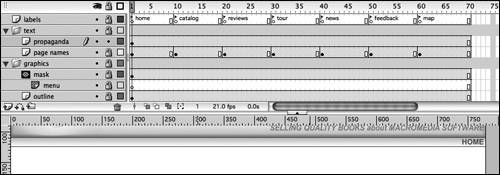
Lock the page names layer when you finish. The Timeline should look like the previous figure.
| 7. | Add the bookstore's slogan using static text on top of the title area.
You need to add another text field above the page names. However, you need to create a new layer because the slogan stays the same throughout the website, whereas the page names change on every page.
Select the page names layer and then insert a new layer. Rename that layer propaganda. An empty keyframe and frames should extend right to Frame 70 already. Select the Text tool and maximize the Property inspector. All the current settings will be used for this text field, except you should click the Italic button and change the Text (fill) color to #999999.
In the propaganda layer, click on top of the title area of the layout and type SELLING QUALITY BOOKS about MACROMEDIA SOFTWARE. When you finish, select the Selection tool and move the text field to a desired location in the general lower-right area of the title area. If you want to align the slogan with the page names, use a vertical guide. Drag the guide from the vertical ruler and align it with the right side of the page name. Then select the slogan and snap the right side of the text field to the guide.
 | 8. | Add aliased small text to the bottom of the Stage.
Small fonts can sometimes be very hard to read in Flash because Flash has to create outlines for the fonts, which can cause them to be blurry. Choosing Bitmap Text (no anti-alias) from the Font Rendering Method drop-down list can prevent the blur. Aliased text is not smoothed out.
Note Small fonts are small fonts. It's not always such a good idea to produce text less than 8 points in size, simply because the text is hard to read at those sizes. If you must use fonts smaller than 8 points, always use the Bitmap Text option. The next step is to add some more text on the propaganda layer. At the bottom of the web page is copyright and contact information for visitors to use. You should use a very small text size because you probably don't want to make it too distracting.
Select the Text tool and maximize the Property inspector. Then leave the text type as static, and select Arial as the font. However, change the font size to 10, change the Text (fill) color back to #666666, make sure that Bold and Italics are not selected, and select the Align Left button to left-justify the text.
Next, from the Font Rendering Method drop-down list, select Bitmap Text (no anti-aliasing) so the text you create renders clearly on the Stage. Using the Text tool, click in approximately the center of the bar on the bottom of the Stage and type Tech Bookstore © 2005.
Tip On OS X, the keyboard shortcut to insert the © symbol is Option+G. On Windows, select from the Start menu All Programs > Accessories > System Tools > Character Map, and copy and paste the copyright symbol from there. Create a second text field within the bottom bar area. Because this text field has exactly the same properties, you don't need to use the Property inspector before you create the field. Click the Stage and enter the following e-mail address: info@trainingfromthesource.com.
 | 9. | Align the small text on the Stage using the Align panel.
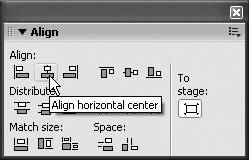
When you finish creating both text fields, click the Selection tool and maximize the Align panel. Make sure the To Stage button is selected. Click the first text field you created and then click the Align Horizontal Center button, which centers the text in the middle of the Stage. Use the Up and Down arrow keys on your keyboard to fine-tune the text placement vertically approximately in the center of the lower bar graphic, but depending on where it looks best against the gradient.
 Note Moving things around with the arrow keys is called nudging. Just so you know. Select the second text field that contains the e-mail address and click the Align Right Edge button in the Align panel. This procedure aligns the bounding box around the text field with the right edge of the Stage. If you think it is too close to the edge, select the text field and use the Left Arrow key to move it a few pixels to the left.
These two text fields are probably already lined up horizontally, but let's make sure that they are aligned perfectly. Select both text fields by holding down Shift while clicking them with the Selection tool. In the Align panel, click the To Stage button again so it is not selected. Now click the Align Vertical Center button so both fields are vertically aligned. When you finish, the text should look similar to the previous figure.
| 10. | Add a link to the bookstore's e-mail address using URL link in the Property inspector.
Sometimes you need a quick and sturdy way to add a URL type link to a line of text. One way is to create an invisible button, which serves as a hot spot, over the text, and then use a button action to specify the URL or e-mail to link to. Or, you can select the text block, and apply a URL link in the URL Link field.
Note Unlike HTML text, this doesn't turn your text blue and add an underline to it. It's up to you to make sure that your users clearly understand that the block of text is clickable.  Select the text field with the e-mail address and maximize the Property inspector. At the URL Link field at the bottom, enter mailto:info@trainingfromthesource.com?subject=TechBookstore into the text field. When you finish, the text field has a dotted underline to signify that there is a URL link applied to it. Select the text field with the e-mail address and maximize the Property inspector. At the URL Link field at the bottom, enter mailto:info@trainingfromthesource.com?subject=TechBookstore into the text field. When you finish, the text field has a dotted underline to signify that there is a URL link applied to it.
Tip Adding a question mark at the end of the e-mail link and typing "subject=Tech Bookstore" automatically fills out the subject line. The end user can, however, still change it. Bummer, right? Tip Remember that not all of your users have a default e-mail client on their machines. Some visitors to the site might be using a shared computer, might not have an e-mail client installed, or might not use the e-mail software that is currently the default. Thus, the Tech Bookstore site uses a built-in contact form, so all users can send feedback or questions from the site. If a visitor clicks the link, a new e-mail message will open in the user's default e-mail client addressed to info@trainingfromthesource.com, with Tech Bookstore entered into the subject field. When you finish, lock the propaganda layer so you do not accidentally add something else to this layer.
| 11. | Save the changes you made to the bookstore7.fla file.
The changes you made in this exercise are saved to the file.
|
|