| You have several graphics on or around the Stage at this point, which are all vector art. Sometimes, however, you need bitmaps for various reasonsfor example, to make your interface more visually compelling. Bitmaps are also very useful in animation because animating a bitmap is simply moving pixels around on a screen, whereas vector art has to be completely redrawn from frame to frame. The problem with bitmaps is that they don't scale well. Scaling up, and sometimes even scaling down, can cause bitmaps to lose resolution on the Stage, so as a best practice, bitmaps should be imported at their intended size, and scaling up or down should be avoided. Images and graphics can be created using any image editing software, such as Macromedia Fireworks or Adobe Photoshop. What's more, Flash has round trip editing features that work in Fireworks and Photoshop both, so you can Right- or Control-click a bitmap in the graphic, select Edit or Edit With, update the image in Fireworks or Photoshop, and the updates will automatically happen in Flash. No need to reimport. In this exercise, you will import bitmap artwork that was already created for you. This artwork will be for buttons, the logo, and the title area, and it will be in PNG format. Flash, however, supports very nearly every bitmap format there is. 1. | Select File > Import > Import to Library to import six PNG files for the buttons. Then place the items in the buttons folder in the library.
When you select the Import to Library menu option, any assets that import will be placed directly in the library, not on the Stage. You also have the option to import items directly to the Stage, although this does place a copy of those assets in the library as well.
From the File menu, select Import > Import to Library. From the lesson02/assets subdirectory, import company_up, company down, contact up, contact down, products up, and products down. You can select all of them at once by pressing Control or Command (depending on your platform) while clicking. Then press the Import to Library button to make the import.
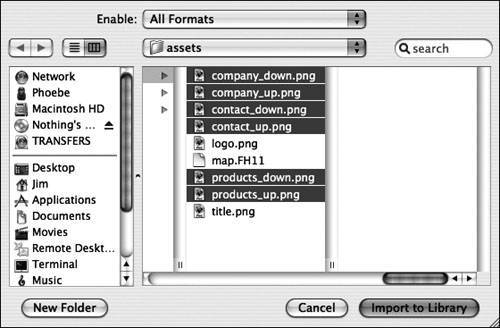 After the graphics are in, drag them and drop them to the library folder labeled buttons. Again, you can select more than one item to drag by Control-clicking or Command-clicking. After the graphics are in, drag them and drop them to the library folder labeled buttons. Again, you can select more than one item to drag by Control-clicking or Command-clicking.
| 2. | Check the optimization settings for the imported bitmap images.
Flash allows you to have a bit of control over the optimization of the bitmap images that you import. By default, all images are optimized in JPG format at 50% quality when you publish your SWF file. To change that, select the image in the library and press the Properties button at the bottom (it's the white i in the blue circle).
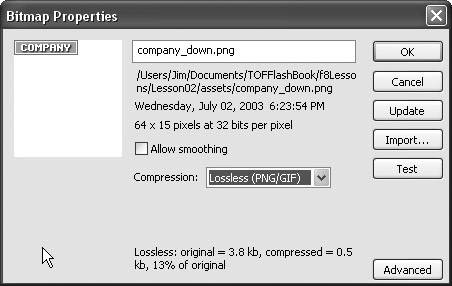 The dialog box has a Compression drop-down list that allows you to switch compression types from Lossless (PNG/GIF) to Photo (JPEG). Lossless is the best option to select for the button graphics you just imported because they have few and simple colors. Photo is the best option to select for graphics that have lots of color and tonality, and gradients. Photo is Flash's default compression type.
Tip For optimal control over compression and image quality, optimize your images before you import them into Flash. The Allow Smoothing check box lets anti-aliasing smooth the edges of the bitmap. In most cases, anti-aliasing enhances the appearance of the image.
| 3. | Import title.png from lesson02/assets and change its compression properties.
Select File > Import > Import to Library again to bring in title.png. Drag the image into the media folder in the library; then select it, Right- or Control-click the bitmap, and select Properties from the context menu. This is another way to get to the Bitmap Properties dialog box.
Change the compression for the title.png bitmap to Photo compression, uncheck the Use Document Default Quality check box that appears, and change the value from 50% to 80%. Click OK.
| 4. | Place the image on the Stage in the background layer, and use the Property inspector to position it at 0,0. Lock the background layer when you are finished.
First, make sure that the background layer is unlocked. If it is unlocked, click it to make it active and then drag an instance of title.png from the library out onto the Stage. Notice the braid around the image, indicating that it is a raw image, not a symbol.
Use the Property inspector to enter in an x of 0 and a y of 0 to position the graphic. When you finish setting the new location for this graphic, lock the background layer so you won't accidentally move the graphic away from this position. The graphic was made to fit the width of the Stage precisely, so it wouldn't do to shift it.
| 5. | Import the logo graphic into the library and change its compression properties to Photo. Place it on the Stage in a new layer named logo.
Import the logo.png graphic from lesson02/assets. When the image is imported, drag it into the media folder in the library. Right- or Control-click and select Properties from the context menu. Set the compression to Photo because this image has gradients, and set the quality to 80%.
Make a new layer above the background layer with the Insert Layer button and rename the new layer logo. Drag and drop an instance of logo.png to the Stage and position it in the upper-left corner.
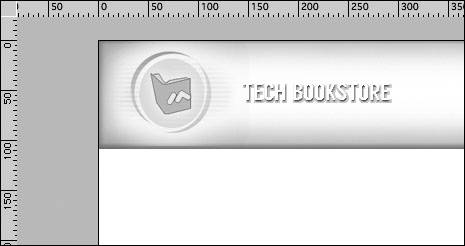 Roughly position the graphic as seen in this image. You can use your own judgment about where the logo looks best in this corner. Just make sure that it doesn't overlap and obscure much of the title text in the image underneath it. When you finish positioning the image, lock the logo layer.
Note To find out how the graphics were made for the Tech Bookstore using graphics editors, go to www.TrainingFromTheSource.com/bonus for a short tutorial by Jen deHaan. | 6. | Save your work.
|
|