| The rules for moving around the Timeline are the same as those you learned when you were dealing with the Clip Viewer in Chapter 5, but if you skipped that chapter, the concepts of scrubbing, zooming, and undoing your mistakes are covered here. Remember, it is very important that you learn to use the mouse and keyboard shortcuts effectively. Scrubbing the Timeline Unlike with the Source Viewer, you can scrub the Timeline from two places: directly under the clips, or directly under the Master/Timeline Viewer. To scrub the Timeline 1. | Make sure the Master/Timeline Viewer has a red border indicating that it is selected.
| 2. | Scrub by doing one of the following:
- Click the Timeline bar, hold down the left mouse button, and drag the cursor left or right (Figure 6.4). If your mouse is equipped with a wheel, use it to step forward or backward one frame at a time.
Figure 6.4. Scrubbing the Timeline with the mouse. 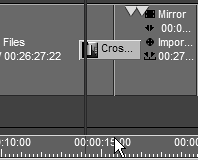
- Hold down the Alt key and hold down the left mouse button and drag the cursor anywhere over the Timeline clips.
- Use the keyboard arrows to step through each frame, one at a time. To move the clip forward or backward faster, hold down the left or right arrow key. To go even faster, hold down the Shift key at the same time.
- Use the J, K, and L keys on your keyboard. K stops playback; L plays the clip forward a little faster each time it is pressed, and J plays the clip backward a little faster each time it is pressed.
|
 Tips Tips
By using the arrow keys and/or the mouse wheel, you can be frame perfect when scrubbing the Timeline. When scrubbing the Timeline, you won't hear any audio; this is because, by default, audio tracks are ignored at all times except when you are previewing. Details on activating audio so you can hear the media clip during scrubbing can be found in Chapter 7.
Using the Zoom tool To display more detail on the Timeline, or to see a whole hour-long project in one screen, you'll need to use the Zoom tool. Two Cursor Lines when in Zoom 1 When the Zoom tool has been expanded to the Zoom 1 setting, the cursor displays a bold red line followed by a faint red line (Figure 6.7). Figure 6.7. At Zoom 1, the timeline cursor brackets which frame is currently being displayed. 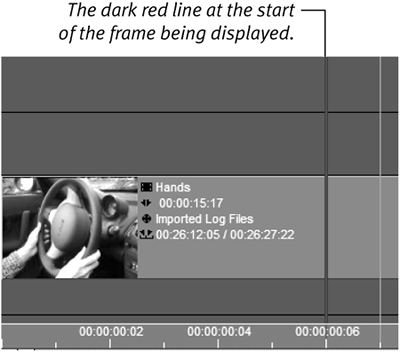
The gap between these two lines is a single frame and will always be the one being displayed in the Master/Timeline Viewer. Any cuts or insertions you make will occur on the dark red line, not the faint red line. |
To use the Zoom tool - Using the mouse, place the arrow pointer over the Zoom tool and drag it to the left to show a higher degree of magnification (Figure 6.5) or to the right to show a decreased level of magnification (Figure 6.6).
Figure 6.5. Magnification at Zoom 1 will display one frame per Timeline mark. 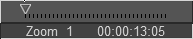
Figure 6.6. Magnification at Zoom 37 will show a two-hour Timeline (approximately) completely on a single monitor. 
Tip
|