Preparing the Storyboard


The first stage, preparation, is simple enough; it requires you only to create and name a Timeline Sequence. The effective use of a Timeline Sequence is covered in Chapters 6 and 14, but in this section, the examples show a sequence called "Act 2 Scene 4"; which should give you a clue as to the function of this incredibly powerful feature.

To prepare the Storyboard

1.

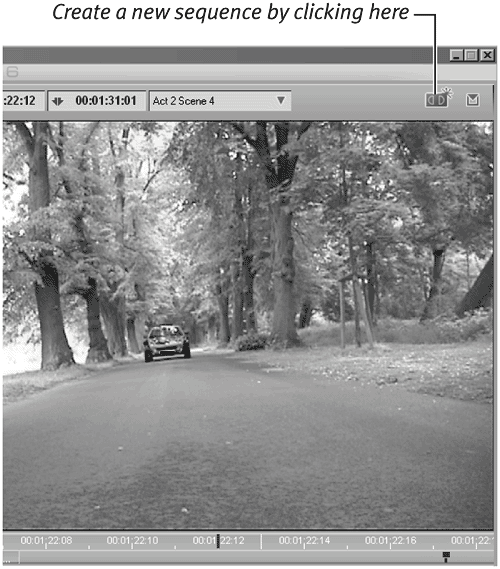
On the main interface, click once on the New Sequence button in the top-right corner of the interface (Figure 5.8).

Figure 5.8. The New Sequence button creates a new Timeline Sequence.


2.

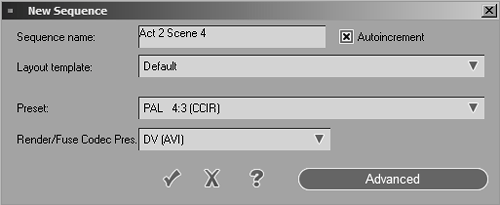
When the New Sequence dialog appears, enter a unique sequence name in the top box (Figure 5.9).

Figure 5.9. Pressing the New Sequence button allows you to name the sequence and select its properties.


The other settings are explained in Chapter 6.

3.

Check that the Timeline cursor is placed where you want to insert your clips. This may be at the beginning of the Timeline, but it may also be just after the last sequence you worked on.

Tip

  • If you have a dual-screen setup, then you don't need to worry about placing the Timeline cursor because you will have the option of dragging your clips from the Storyboard monitor to the Timeline. Single-screen users don't have this luxury and must always plan ahead.


Pinnacle Liquid Edition 6 for Windows
ISBN: 0321269160
EAN: 2147483647
Year: 2003
Pages: 245
Authors: Paul Ekert

flylib.com © 2008-2017.
If you may any questions please contact us: flylib@qtcs.net