| Liquid Edition's unique file structure means that you have to exercise some care when moving files around using the Windows Explorer. Physically removing a file from a folder and transferring it to another can cause the Timeline render marker to go dark reda sign that the media can't be located and can't be worked with. Restoring this can be difficult, and in some cases, impossible. However, if you need to switch the location of your media files using Windows Explorer, then you need to understand the following rule: - When searching for media clips, Liquid Edition is looking for a folder called Reels. This folder can be anywhere in the directory tree, but it must be the folder that contains the video clips and all the associated files.
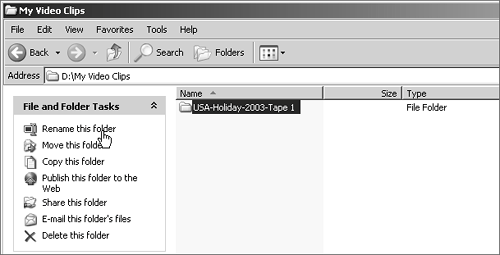
To physically move the location of a media file 1. | Open Windows Explorer and create a new folder, giving it a unique name that is associated with the project you are working onfor example, USA-Holiday-Tape 1 (Figure 4.18).
Figure 4.18. Creating a clearly named folder at a new location. 
| 2. | Open this new folder and create another folder inside this one called Reels (don't forget the "s").
| 3. | Browse to the original Media folder and locate the original Reels folder. Inside you will find the names of all the Reels you have captured to this location.
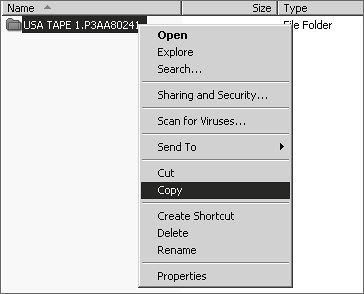
| 4. | Once you've located the correct folder, right-click it and select Copy (Figure 4.19).
Figure 4.19. Copying the entire folder from the original location. 
Remember, it's the whole folder you are copying, not just the one video and accompanying audio files. Everything in that folder must be copied, so it is far easier to copy the folder itself.
| 5. | Browse back to the new Reels folder you created in Step 1, right-click, and select Paste.
Make sure you are pasting inside the new Reels folder; if you do not, then Liquid Edition will not be able to find it.
| 6. | Open the Media Management interface and then add this new location following the instructions in the "To add a new media drive or folder" section earlier in this chapter. You only need to select the folder in which the new Reels folder has been created. In this example, the folder USA-Holiday-Tape 1 is added.
| Once it has been added, Liquid Edition will automatically look inside this new location for the Reels folder. Once it finds this, it will scan the contents and reassociate any clips it has in the Project Browser with any clips that are stored in this new location.
|
When Moving Media Goes Bad There can be times, particularly when you're using removable hard drives, that it all goes wrong and you end up with all the render slices turning dark red. This is Liquid Edition's way of telling you it can't find the file. If this happens, do the following: - Right-click inside the right window of the Project Browser and select Verify Imported Media. Then chose All In Rack or Selected. Follow the prompts and Liquid Edition will search the Media folders looking for these associated clips.
If it cannot find the files, then make sure the drive they are stored on appears in the Media Volume area of the Media Management interface.
|
 Tip Tip
|


 Tip
Tip