| I've touched on Sequences in various chapters throughout this book, but here I'd like to hammer home what a Sequence is and how you can use it to effectively improve your workflow. Simply put, a Sequence is the end result of placing clips, titles, images, and filters on the Timeline. During the life of a project, you can, and should, create as many Sequences as you want. Here are some examples of sequences: Act 1, Scene 1; Act 1, Scene 2; Car chaseScene 1. or The wedding of Jim & Joan Registrar The wedding of Jim & JoanChurch service The wedding of Jim & JoanReception dinner The wedding of Jim & JoanThe speeches
With this last example, perhaps you can see more clearly how each part of the overall projectthe weddingcan be split into separate parts or even subsections of parts. The use of sequences in this way allows you to concentrate on one specific area of the project at a time, editing that until it's perfect. In this section, you'll learn how to create a new Sequence, switch between Sequences, and combine Sequences together onto a single Timeline. To create a new Sequence 1. | On the main interface, click once on the New Sequence button  in the top-right corner of the interface (Figure 14.1). in the top-right corner of the interface (Figure 14.1).
Figure 14.1. Click the New Sequence button to open the New Sequence dialog. 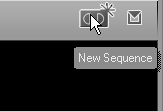
| 2. | When the New Sequence dialog appears, enter a unique Sequence name in the top box (Figure 14.2) and select the settings appropriate to the media clips you're using.
Figure 14.2. The New Sequence dialog. 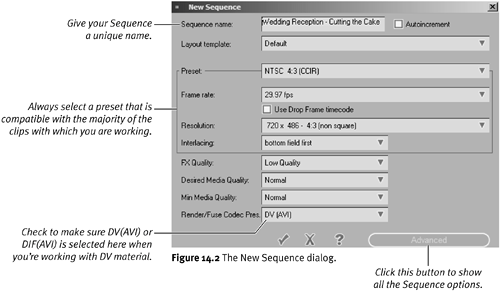
| 3. | Click the check mark to accept these settings.
|
 Tips Tips
To view the New Sequence dialog as it appears in Figure 14.2 click the Advanced button and the rest of the options will appear. Check the Render/Fuse Codec Preset (at the bottom of the Advanced menu). This should read either DV (AVI) or DIF(AVI) when you are working with normal DV material. If you use any other codec setting, you may experience problems when you try to apply certain filters and effects such as Timewarp. You can rename a Sequence by opening the Sequences Rack, right-clicking it, and then selecting Rename from the pop-up menu. Always pick a preset compatible with the format in which the scene was filmed. Although Liquid Edition can support multiple formats in a Timeline, picking a preset closest to the majority of your clips can save unnecessary rendering time every time you place a clip on the Timeline.
Finding Your Sequence after a Software Crash If your computer crashes while you're editing, Liquid Edition opens with an empty Timeline the next time you launch the application. This protects against corrupted projects or Sequences that might stop the application from opening when you restart it. However, because Autosave backs up your work 30 times a second, the Sequence and its undo history aren't lost; they're just hidden from view. To find your Sequence, click the drop-down menu to display a list of all the Sequences in the current project and pick the last sequence you were working onthis is usually the one at the top of the list. |
|