Avoiding Transition Problems
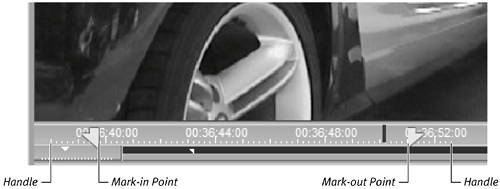
| Although the single-track edit system is indisputably the more flexible of the two approaches to NLE, you don't get something for nothing. Because of the sheer power you wield by being able to place a transition on any track you want, you'll find that you have rules to follow. Liquid Edition needs you to follow these if it is to fully understand exactly what you want it to do. These rules are not that complex, and if you take certain precautions, you can avoid the confusion that comes with learning how to use the single-track edit system. The most important thing to know about the rules is to make sure you have enough available handles (on both clips) and that you know how to adjust a clip if you don't have enough. Using available handlesA handle is the bit of a clip you don't see. It's the bit that a transition needs in order to have a tangible piece of video with which it can work. It's also one of the more challenging aspects of single track editing, particularly for users transferring from the easy A/B roll system. But in fact handles are simple enough once you know exactly what you are looking for. To visualize the handle of a clip
However, if you try to use a clip whose mark-in and mark-out points are the same as its clip-in and clip-out pointsin other words, its natural lengthyou'll encounter a problem (Figure 8.6). Figure 8.6. Liquid Edition uses the clip-in and clip-out points of a media clip that has no mark-in and mark-out points.
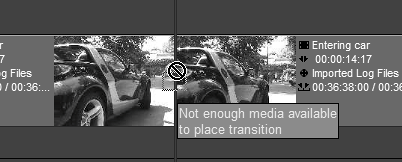
Repeat the last set of instructions but set the mark-in and mark-out points at the start and end of the clip respectively. This creates a Timeline that appears to be exactly the same as Figure 8.5, but you'll find that attempting to place a transition isn't possible. Instead, if you are dragging and dropping a transition, you see the error message "not enough media available to place transition" (Figure 8.7). Figure 8.7. The error message you see if no handles exist for a transition to latch onto.
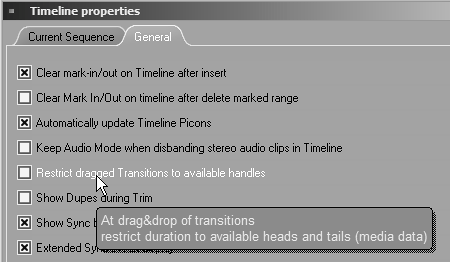
Worse still, if you're using the Add Dissolve button If you don't have enough handle lengthIn Chapter 6, I recommendedperhaps a little controversiallythat you use embedded audio wherever possible to avoid audio sync issues. To avoid transition problems, I recommend that you alter a setting in Liquid Edition that prevents transitions from being placed if you don't have enough available handle length. This means that the transition can appear even if it doesn't work correctly, allowing you to continue working without constantly worrying about available handle lengths. I cover trimming these clips so that they work with transitions in the "Trimming Associated Clips" section later in this chapter. To turn off "Restrict dragged Transitions to available handles"
|
EAN: 2147483647
Pages: 245


 Tip
Tip