The Shell Itself
|
| < Day Day Up > |
|
First we should get familiar with the actual shell interface. To use the shell, you need to go to System Tools and select Terminal. As you get more comfortable with Linux, you will discover alternate ways to invoke the shell, but for now we can use this route. When you start a shell, you will see something much like what is shown in Figure 18.1. Notice that the cursor prompt you see is actually the username of the user who is currently logged on. There are shell commands to change even that, but for our purposes it’s just fine.
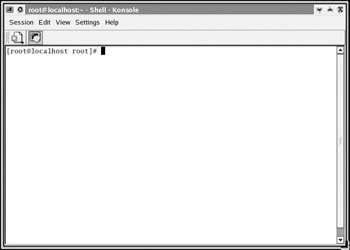
Figure 18.1: The terminal.
The drop-down menu at the top should look familiar to you. It is quite similar to the drop-down menu of many Web browsers and is the common interface you have seen in almost all KDE applications. Two particular menu items are of special importance. The first is the File menu. Under this you can see options to start a new session. A session is an individual instance of a shell. You can have multiple sessions running at one time, all controlled from this single terminal window. This enables you to work with several different shell commands at the same time if you want. You should also note the Settings menu. Under this you see a number of options for customizing the terminal window. You can change the size, color combination, and other aspects of the terminal.
The first commands we will look at involve the shell itself and how it behaves. All shells have an interesting feature called History. The history command enables you to see the commands that have been entered previously. By default, this command will return the last 500 shell commands. This may be far more than you want to view. This brings us to a related command, HISTSIZE. Before we continue discussing this command, you should note that it is typed in all capital letters, intentionally. It is one of the very few shell commands that is typed in all uppercase. By typing in HISTSIZE=5, as shown in Figure 18.2, you are telling the shell to only return the last five commands when the history shell command is executed.
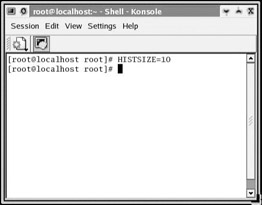
Figure 18.2: The HISTSIZE command.
| Note | Technically speaking, HISTSIZE is not a command per se. It is actually an environmental variable. However, for our purposes here it works like and can be used like other commands. |
| Note | You must type in the shell commands exactly as you see them in this text or they will not work. For example, HISTSIZE=5 is all uppercase letters with no spaces. Typing it in any other way will not work. Most shell commands are all lowercase. These commands are case sensitive. |
The history and HISTSIZE commands can be very useful. There may be occasions when you need to know what was done a few commands back. Another useful command is clear. Enter the word clear and press Return and it will clear the current view of the shell. This can be useful when you have to run several commands and the shell is appearing a bit cluttered.
While we will be working with the bash shell, you may be curious as to how you would go about invoking the other shells that we have mentioned. One obvious way is to set up that shell as the default shell for that user. However, there should be some way to change what shell you are using while the terminal is open. Fortunately, there is a way to do that very thing. You enter the abbreviation for that shell, and you will then be using that shell. For example, if you want to use the C shell, type in csh and then press Enter. You will not see any dramatic change in the appearance of the shell itself. In fact, you will see very little change. The cursor prompt will change slightly, indicating that you are using a different shell. In fact, that will be the only immediate indication that you have invoked a different shell. All the shell commands we will work with in this book will work in any shell. However, if you switch to C shell, you can do all the commands that are unique to that shell. When you are ready to switch back to bash, just enter bash. You can invoke the various other shells with just as much ease. Typing in ksh will invoke the Korn shell, and sh will invoke the Bourne shell. Changing between shells is a very easy thing to do.
There are two other very important shell commands you need to be aware of. Both of these will provide valuable information about other commands. The first is the man command, which was discussed briefly earlier in this book. Linux has a built-in manual. When you enter man followed by a particular command, you will display the manual page for that command.
For example, if you want to know about the ls command, enter man ls. You will immediately discover that most commands have several flags you can pass to them to make them behave differently. A flag is a character such as a letter that tells the command to modify its behavior in some way. You also will need to know how to exit the manual page when you are done reading it. That is simple; just enter the letter q, and you will quit the manual page.
Another useful command is help. If you enter a command followed by two dashes and the word help, you will see a brief list of flags you can pass to that command. help is sort of like an abbreviated manual page. An example of using help is shown here:
ls—help
|
| < Day Day Up > |
|
EAN: 2147483647
Pages: 247