| MySQL is available in both Windows and Macintosh versions that include an installer. The installers provide a wizard to guide you through the installation process. The Windows installer version of MySQL also includes a wizard for configuring MySQL once it's installed. After MySQL is configured for Windows, you need to configure it manually to work with an Apache Web server. The Macintosh version does not include a configuration wizard, so once it's installed, you need to configure it manually in the Terminal window. If you have previous installations of MySQL on your computer, see the MySQL manual at http://dev.mysql.com/doc/mysql/en/index.html for instructions regarding installing a newer version. To install MySQL on a PC running Windows: 1. | Open the MySQL 4.1 downloads page at http://dev.mysql.com/downloads/mysql/4.1.html.
| 2. | In the Windows Downloads section, click the Pick a Mirror link next to Windows (x86) to download the Windows installer version (Figure 4.3).
Figure 4.3. Download the latest stable Windows version of MySQL from MySQL.com. 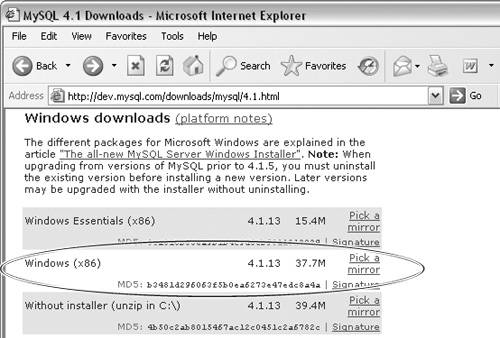
Based on your IP address, a list of mirror sites is generated.
| 3. | Click the link to the nearest mirror site to download the file. The File Download dialog opens. Click Save to save the file to your hard drive.
| 4. | Once the file has completed downloading, double-click the file to extract the zip file, and then double-click the setup.exe file.
The MySQL Setup wizard appears (Figure 4.4).
Figure 4.4. The MySQL Setup wizard installs MySQL on your computer. 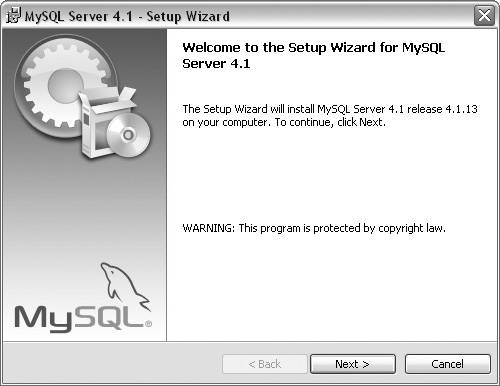
| 5. | Click Next, and on the Setup Type pane that appears, select Typical. Click Next.
| 6. | On the Ready to Install the Program pane, review your installation settings. Click Install if they're correct, or click Back to make changes.
| 7. | On the MySQL.com Sign Up pane, do one of the following (Figure 4.5):
Figure 4.5. Create a free MySQL.com account to access comments, bug reports, and the MySQL newsletter. 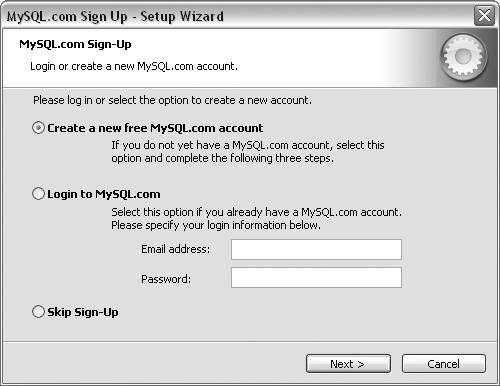
Select the Create a New Free MySQL.com Account radio button if you don't have a MySQL.com account and want to create one. A MySQL.com account enables you to add comments to the online MySQL manuals, report bugs via the online bug tracker, and subscribe to the MySQL newsletter. Select the Login to MySQL.com radio button and enter your e-mail address and password if you already have an account. Select the Skip Sign-Up option if you don't want to create an account or log in to an existing account. An account is not required in order to install MySQL.
| 8. | Click Next. If you chose to create a new account, the next three panes collect your user information. Once that process is complete, the Wizard Completed pane displays (Figure 4.6). If you chose the second option in Step 7, the Wizard Completed pane displays once you log in, and if you chose the third option, it displays immediately.
Figure 4.6. Once the installation is complete, you can configure MySQL. 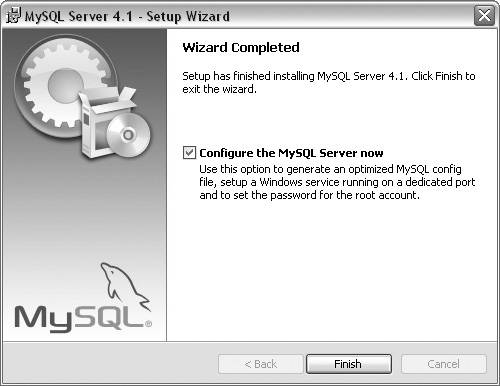
| 9. | On the Wizard Completed pane, select Configure the MySQL Server Now and click Finish. The MySQL Server Instance Configuration Wizard dialog appears (Figure 4.7).
Figure 4.7. Configure your MySQL installation with the MySQL Server Instance Configuration wizard. 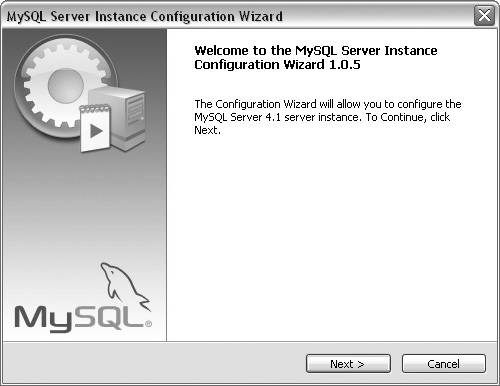
You have now completed your installation of MySQL. Leave the MySQL Server Instance Configuration Wizard dialog active, and proceed to the next task, which involves configuring MySQL.
|
To configure MySQL on a PC running Windows: 1. | Follow all the steps of the previous task. Click the Next button in the MySQL Server Instance Configuration Wizard dialog.
| 2. | On the configuration-type pane that appears, select Detailed Configuration (Figure 4.8). This option involves more steps than the Standard Configuration but gives you more options for an optimal setup. Click Next.
Figure 4.8. Choose Detailed Configuration for an optimal MySQL configuration for your computer. 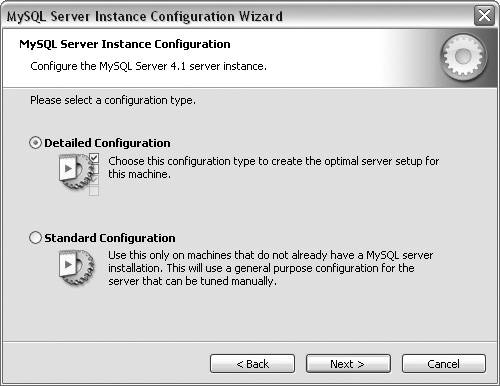
| 3. | On the server-type pane that appears, select Developer Machine, since this server is being used as a local server for Web-application development. Click Next.
| 4. | On the database-usage pane, select Non-Transactional Database Only. You can reconfigure MySQL at any time and make a different selection if your database needs change. Click Next.
| 5. | On the concurrent-connections pane, select Decision Support (DSS)/OLAP. Or select Manual Setting, and from the Concurrent Connections drop-down list select the number of concurrent connections. Click Next.
| 6. | On the networking-options pane, select Enable TCP/IP Networking (Figure 4.9). In the Port Number drop-down list, select the default port number for MySQL (3306) or choose a different port from the list if you're already using 3306. Click Next.
Figure 4.9. Enable TCP/IP connections via Port 3306. 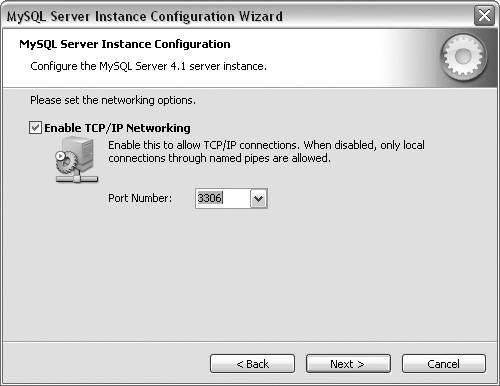
| 7. | On the character-set pane, select one of the following (Figure 4.10):
Figure 4.10. Choose a character set. 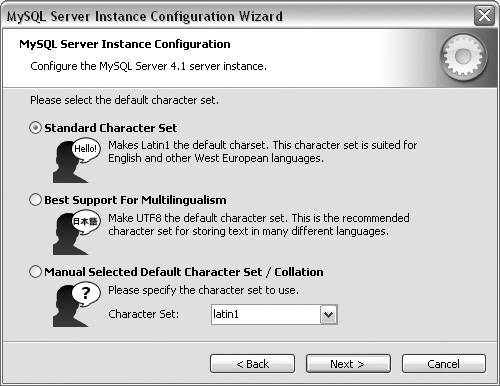
Standard Character Set if you are developing pages for an English-speaking audience. Best Support for Multilingualism if you're developing for an international audience. Manual Selected Default Character Set/Collation, and from the drop-down list choose the appropriate character set for your audience.
| 8. | Click Next. On the Windows-options pane, select the Install As Windows Service option (Figure 4.11). From the Service Name drop-down list, select a name for the service. Remember this name, as you'll need it later to identify the MySQL service in the list of Windows services (Step 11). Deselect the Launch the MySQL Server Automatically option, unless you want the MySQL service to start automatically whenever your computer starts. Check the Include Bin Directory in Windows PATH box to add MySQL to the Windows PATH variable. Click Next.
Figure 4.11. Install MySQL as a Windows service. 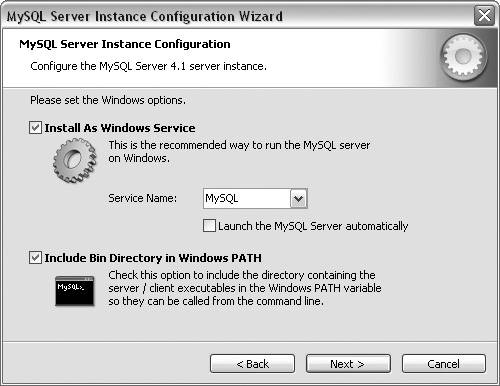
| 9. | On the security-options pane, select Modify Security Settings (Figure 4.12). In the New Root Password field, enter a new root password for the server. In the Confirm field, re-enter the new password. Be sure to write it down. You'll need it later to use the MySQL monitor, a command-line interface for the MySQL server. Deselect both the Enable Root Access from Remote Machines and Create an Anonymous Account options. Click Next.
Figure 4.12. Choose a MySQL password to use the MySQL monitor and to make database connections. 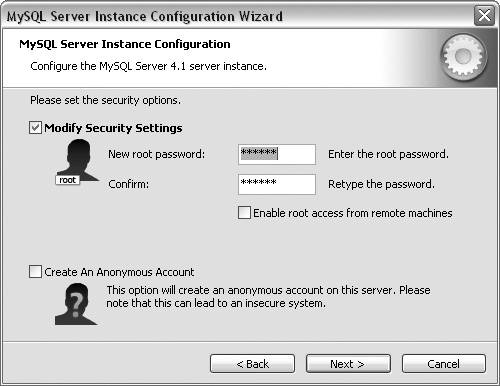
| 10. | On the ready-to-execute pane, click Execute to start the configuration process. When the configuration is complete, a message displays on this pane to show that each task has been completed (Figure 4.13). Click Finish to close the wizard.
Figure 4.13. The wizard confirms that the configuration is set. 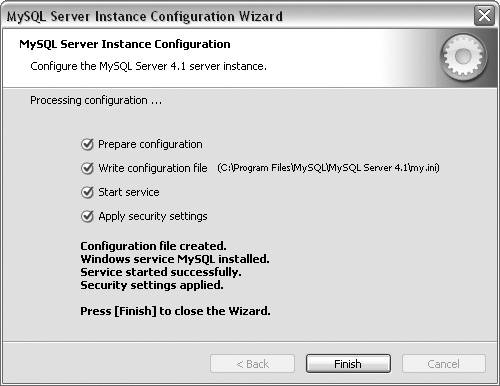
| 11. | To test your MySQL installation, open the Start menu and choose Control Panel > Administrative Tools > Services to open the Services window. MySQL (or whatever name you chose in Step 8) should now be in the list of services (Figure 4.14).
Figure 4.14. When you're finished, the name you chose for the MySQL service, MySQL, should be listed in the Services window. 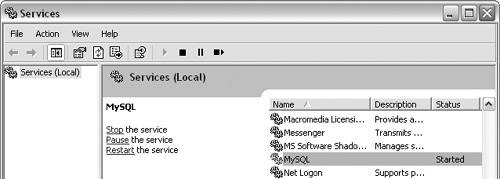
|
 Tips Tips
You can run the Configuration wizard again at any time to change the configuration settings. From the Start menu, choose All Programs > MySQL > MySQL Server 4.1 > MySQL Server Instance Config Wizard to open the wizard. To open the reference manual, choose All Programs > MySQL > MySQL Server 4.1 > My SQL Manual. To open the MySQL monitor (Figure 4.15), choose All Programs > MySQL > MySQL Server 4.1 > MySQL Command Line Client. You will need the password from Step 9 to start the monitor so that you can enter commands. Figure 4.15. Enter your MySQL password to start the MySQL monitor. 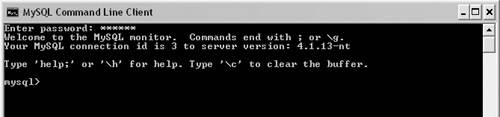
To configure MySQL on a PC to work with an Apache Web server: 1. | From Microsoft Internet Explorer, enter http://localhost/php/test.php to view the current PHP status page (Figure 4.16).
Figure 4.16. Find the PHP configuration file path on the PHP status page. 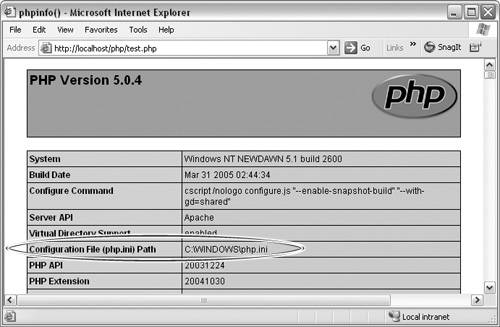
| 2. | Note the Configuration File (php.ini) Path. From the location noted in that path, open the php.ini file in Notepad.
There may be more than one php.ini file. What's important is which one is actually being used to configure PHP. Use only the php.ini file whose location matches the configuration file path on the PHP status page, and delete any other php.ini files.
| 3. | In Notepad, choose Edit > Find to find doc_root = in the file (Figure 4.17). Make sure that doc_root = is set to the location of the Apache htdocs folder on your computerfor example, c:\program files\apache group\apache\htdocs.
Figure 4.17. Set the PHP document root to the root of the Apache Web server. 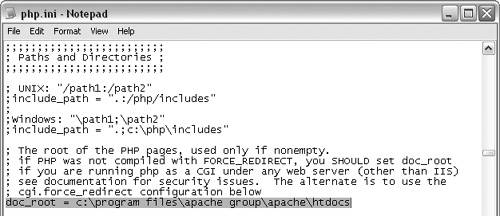
| 4. | Choose Edit > Find to find extension_dir = in the file (Figure 4.18), and change it to extension_dir = c:\program files\apache group\apache\bin\php\ext.
Figure 4.18. Set an extension directory location so that the PHP extension files can be located. 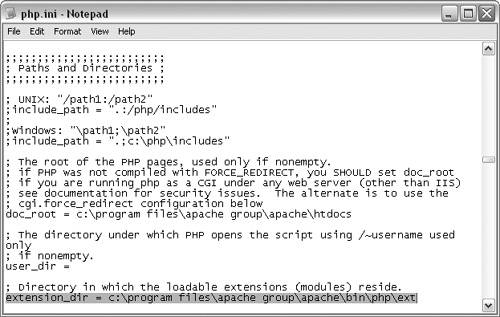
Unlike earlier versions of PHP, PHP5 does not automatically load the MySQL libraries. Adding a value for extension_dir in php.ini loads the libraries.
You'll create these directories and copy the extension files to them in Steps 7 and 8.
| 5. | Choose Edit > Find to locate the ;extension=php_mysql.dll line (Figure 4.19). Delete the semicolon at the beginning of the line to activate this line.
Figure 4.19. Activate the MySQL extension in the php.ini file. 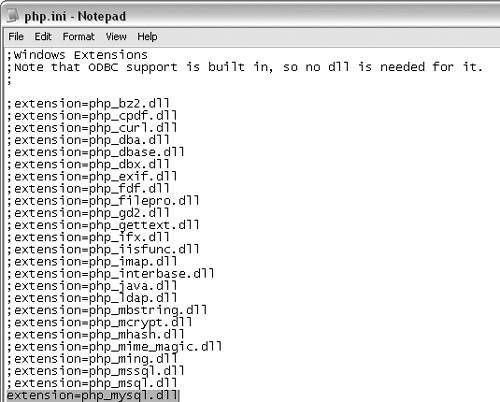
| 6. | Choose File > Save to save the changes to php.ini from Notepad. Close the php.ini file.
| 7. | From the C drive, open Program Files > Apache Group > Apache > bin. From the bin directory, create a new directory named php. From the php directory, create a new directory named ext.
| 8. | From the C drive, open the main php directory (c:\php). From this php directory, open the ext directory. Select all the files in this directory and copy them to the ext directory you created in Step 7. This makes the MySQL libraries accessible to PHP from Apache.
Next you'll test your configuration by opening the PHP status page again.
| 9. | From Internet Explorer, enter http://localhost/php/test.php. Scroll down the page to the Configuration section. If a MySQL section appears in the Configuration section (Figure 4.20), you have successfully configured MySQL with PHP.
Figure 4.20. A MySQL section on the PHP status page indicates a successful configuration of PHP with MySQL. 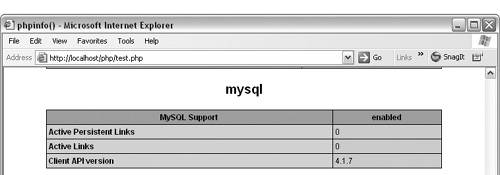
|
To install MySQL on a Mac: 1. | Open the MySQL 4.1 downloads page at http://dev.mysql.com/downloads/mysql/4.1.html.
| 2. | From the Mac OS X downloads section, in the Mac OS X 10.4 installer section, click the "Pick a mirror" link next to the Standard version to download the Mac installer version (Figure 4.21).
Figure 4.21. Download the latest stable Mac OS X version of MySQL from MySQL.com. 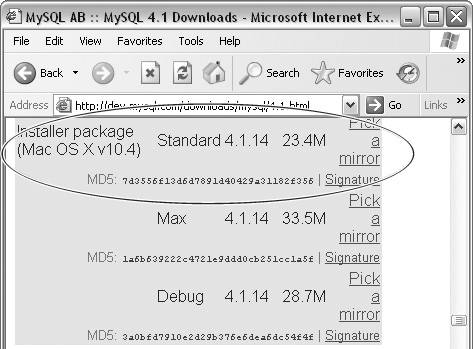
Based on your IP address, a list of mirror sites is generated.
| 3. | Click the link for the nearest mirror site to download the file. The Downloads dialog appears (Figure 4.22).
Figure 4.22. Download the disk-image file to your Desktop. 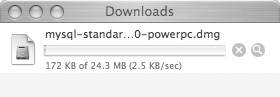
| 4. | Once the file has completely downloaded, double-click the .dmg file to mount the disk image, and then double-click the mysql package to start the installer (Figure 4.23). The MySQL 4.1.14 Standard for Mac OS X installer appears. Click Continue.
Figure 4.23. Double-click the mysql package to start the installer. 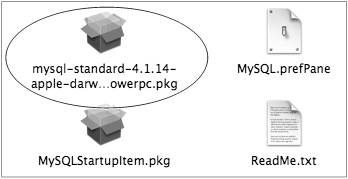
| 5. | On the Important Information pane, click Save to save the read-me file for installing MySQL on Mac OS X, and then click Continue.
| 6. | On the Software License Agreement pane, click Continue to continue the installation. Click Agree on the message dialog to accept the license agreement.
| 7. | On the Select a Destination pane, choose your Mac hard drive and click Continue.
| 8. | On the Easy Install pane, click Install to do a basic installation of MySQL.
| 9. | In the Authenticate dialog, enter your Mac password in the Password field.
| 10. | A message displays to let you know the installation was successful (Figure 4.24). Click Close to close the installer.
Figure 4.24. The installer lets you know if the installation was successful. 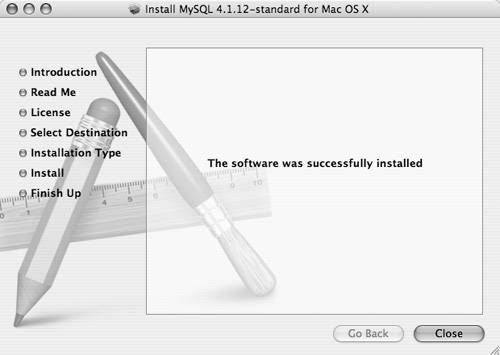
| 11. | After the installation, you can start MySQL by entering commands in the Terminal window, as detailed in the MySQL read-me file.
|
Tips Three additional files are included in the download (Figure 4.23): MySQLStartupitem.pkg, MySQL.prefPane, and ReadMe.txt. To install the startup item so that it automatically starts MySQL during Mac system startup, double-click the package named MySQLStartupitem.pkg. Double-click the MySQL.prefpane file to add a MySQL pane to System Preferences. In the System Preferences window, double-click the MySQL icon to open the MySQL pane. From the MySQL pane you can start and stop the MySQL server (Figure 4.25). Figure 4.25. Use the MySQL System Preferences pane to start and stop the MySQL server. 
|