| While it is possible to create entire projects utilizing only built-in instruments that come with the application, Logic Pro also provides ways to integrate external hardware into the computer recording environment. Logic Pro has a handy little plug-in that enables you to create a direct connection to an external piece of MIDI hardware as if it were an internal Audio Instrument. The plug-in brings the external device's audio output back into Logic's mixer for further processing and bouncing, all in real time. 1. | Select the Inst 2 track.
| 2. | In the Arrange channel strip, click-hold the input field and choose Stereo Logic > External.
The External plug-in opens.
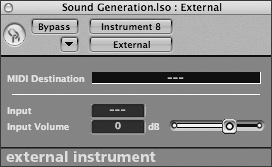
This plug-in doesn't do any processing at all, but it functions as a signal router. Basically, it sends MIDI data out to a selected instrument in the Environment representing your external MIDI hardware and receives audio input from a selected input on your audio interface that is receiving the signal from that external MIDI device.
| 3. | Physically patch the audio outputs from your selected MIDI hardware to a pair of adjacent audio inputs on your audio interface (1-2, 3-4, 5-6, and so on).
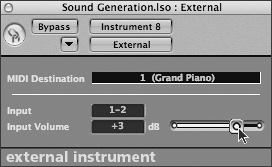
| 4. | In the External plug-in, click-hold the MIDI Destination field and choose Generic Keyboard > 1 (Grand Piano).
This menu mirrors the available choices when assigning a MIDI track within the Arrange window. Each enabled channel of the device is represented and may be chosen.
NOTE For this exercise, you set the MIDI destination to a generic MIDI instrument within the song's Environment. This Multi Instrument is set to output on all MIDI ports of your interface, so it should trigger all MIDI devices that are connected. Since only one MIDI device has its audio outputs connected to the audio interface and chosen within the External plug-in, this will work well for the purposes of this exercise. Within your own Autoload (containing your own MIDI setup in the Environment), however, you would select an instrument representing your individual MIDI hardware. | 5. | Click-hold the Input field and choose the inputs of your audio interface into which you plugged the MIDI hardware.
| 6. | Play your MIDI controller.
You should hear the output of your MIDI device, which is routed into the Inst 8 Audio Instrument Object/track.
| 7. | Listen to the sound level, and apply additional gain attenuation, if needed, by adjusting the Input Volume slider.
You are now ready to apply additional plug-ins, make volume and pan adjustments, and mix and bounce the MIDI hardware as if it were a software instrument.
NOTE Faster than real-time freezing and bouncing (offline) is not available to External instruments, as the outgoing MIDI signal and the incoming audio signal must be transmitted to the hardware device in real time. Real-time bounces and freezes work fine. | 8. | Choose File > Close.
An alert appears asking if you'd like to save the changes done to the song. It is not necessary to save the song file, as no data was actually written.
| 9. | Click Don't Save.
|
|