Section 5.2. Optimizing Images for the Web
5.2. Optimizing Images for the WebOn the Web, lighter image filesfiles that consume relatively smaller amounts of disk spacedownload faster than heavier files. It's one of the few absolutes in this game. A light image load improves the performance of your site. At the same time, lighter image files contain less visual information than heavier image files, so they're more likely to look cheap and cheesy, which doesn't help anyone. Your images have to look good. But they also have to download quickly. This is the balancing act called web optimization. For every image that you plan to use, your goal is to achieve the lightest possible image file while maintaining the overall image quality.
5.2.1. Optimizing ResolutionResolution is the pixel density of an imagethe amount of pixels that appear in any given area, usually expressed as pixels per inch (ppi). As resolution increases, more pixels are packed into the same amount of space, which allows for finer detail and increases the overall clarity of the image. The pixel density is what makes high-resolution images sharper than their lower-res counterparts.
More pixels per inch means more visual information, but it also means a heavier image file. As it happens, the weight of a raster graphic is directly related to the number of pixels that it contains. Add more pixels, and you increase the weight. Take pixels out, and you decrease the weight. Happily, the images that you plan to use on your site don't require very much in the way of resolution. Web images are supposed to be viewed on screen, and even the best monitors are relatively low-res output devices. Windows monitors typically display at 96 ppi. Macintosh monitors are lower still, at 72 ppi. By way of comparison, an image needs to have a resolution of 300 to 600 ppi to look good on the printed page. If you have a digital camera, your photos probably come out somewhere in this range. The first, best thing that you can do to optimize your images for the Web is to reduce the image resolution to 72 ppi. Web designers have adopted this number as the universal standard for all web graphics, and that number has stuck. It's one of the few things that most of us agree on. The reason why it's 72 instead of 96 isn't because most of us are on Macs. An image at 72 ppi looks fine on Windows screens, despite the slightly better Microsoft pixel density. More importantly, 72 ppi means fewer pixels, so the 72-ppi image weighs less. The best part is that a high-res image looks exactly the same on screen as a 72-ppi web-optimized image. You get no (or negligible) loss of image quality by reducing resolution, yet you reduce the weight of the file dramatically. Talk about a win-win. A 1 MB digital photo suddenly weighs in at 40 or 50 KB while looking just as crisp and clear, as Figure 5-4 shows. The photo on the left has a resolution of 300 ppi, while the photo on the right has a much lower resolution of 72 ppi, yet they look exactly the same on the monitor. Figure 5-4. Comparing low- and high-res versions of an image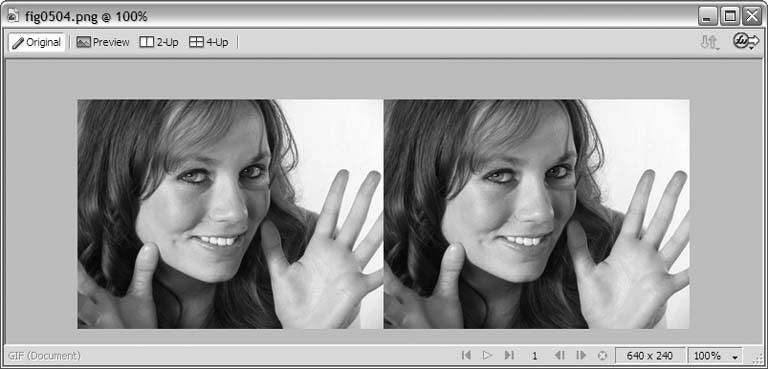
Keep in mind that, when you reduce the resolution of the photo, say from 300 ppi to the web standard 72 ppi, you're losing more than three quarters of the visual information. On your monitor, you can't tell the difference, because all that extra resolution in the 300-ppi version goes to waste. Remember, the monitor tops out at 72 or 96 ppi. Print out the 72-ppi version, though, and you notice the difference immediately. This is why images that you print from the Web look razor-sharp on screen but grainy or blurry on paper. This is also why, when you decrease the resolution of an image for the Web, you should always save the Web version under a different filename (see "Naming Images for the Web" later in this chapter), and keep the original in a safe place. You never know when you might want that higher-res version.
If you don't have image-editing software, you're not out of luck. Dreamweaver comes with image resampling, a tool for fine-tuning resolution and size, as you'll see in Chapter 13.
5.2.2. Optimizing Image SizeReducing the physical dimensions of an image to the precise size that you need for your page is another sure remedy for excess weight on the Web. If an image is physically smaller than another image, and both have the same resolution, then the smaller image contains fewer pixels, and fewer pixels equals less weight. When you place an image on a web page, you specify, among other things, the image's width and heightbut nothing prevents you from making up your own numbers. You can scale down a 1600-by-800-pixel image very easily in this way by reporting the width as 400 pixels and the height as 200 pixels instead of their true 1600 and 800 values. This gives you, in essence, a 75% reduction in size. The problem with this approach is that, while the images on your page appear to be smaller, they really aren't. The image files themselves still retain their full width and height; the browser simply makes them look smaller. And of course, they remain as heavy as before the browser scaled them. Your best bet is to figure out the exact width and height that you need for each image and then physically change the images to this size. If you know this information ahead of time, that's great. Fire up your image editor and shrink those images. Don't forget to save the smaller versions under different filenames than the originals. It's always good to be able to go back to the large version and make a new smaller version if your size requirements change.
Figure 5-5. Examining the palette of a GIF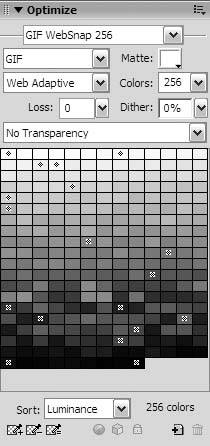 If you don't know the correct size because you haven't built your site yet, that's fine, too. Do nothing for now, and fiddle with the dimensions once you place them on your pages. But when you do know the correct dimensions, you want to make sure that you resample your images at their modified sizemore on that in Chapter 13. 5.2.3. Reducing the Number of ColorsIn GIF and PNG images, each color in the palette contributes a little extra weight to the image file. So, if your image is in the GIF or PNG format, you can modestly decrease the weight of the file by reducing the number of colors in the palette. You'll need to use your image editor for this operation, as shown in Figure 5-5. Dreamweaver's built-in graphics tools don't get into this much detail.
Keep in mind that removing colors affects the image quality of your GIF or PNG. However, you can generally afford to lose a good many of them before you notice a visible change. 5.2.4. Increasing CompressionJPEG images don't have a built-in palette, but you can adjust their level of compression. Compression is a method for reducing the weight of a computer file. There are two types: lossless compression, which retains all the information in the file and simply organizes it more efficiently; and lossy compression, which organizes the data in addition to throwing some of it out, but hopefully not so much of it that the human on the other side of the screen notices.
Compression doesn't just apply to computer graphics. Popular audio formats like MP3 are compressed as well. Their lighter weight makes them convenient to download, but the discerning audiophile can hear a difference in the fidelity of an MP3 when compared to the uncompressed original. The JPEG format is lossy by nature, which means that, when you save an image as a JPEG, you automatically lose a little image quality. In graphics software like Fireworks and Photoshop, you can manually adjust the level of compression to jettison more and more of the visual data. As compression goes up, file weight goes down. Most JPEGs can withstand a serious crushing before they noticeably degrade. The trick is to find the level of compression at which the quality deteriorates too significantly and then back off ever so slightly. As you can see in Figure 5-6, Fireworks has crushed this JPEG image fairly well (image quality 33/100), but it is just beginning to show signs of pressure. Figure 5-6. Visible degradation occurs at high compression levels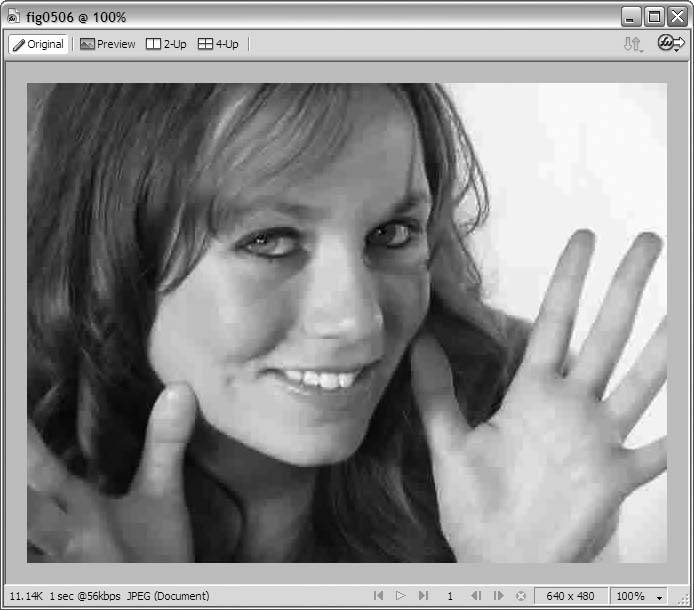
|
 Canvas
  Canvas
 EAN: 2147483647
Pages: 154