Hack 74 Mounting a WebDAV Share
|
Connect to a WebDAV-based network drive and work with remote content just as if it were on a local drive. WebDAV, or Web-based Distributed Authoring and Versioning, allows you to share directories and files via your web server for remote editing of documents and other files. (See [Hack #95] for more detail on WebDAV and WebDAV-enabled servers.) Mac OS X has support for WebDAV built right into the operating system and integrated seamlessly into the desktop environment. Simply point to a server, much as you would an AppleShare or SMB (Windows) share, log in, and bingo!, you have a new virtual drive right on your desktop. WebDAV is actually the technology behind much of iCal calendar publishing [Hack #30] and iPhoto sharing. 74.1 Connecting and Mounting To connect to a WebDAV share, you'll need to start from the Finder. Click the Finder icon in your Dock or on any open space on your Desktop. Select Go Figure 6-28. Connecting to a WebDAV server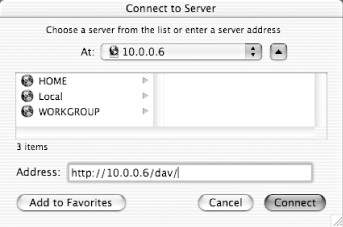 Enter the URL of the WebDAV share into the Address field. In Figure 6-28, I've used a share created with [Hack #95], 10.0.0.6 on my private local network.
Click the Connect button. If the WebDAV server at hand isn't using SSL (Secure Sockets Layer) for secured, encrypted interaction, you'll be told as much (see Figure 6-29). If you're comfortable continuing (sending your username/password and content over the network in the clear), click Continue. Figure 6-29. SSL security notification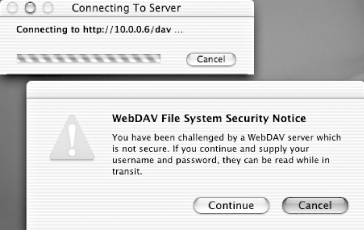 Next, if the WebDAV share restricts access (which it should), you'll be prompted for a Username/Password pair, as shown in Figure 6-30. Type in the appropriate authentication and click OK to mount the WebDAV share. Figure 6-30. Authenticating yourself to the WebDAV server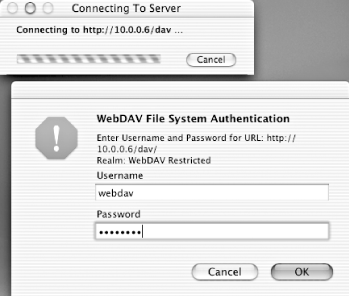 After a few seconds, a Finder window will appear with a view on the WebDAV directory you just mounted, dav in my case (see Figure 6-31). An icon for the networked drive will also appear on the Desktop. Figure 6-31. A mounted WebDAV volume in the Finder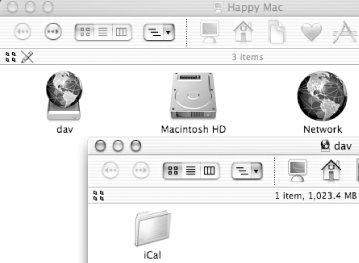 You can browse around, add, update, and delete anything for which you have permission to do so, just as on any local drive. Of course, since the mounted share is treated just like any other drive, you can browse around and alter its content from the Unix command line via the Terminal (see Figure 6-32). Figure 6-32. The WebDAV volume on the command line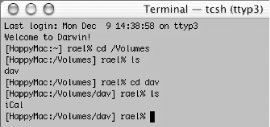 74.2 Disconnecting Unmount a WebDAV share just as you would any other removable media (CD, DVD, iDisk, etc.): drag it to the Trash can in your Dock a little silly, if you think about it or select the drive icon and press |
EAN: 2147483647
Pages: 161
 Connect to Server . . . or type