How to Do It: Securing Your Wireless Network
| Here is an overview of the steps you'll go through in this section:
Change the Router's Default PasswordAs previously mentioned, routers from the same manufacturers all come with the same password. Although it may be easy to keep it the way it is out of the box, it is well worth the 30 seconds it takes to change it. Here are the configuration steps that you need to do:
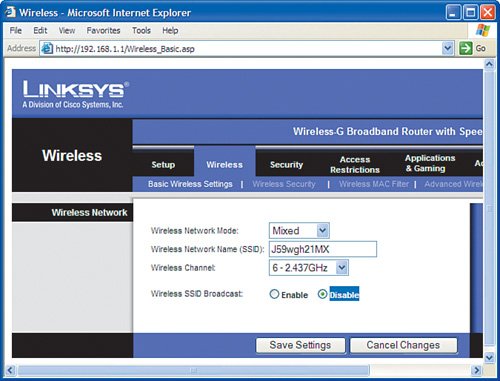
Stop Advertising Your Wireless NetworkBy default, wireless routers are set up to broadcast their SSID to make it easy for wireless cards to learn the wireless network without having to know information in advance. Nice feature, bad security practice. Broadcasting the SSID of our wireless home network is entirely unnecessary. So, the first step to securing our network is to shut it off. Here's the configuration steps that we need to do:
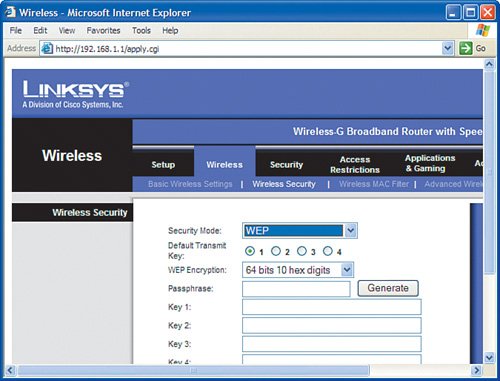
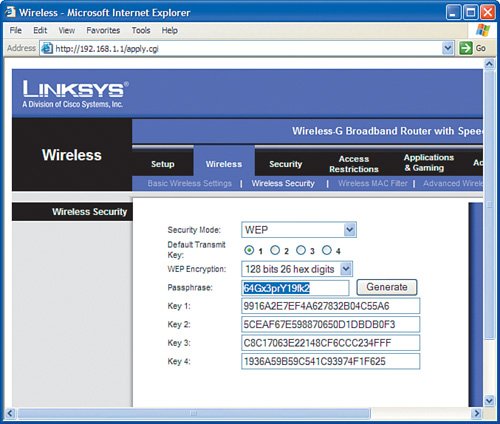
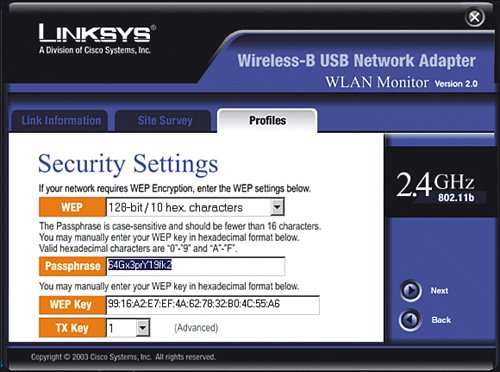
Just by taking these simple steps, you have made your wireless network relatively invisible and fairly anonymous so that people looking for signals will not see a router with your name on it. Very Important As a reminder, never use the default SSID that the wireless router is set up with. (For Linksys products this is linksys.) If the SSID is not being broadcast but is easily guessed by intruders, your wireless network is still vulnerable. Change the SSID to something else, such as a random series of uppercase letters, lowercase letters, and numbers. Write it down. Enable Wireless EncryptionEven with reduced visibility to your wireless network, a more sophisticated eavesdropper still might be able to learn the SSID and try to obtain access, so you need more security. The next step to securing the wireless network is to turn on encryption. Again, by default, encryption is disabled in wireless router products out of the box. To turn on encryption, we make up a secret key (see the previous section on encryption) that is known only by the wireless router and the wireless NICs in our wireless network (NIC stands for network interface card, which is the wireless-enabled card in your computer that allows connection to a wireless router). To communicate, this secret key must be known; otherwise, the conversation is unintelligible. In general, both the wireless router and all wireless cards in your network have to be running the same encryption method. However, depending on the age of the wireless product, they may not support all options listed in Table 2-1. The key then is to examine what each device (including the router) supports and use the highest level of encryption that all of them can handle. Meaning, start at the top of the table, if all your devices support WPA2, use it. If even one of the devices you plan to network does not, you either need to replace it with one that does or go down in the table (for example, WPA or 128-bit WEP). Very Important Keep in mind that even 128-bit WEP is pretty good and will defeat "curious neighbors," but it will not keep a real hacker out. WPA2 is approaching the level of wireless network security that large corporations rely on. So, although you do not need to be overly alarmed if your network "only" supports 128-bit WEP, you should consider upgrading to products that support WPA, or better yet WPA2. After you choose your method of encryption, you need to implement it on the wireless router and all wireless cards in your network. Each device must be "told" what the super-secret key is to be able to join the conversation. Enabling WEP Encryption on the Wireless RouterFirst, let's take an example of implementing 128-bit WEP encryption. We will pick a passphrase of 64Gx3prY19fk2. Now, let's program the wireless router to use this WEP key. Very Important It is good practice to always make any modifications to the settings on your wireless router from a computer that has a wired connection, not a wireless connection. This is especially true when changing the wireless settings, such as WEP encryption. If you make a mistake (a typo for example on the passphrase), you will be unable to reconnect your computers to the router, thus cutting off the limb you are standing on.
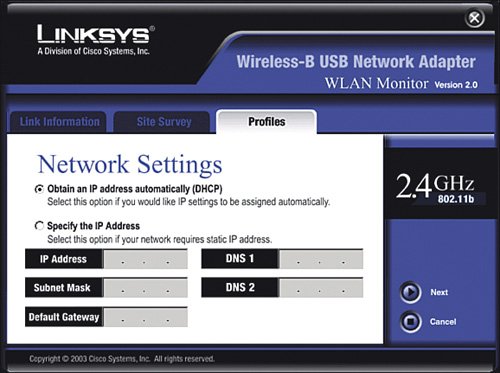
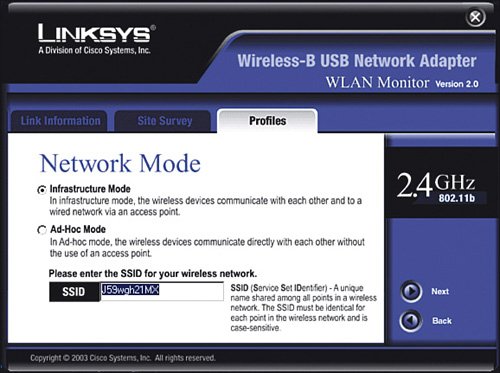
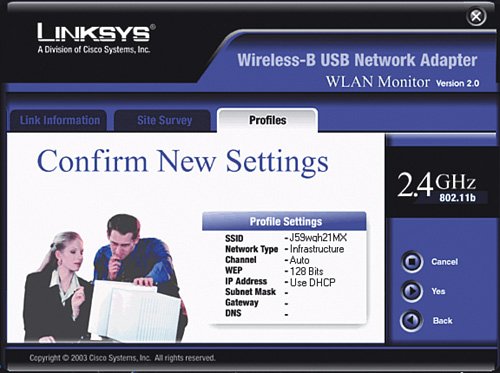
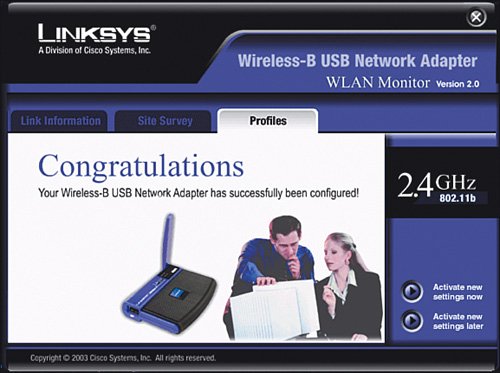
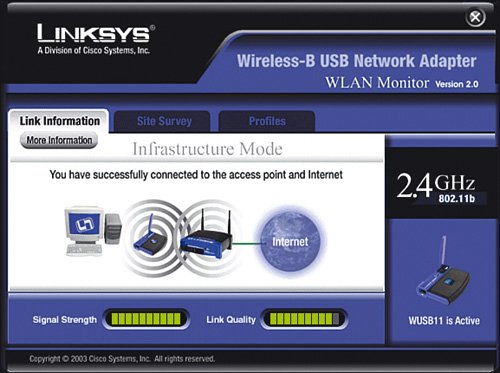
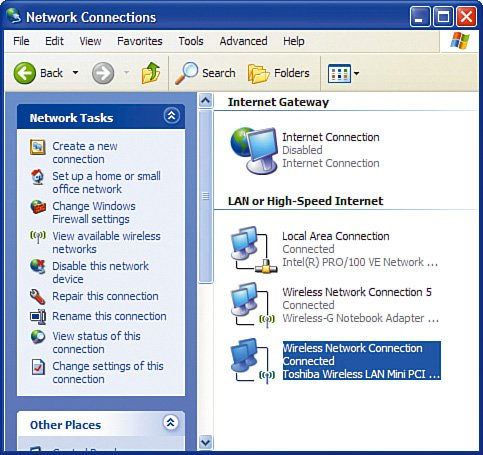
Immediately after you click Save Settings, any computers that were connected with a wireless card to the wireless router will lose connectivity. This is normal because you have just changed the way they are supposed to communicate with the wireless router, but you have not told them the super-secret password to use yet. Let's do that now for each wireless NIC. Very Important You may notice four keys are listed after you generate the WEP key. In general, you can choose any of the four keys, but most often you can just pick key number one. The other three keys are just alternate keys that you can use if you want to keep the same passphrase but change the actual key. Keep in mind that if you choose a key other than number one, write it down because this is the key you will also need to enter in all the wireless NICs. Enabling WEP Encryption on the Wireless NICThere are a couple different ways to manage the wireless connection in each of your computers. Windows XP offers a built-in function for wireless NIC management. With computers with older versions of Windows (2000, 98SE, and so on) most likely you need to use a wireless management program that comes with the NIC. The sections that follow show two examples: a Windows 98 desktop computer with a USB-connected wireless card that we set up with the Linksys WLAN utility and a Windows XP laptop that we set up using the XP built-in wireless NIC management function. Enabling WEP Encryption Using the Linksys UtilityFirst, let's walk through an example of setting up WEP encryption on a computer running Windows 98SE, using a USB wireless NIC and the Linksys WLAN utility:
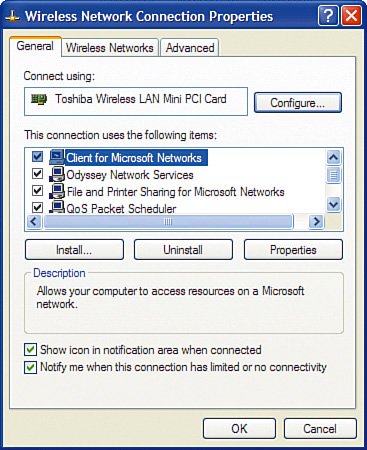
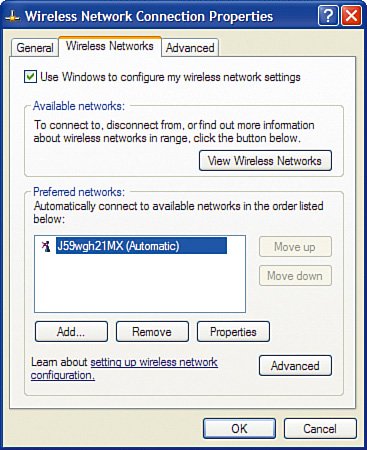
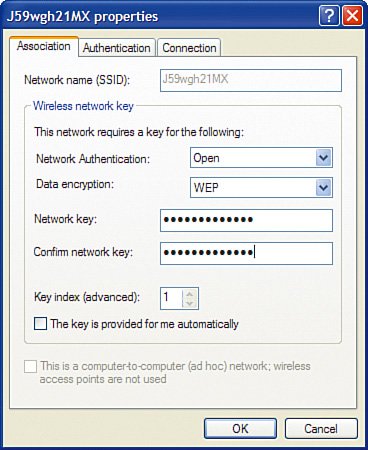
Enabling WEP Encryption Using Windows XPNow let's walk through enabling WEP encryption on a built-in wireless NIC on a laptop computer running Windows XP:
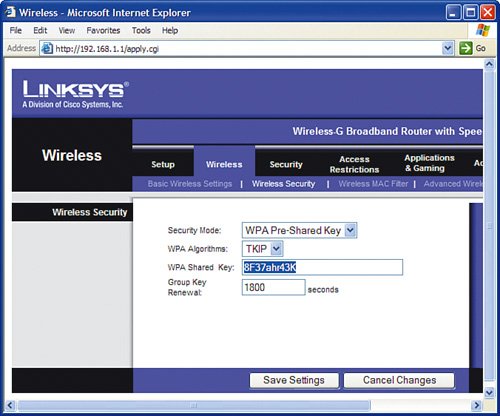
WPA Encryption ExampleTo compare enabling WEP encryption to how WPA encryption is enabled, let's take an example of WPA (this time, we pick 8F37ahr43K as our example pre-shared key). Enabling WPA encryption is a lot like enabling WEP encryption, except you must make one additional decision: You must decide how long an encryption key will be allowed to be used before a new key is assigned. The lower the value, the less time a hacker has to try to "crack" the key. For example, if you set the value to 1800 seconds (which is 30 minutes for you nonmath majors), a key is used for 30 minutes, and then the wireless router and wireless NIC create a new key. If a hacker "cracks" the key within 30 minutes (which is pretty tough to do), the key will only be valuable for the remainder of the 30 minutes before it is switched to an entirely new key, and the hacker would have to start all over. First, here's an example of setting up WPA on the wireless router:
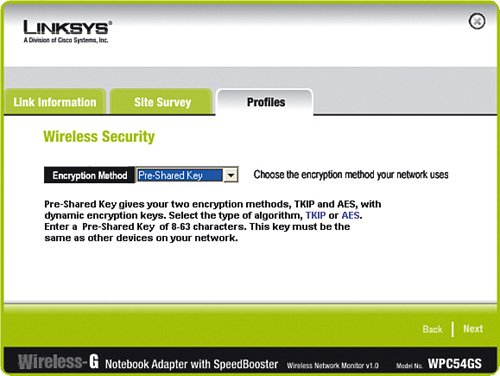
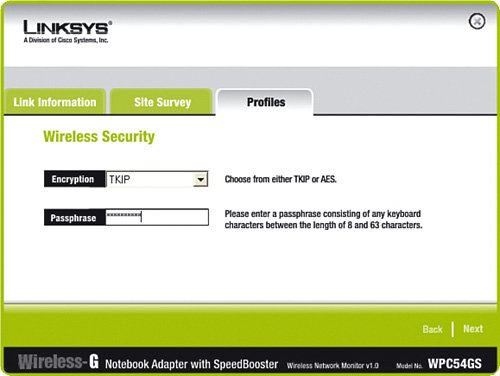
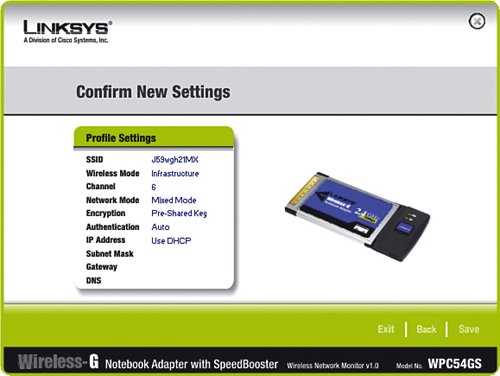
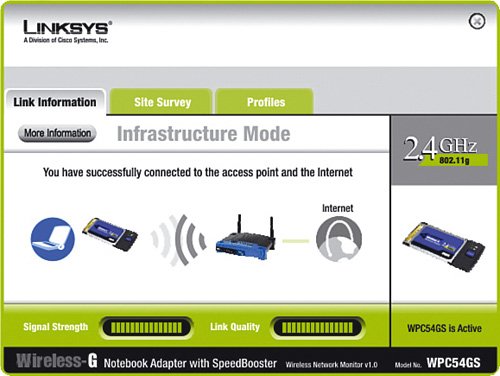
With WPA, we also then need to tell the super-secret password to each of the devices with wireless cards so that they know how to decode the conversations with the wireless router. Here is an example for a Linksys WPC54GS Wireless-G PCMCIA laptop NIC:
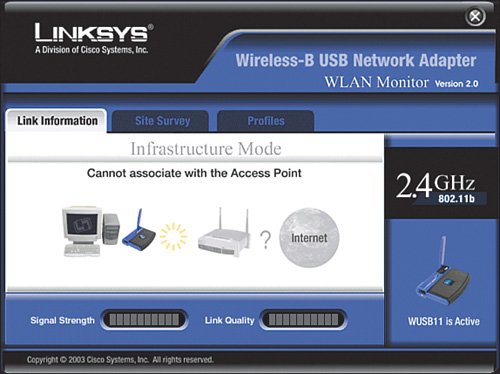
Continue setting up each NIC with the super-secret password, each time checking to see whether the connection is reestablished to the wireless router. Troubleshooting Tips: Wireless EncryptionIf any of the computers do not reestablish communication, items to check include the following:
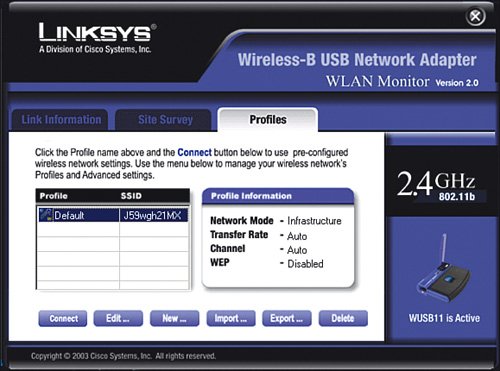
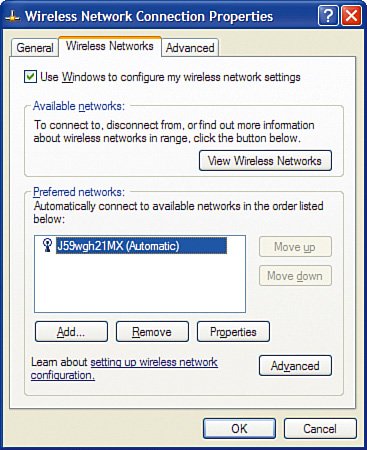
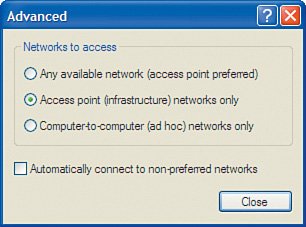
Disable Ad-Hoc NetworkingAs previously mentioned, we recommend for security reasons that you operate your wireless home network in infrastructure mode, meaning a wireless router provides the central point of the network and all wireless computers communicate only with the central point, not to each other directly (which is called ad hoc). This is a relatively low security risk, but there is a small possibility that those sitting next to us in an airport or other public location can try to make an ad-hoc connection directly between their laptop and ours. Because we only ever plan to use our laptop computers connected to a wireless router in infrastructure mode, we should disable ad-hoc networking mode so that it is not possible for another laptop computer to attempt to make a connection directly to our laptop. Using the Linksys NIC management utilities (such as WLAN Monitor), we do this by selecting infrastructure mode. When using Windows XP, the operating system manages most wireless NICs for us, and an additional step is required. If your laptop or NIC does not support doing so, do not worry about it too much; if it is supported, however, why not take advantage of it? Here is how to disable ad-hoc wireless networking in Windows XP for a built-in wireless NIC:
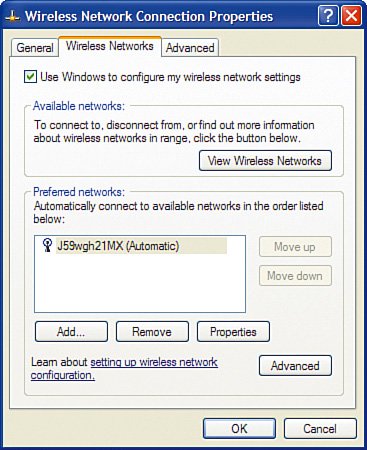
Now, if we encounter another computer with a wireless NIC that attempts to set up an ad-hoc connection, our wireless NIC will not respond to the attempt, keeping our wireless network (and laptop) secure. Prevent Unintentional RoamingWireless networks are a bit like cell phones. Your cell phone tries to find the closest cell tower so that you can get the most bars of signal strength to have high-quality voice calls. Wireless NICs work in a similar way in that they try to find the wireless router that has the strongest signal. The assumption is that the router it finds is yours because it is the closest and therefore has the strongest signal. However, that is not always true. If you have poor signal strength in a particular room of your house and your neighbor's router actually has a better signal in that room, your wireless NIC might try to roam onto your neighbor's router, unless you instruct it not to. You do not want your laptop unintentionally hopping over to your neighbor's wireless router whenever it sees a stronger signal or for whatever reason loses connectivity with your own router. Using the Linksys NIC management utilities (such as WLAN Monitor), this is pretty easy. Simply do not add your neighbor's wireless SSID as a profile. When using Windows XP to manage wireless connections, an additional step is required:
Now, if the wireless NIC sees your neighbor's wireless router, it will not try to connect to it because it is not in the list of preferred networks. |

EAN: 2147483647
Pages: 130