IDS Tools
| The following sections cover tools that can be used to protect a Cisco-based network infrastructure. The focus is on deploying an easily available IDS that can provide adequate protection against network intrusion. These sections also cover tools that monitor Cisco devices and, on detecting a change in the configuration, send out alerts to Netadmins. The popular IDS tools discussed in this section are as follows:
SnortSnort, created by Martin Roesch, is inarguably one of the most popular IDSs. Snort is primarily a signature-based NIDS with alerting capabilities. Snort can detect a wide range of network attacks and probes, including port scans, OS fingerprinting, and buffer overflows. Snort uses a modular architecture to apply the signature database for intrusion detection. Snort refers to the signatures as rules. Snort uses a flexible and powerful rules language to define the inspection engine. In fact, some of the commercially available IDS appliances are based on Snort. Snort is available for both the Linux and MS-Windows platforms at http://www.snort.org/. While the exact hardware requirements depend on the version of Snort and the network traffic, Snort performs better with a larger amount of RAM and faster processors. As a reference point, when monitoring a T-1 link to the Internet, the following combination worked well:
Snort is a command-line interface (CLI) based tool but can be managed and configured through a number of third-party graphical user interface (GUI) tools such as ACID, IDSCenter, and BASE. Deploying Linux-Based SnortThe steps involved in deploying a simple Snort system on a Debian-Linux system are as follows:
Installing SnortTo install Snort in Debian-Linux, use the apt-get install command as follows: apt-get install snort The system prompts you for information regarding the local environment, such as the network address and the interface used to run Snort. Based on the information that you enter, the installation script automatically creates the snort.debian.conf file for customizing Snort in your network. Configuring SnortSnort uses the /etc/snort/snort.conf file for configuring. The default file should work for most environments. However, you can customize the file as necessary. The default /etc/snort/snort.conf file is divided into the following four sections:
Running SnortTo start Snort from the command line, enter the following syntax: snort [-options] option-parameters Table 9-1 provides a list of common options for running Snort.
You should test the configuration first by starting Snort in the verbose mode using the v option, as follows: snort -v -c /etc/snort/snort.conf Snort should start displaying the captured packets onscreen. Snort also displays errors that it encounters during the startup. To stop Snort, press Ctrl-C. After testing the configuration and eliminating any errors, you can start using Snort. To run Snort in a production environment, use the -D option. This option forces Snort to run in background (daemon) mode. The command syntax is as follows: snort -c /etc/snort/snort.conf -D Viewing Snort AlertsAll the alerts are stored in text format in the /var/log/snort/alert file. You can check the alerts by using the tail command, as shown in Example 9-1. Example 9-1. Snort Alertsroot@linuxbox2:~# tail -f /var/log/snort/alert [**] [1:469:3] ICMP PING NMAP [**] [Classification: Attempted Information Leak] [Priority: 2] 12/05-14:51:39.637594 192.168.0.100 -> 192.168.0.103 ICMP TTL:54 TOS:0x0 ID:19283 IpLen:20 DgmLen:28 Type:8 Code:0 ID:47944 Seq:19719 ECHO [Xref => http://www.whitehats.com/info/IDS162] [**] [1:1418:11] SNMP request tcp [**] [Classification: Attempted Information Leak] [Priority: 2] 12/05-14:51:45.734136 192.168.0.100:50173 -> 192.168.0.103:161 TCP TTL:59 TOS:0x0 ID:29955 IpLen:20 DgmLen:40 ******S* Seq: 0x7344580C Ack: 0x0 Win: 0x1000 TcpLen: 20 [Xref => http://cve.mitre.org/cgi-bin/cvename.cgi?name=2002-0013][Xref => http:// cve.mitre.org/cgi-bin/cvename.cgi?name=2002-0012][Xref => http:// www.securityfocus.com/bid/4132][Xref => http://www.securityfocus.com/bid/ 4089][Xref => http://www.securityfocus.com/bid/4088] As highlighted in Example 9-1, Snort identifies the Internet Control Message Protocol (ICMP) ping scan traffic generated by the Nmap scan. The alerts also include hyperlinks that provide more information about the particular attack. Warning Depending on various factors, such as the location of Snort in the network and the network traffic, the log file can grow quickly. To efficiently manage log files, you can use the Linux logrotate utility. You can also consult the frequently asked questions (FAQs) section at the Snort website for more information on managing Snort logs. Deploying MS-Windows Based SnortThe steps involved in deploying a simple Snort system on a Windows system are the same as those for a Linux system. These steps are as follows:
Installing SnortSnort is supported by Windows NT, 2000, 2003, and XP. Installing Snort in MS-Windows is a two-step process, as follows:
Installing SnortThe installation files are available at http://www.snort.org. Download the Snort binary files for MS-Windows, save them, and double-click the executable file to begin installation. By default, the files are installed in the C:\snort directory. Other important file locations are as follows:
Although the sample installation discussed in this chapter is based on these defaults, you should install Snort on a separate partition (and preferably a separate drive) for better performance and security. Installing the WinPcap DriverA packet-capture driver such as WinPcap allows applications to directly access raw packets that are flowing through the wire. WinPcap also provides packet filtering prior to passing on the captured packets to upper-level programs. The MS-Windows version of Snort requires the WinPcap driver to capture packets. However, not all versions of WinPcap are compatible with Snort. For example, Snort 2.3 for Windows runs with WinPcap 3.0. Download and save the installation files from http://winpcap.polito.it/ and double-click the executable file to begin installation. Reboot your machine after the installation is complete. Configuring SnortSnort uses the C:\snort\etc\snort.conf file for configuring. Edit the default snort.conf file according to your network environment. The three variables that should be changed are as follows:
Example 9-2 depicts the partial configuration of the snort.conf file. Example 9-2. Snort.conf Partial Configuration# specify local network to be monitored var HOME_NET 192.168.0.0/24 #define external networks var EXTERNAL_NET !$HOME_NET # specify the location of rules var RULE_PATH c:\snort\rules Running SnortThe command syntax to start Snort from the MS-Windows CLI is as follows: C:\snort\bin\snort.exe [-options] option-parameters Table 9-2 provides a list of common options for running Snort.
However, before running Snort, you should test the various configuration parameters. The steps for testing Snort are as follows:
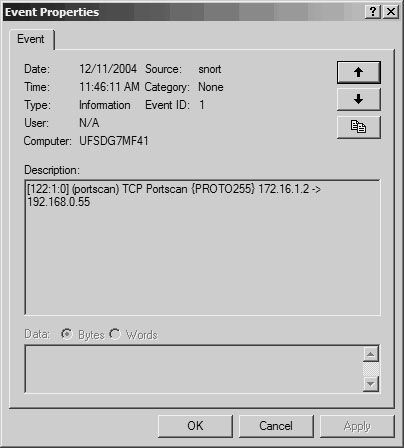
Viewing Snort AlertsTo check the alerts generated by Snort, open the Windows Event Viewer by choosing Start > Settings > Control Panel > Administrative Tools > Event Viewer. Select the Application tab to view all the events. You can sort the events generated by Snort by clicking the Source field, as shown in Figure 9-2. Figure 9-2. Windows Event Viewer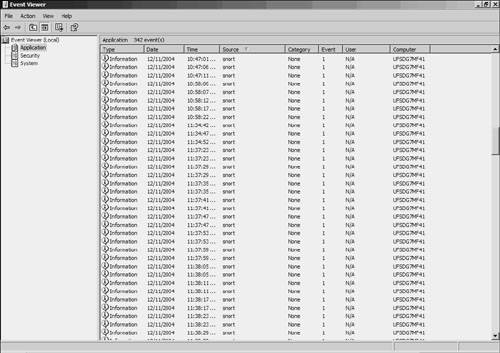 Double-click any alert to view more details, as shown in Figure 9-3. Figure 9-3. Windows Event Viewer Details Snort identifies the TCP port scan traffic originating from the source address 172.16.1.2. Note For more information on deploying Snort in Windows, visit http://www.winsnort.com. This website provides a great deal of resources, including step-by-step guides, forums, and tips for deploying Snort in Windows. Snort for Advanced UsersThe CLI-based Snort deployment, with alerts stored in a text file, provides a simple and efficient IDS for smaller networks with lower traffic. By default, the packet captures are stored in Tcpdump format. However, in larger and busier networks, a text-based Snort system can generate a large number of alerts. Managing and searching through the alerts can be a daunting task. In such cases, you can configure Snort to send alerts and logs to an SQL database. SQL databases can store the data efficiently and hence boost the performance and scalability of Snort. Snort can interface with both open source databases (such as MySQL and PostgreSQL) as well as commercial databases (such as MSSQL and Oracle). However, the SQL database only provides a better back end for Snort. To search and view the alerts stored in the SQL database, you can use Analysis Console for Intrusion Databases (ACID), which is a web-based GUI tool specifically developed to search and process alerts generated by IDSs and firewalls. ACID, an open source tool, is available at http://acidlab.sourceforge.net/. Figure 9-4 shows the internal architecture of a scalable IDS using Snort, an SQL database, ACID, and a web server. Figure 9-4. Advanced Snort Architecture Deploying SQL- and ACID-based Snort systems is a project by itself and is beyond the scope of this discussion. Nonetheless, the Snort website provides detailed documentation for deploying Snort with MySQL and ACID. Netadmins who are interested in evaluating the MySQL+ACID version of Snort can use the Knoppix-STD or Network Security Toolkit based live CD-ROM. (For more information on live CD-ROM, refer to Chapter 7.) The live CD-ROM based Snort offers following advantages:
Figure 9-5 shows a sample report generated by the ACID console on the NST live CD-ROM. The pie chart reports indicate the signature classification over a number of alerts. The live CD version of Snort is especially handy if you need a functional copy of Snort for a couple of days but do not want to install it on a dedicated computer. Figure 9-5. Snort Reports Using the ACID Console RancidRancid, an acronym for Really Awesome New Cisco confIg Differ, is a tool that can detect changes in the configuration of network devices. Rancid maintains and compares recent copies of device configurations. Rancid functionality can be summarized in the following three steps:
Rancid runs in Linux and other flavors of UNIX. However, at the time of this writing, the Windows version of Rancid was not available. Rancid works for IOS-based devices, CatOS-based switches, and PIX Firewalls. In addition to its role as an IDS tool for detecting configuration changes, Rancid also helps track changes. The trails of changes are helpful when troubleshooting network issues. Please note that RANCID is not a true IDS tool as it does not detect configuration changes in real time. Nonetheless, RANCID provides periodic monitoring and alerts for configuration changes. Deploying RancidThe steps involved in deploying Rancid on a Debian-Linux system are as follows:
Installing RancidLog in to the Debian-Linux system with root privileges. Install the core module of Rancid for Debian using the apt-get install command, as follows: root@linuxbox2:/home# apt-get install rancid-core Note To install Rancid on other versions of Linux, follow these steps:
Configuring RancidFollow these steps to configure Rancid:
Testing Rancid ConfigurationsLog in as the user ciscoadmin on the Linux machine and test the configuration by running the /usr/bin/rancid-run command. Check the /var/log/rancid file for error messages. Automating Rancid Through crontabAfter verifying the configurations, Rancid should be configured to run periodically. Linux provides the crontab e command for scheduling the programs to run at preset intervals. Example 9-3 creates job schedules for running Rancid every hour. A sample contents of the crontab file is included in the /usr/share/doc/rancid-core/examples/cron.example file. Example 9-3. Scheduling Rancid Using crontab ciscoadmin@linuxbox2:~$ crontab -e # run rancid every hour 1 * * * * /usr/bin/rancid-run # clean out old logs every midnight 50 23 * * * find /var/log/rancid -type f -mtime +2 -exec rm {} \; Obtaining Rancid E-Mail OutputExample 9-4 shows the e-mail sent by Rancid to spope@abcinvestments.com with the changes in the router configurations. The lines beginning with a plus sign (+) denote configurations added, while the ones beginning with a minus sign or hyphen (-) indicate configurations removed from the old configuration. Also, note that Rancid includes several lines of configuration surrounding the changes, thus making it easy to understand and correlate the changes. Example 9-4. E-mail Output from RancidIndex: configs/192.168.0.10 =================================================================== retrieving revision 1.5 diff -u -4 -r1.5 192.168.0.10 @@ -85,9 +85,9 @@ logging 192.168.0.100 access-list 100 permit ip any any access-list 101 permit icmp host 192.168.0.10 any access-list 101 permit icmp any host 192.168.0.10 - access-list 102 permit udp any any - access-list 102 permit tcp any any + access-list 103 permit ip any any access-list 125 permit ip any host 192.168.0.35 access-list 125 permit udp any host 192.168.0.35 eq 1813 access-list 125 permit udp any host 192.168.0.35 eq 1646 snmp-server community read RO Index: configs/192.168.0.6 =================================================================== retrieving revision 1.5 diff -u -4 -r1.5 192.168.0.6 @@ -164,9 +164,9 @@ access-list 91 permit any access-list 92 deny 0.0.0.66 255.255.255.0 access-list 92 permit any access-list 100 permit ip any any - access-list 101 permit udp any any - access-list 102 permit tcp any any + access-list 103 permit ip any any access-list 162 permit ospf any any access-list 162 permit gre host 10.2.2.2 host 11.2.2.2 access-list 162 permit gre host 10.2.2.5 host 11.2.6.6 In case the Cisco devices use the username/password combination, you can add the username information in the .cloginrc file using the add user command. Additionally, you can use the add method command, to instruct RANCID to use SSH instead of telnet for connecting to the target Cisco device. Following is sample content of the .cloginrc file for defining user user1 with password cisco123, enable password cisco456 to connect to router 192.168.0.20 via SSH # add password router-ip telnet-password enable-password add password 192.168.0.20 cisco123 cisco456 # add user router-ip user-name add user 192.168.0.20 user1 # add method router-ip ssh add method 192.168.0.20 ssh |
EAN: 2147483647
Pages: 106