Unit Testing
To test the Group Chatting application:
-
Download and install the free implementation of the Jabber Server from the following URL:
http://www.jabberstudio.org/projects/ejabberd/releases/view.php?id=610
-
Set the path of the bin directory of Java 2 SDK (J2SDK) by executing the following command at the command prompt:
set path=%path%;D:\j2sdk1.4.0_02\bin;
-
Set the classpath of the lib directory of J2SDK by executing the following command at the command prompt:
set classpath=%classpath%;D:\j2sdk1.4.0_02\lib;
-
Copy the GroupLoginGUI.java, GroupList.java, AddUser.java, GroupChat.java, EditGroup.java, GroupTree.java, ChatWindow.java, and SocketConnection.java files to a folder on your computer. Use the cd command at the command prompt to move to the folder in which you have copied the Java files. Compile the files by using the javac command, as shown:
javac *.java
-
To run the Group Chatting application, specify the following command at the command prompt:
java GroupLoginGUI
-
The Login window of the Group Chatting application appears. Specify the login information, as shown in Figure 4-10:
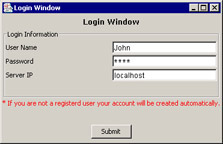
Figure 4-10: Specifying Login Information -
Click the Submit button to send the login information to the Jabber Server.
-
The user interface of the Group Chatting application appears. Select File->Add User to add other end users to the selected group.
-
Enter the name of another end user and the group name to add the specified user to a group, as shown in Figure 4-11:
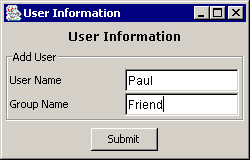
Figure 4-11: Adding an End User to a Group -
Click the Submit button to add an end user to a group.
-
Select File->Edit Group to rename a group.
-
Enter the name of the old group and the new name to rename an existing group, as shown in Figure 4-12:
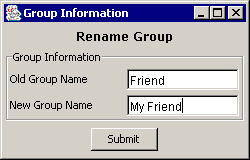
Figure 4-12: Entering the Old and New Group Names -
Click the Submit button to rename the group. The group with the new name appears, as shown in Figure 4-13:

Figure 4-13: Renamed Group -
Select an end user name from the tree structure of the available groups to initiate a private chat.
-
Type the message that you want to send and click the Send button to send the text message to the selected end user, as shown in Figure 4-14:
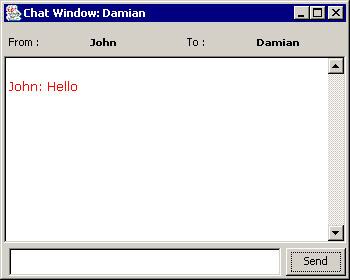
Figure 4-14: Sending a Private Message -
Select a specific group from the tree structure of the available groups to participate in a group chat.
-
Type the required message and click the Send button to send the text message to all end users logged on to the selected group, as shown in Figure 4-15:
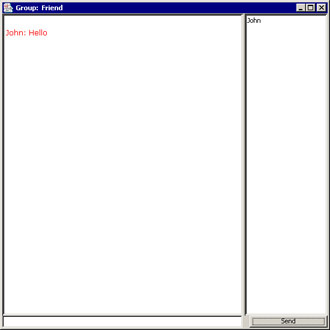
Figure 4-15: Sending a Group Message