Troubleshooting
| [ LiB ] |
Troubleshooting
New equipment is usually covered by the warranty. And repairing stuff yourself will often void this warranty. But a lot of the equipment I use is either used or old and not covered anymore. So I had to teach myself troubleshooting and basic repairs .
The basic methodology I use for finding out what's wrong is this: If there's no sound coming out of my amp when the guitar is plugged in, I figure it must be something in the chain: guitar, cable, effects pedal, cable, amp, speaker, or speaker cable. So I replace each one of the elements with a substitute that I know to be working until I isolate the problem.
Then I work within that unit to find the problem. For instance, if I find it is the amp, I try that amp with a different speaker. Or that speaker with a different amp. I unplug the unit so I won't get shocked and take it apart ( carefully laying all the screws somewhere that I won't lose them and separating them into piles and labeling them if I think that it's going to be confusing when I go to put it back together) and look for visible problems: wires that have come undone, parts that have fallen down inside, jacks that are physically compromised. Then I fix that, plug the unit back in (being careful not to get shocked if the unit's still open ), and see if that fixed it. If not, I look further.
A good thing to own is a VOM or volt/ohm meter (or sometimes voltometer or voltmeter). You can get them for about $30 and up at Radio Shack or a similar store. They are useful to see where the voltage is flowing . If you can read a circuit diagram, a.k.a. schematic (the schematic for an amp is often glued inside the amp or at least published in the owner's manual), you should be able to easily trace where the problem is. You can also use one to test to see if there's a short sending power between your guitar strings and the mike, so you won't get shocked.
Sometimes it's as simple as a blown fuse. Fuses exist for a reason. They melt and break the flow of current easily and are there to protect the circuitry of the amp. You can usually see if a fuse is blown by inspecting it visually. But sometimes the break is almost microscopic or hidden from view down in the metal housing on the end. The ohm function of a VOM is useful for testing fuses. Take them out and test their resistance. If it is low, they are good. If the needle doesn't move at all, they are blown.
Make sure you use the right fuse. Never use an automotive fuse for a guitar amp! And make sure the fuse you use has the recommended voltage and amperage rating for the piece it's protecting. A fuse that's rated too low will blow too often. Too high and it will not protect the amp. The amp will blow before the fuse.
Never bypass a fuse with a piece of foil or a wire. This is asking for trouble: ruined equipment or even a fire. If your fuse keeps blowing, there is probably a reason. If you can't figure it out, maybe it's time to take it in to a competent repairperson.
Sometimes the fuse is accessible from the rear of the amp; sometimes you have to take it apart. Sometimes the fuse, or even a second fuse, is inside the amp on the circuit board. This is bad planning as far as I'm concerned , because it makes it hard to get to quickly. You need a screwdriver and some time. If it's accessible from the back of the amp, it takes seconds.
I used to keep a small box of fuses duct taped to the side of my SVT amp head.
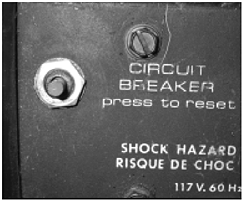
Some amps have circuit breakers, which are basically switches that function as reusable fuses. Just press the button to reset them. But first make sure you look for whatever it was (overload on one circuit? too many amps plugged into one outlet? need to put a fan on an overheated amp?) that made it trip.
It is good to develop a relationship with a good repairman in your town. Ask more experienced musicians in your scene who's good and won't rip you off.
Figure 5.15. Circuit breaker button on the back of a mixer.
NOTE
Approach all equipment repairs with caution. You can die. The author and the publisher take no responsibility if you open your gear and start messing around. Just because I'm willing to die for my art doesn't mean you should.
Don't get shocked. Electrolytic capacitors (usually blue cylindrical-shaped things with two wires coming out of them) and cathode ray tubes (TV and computer monitor screens) can store charges and shock you even when the unit is unplugged. Experienced repairmen usually discharge them after unplugging the unit and before working on them by carefully shorting them out with the metal blade of a plastic-handled screwdriver.
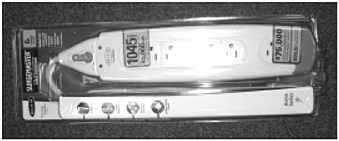
Power strips (with surge protectors) are good for plugging several devices into one outlet. Often, gigs will not have one. Carry a power strip with you to gigs, and make sure it has a circuit protector (like a reusable flip-switch fuse). Make sure it's grounded and UL rated.
Figure 5.16. Power strip with surge protector.
Every piece of equipment you use that plugs into the wall should be UL rated. There will be a sticker somewhere on it to tell you this.
Write your name with a Sharpie on the power strip somewhere. They all look alike.
How to Solder
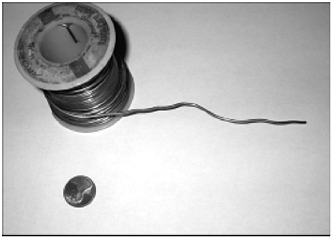
Soldering is the act of melting a lowmelting point metal alloy (typically tin mixed with lead) onto two or more wires or connections to permanently bond them. For electrical work, you must use rosin-core solder, not acid-core. It will be marked . Acid core is for plumbing, and if you use it on electrical parts, they will actually dissolve and come undone with time.
A soldering iron costs about 10 bucks. (Radio Shack is a good bet. Just give a fake name there and tell them "I don't want to get the catalog" or they'll spam your mailbox with catalogues for the rest of your life.) A soldering gun is a bit more heavy duty and costs 40 or 50 bucks. If you're going to be doing a lot of this, I recommend the gun.
To use it, plug it in and let it warm up. Make sure you don't touch the tip, or you'll get burned. I usually see when it's hot enough by licking my thumb and quickly touching it and pulling away. This is dangerous, but I've never been burned by it. If the spit sizzles, it's hot enough. You can also wait until you see/smell a little smoke from it. There won't be any the first time you use it, but after the first use, there will be a little residual rosin from the solder to make some smoke.
Figure 5.17. Soldering iron.
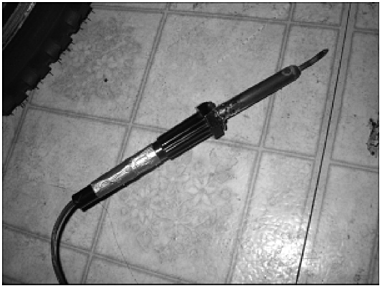
Figure 5.18. Solder.
First you have to tin the tip, which means touch a little bit of solder (solder looks like wire, but melts on contact with the tip of the iron) to the hot tip of the iron. If it's hot enough, solder will flow onto the tip and cover it with a thin shiny layer. If the tip has been used a lot, it may have too much oxidized material on it to get a good tin going. In that case, I would rub it on a piece of sandpaper, then rub it quickly on a piece of paper to rub the sand off. Then it should take a tin quite well.
Once you've tinned it, you just melt a little more solder onto whatever it is you're trying to join. If it's wires, you might want to twist the ends of the wire together first. You can also get a jig at Radio Shack that is basically a clamp with roach clips on the end to hold different parts. It essentially gives you extra hands, because it seems to take more than two to effectively solder: one for the iron, one for the solder, and one for whatever you are soldering.
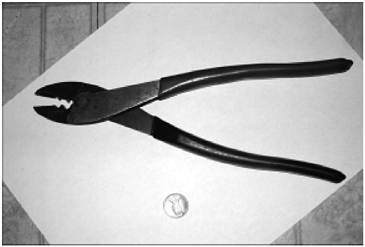
To join two wires, first strip them with a wire stripper or a knife . Be careful not to cut yourself or cut too much wire. This gets easier with practice.
You just flow the solder on to the two parts to be soldered. A trick is to heat them both before applying the solder. If the parts are hot, the solder will flow better. Make sure the parts aren't attached to something heat sensitive, like an integrated circuit. If they are, you can first attach a heat sink (a roach clip, or "alligator clip" as they're called in electronics stores, with fins to dissipate the heat) behind the parts to be soldered.
Once the parts to be soldered have the molten solder flowed to them, let them cool for at least a minute. Then they should be electrically and mechanically bonded for life.
Try not to get molten solder on the floor or, God forbid , on yourself. It is very hot and will burn anything in its way. I usually solder over a workbench that is made of Formica and doesn't matter if it gets little burns on it.
Figure 5.19. Wire stripper.
Also try not to breathe the fumes produced by soldering. Rosin-core solder does not produce fumes nearly as toxic as acid-core, but still it will bug your lungs. And the lead in solder is toxic. Open a window.
When you're done, unplug the soldering iron and let it cool. It takes several minutes to be cool enough to touch (longer than it took to get hot), so don't space out and forget it was on and burn yourself or start a fire.
| [ LiB ] |
EAN: 2147483647
Pages: 138