Controlling Controls in Forms
When writing this book, it was my intention to use techniques that could be applied equally among the various versions of Access. However, Microsoft didn’t cooperate. Access 2003 handles some aspects of form controls a little differently than 2000 and 2002. For that reason, the techniques that I show you may not be the most elegant solutions, but they work between versions and are fairly easy to use.
Let’s begin with a discussion of forms and controls. A good place to begin is by opening the form frmCustomer in Design View, as shown in Figure 12-7. Each object on the form is called a control. All we have here are label controls and text controls. The text controls are bound to the columns of either tblCustomer or, depending on your coding, the recordset. When a form is automatically generated, as this one is, Access assigns names to those controls automatically.
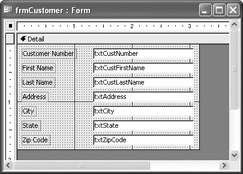
Figure 12-7: frmCustomer in Design View
In the case of the bound text controls, the name is usually the same as the column it is attached to. If you are using Access for day-to-day record keeping, this does not cause a problem; however, if you are going to use it in a VBA environment, it could cause some programming confusion. For that reason, I usually right-click on each of the text boxes and select the Properties option. This opens the Properties window, whose All tab is shown in Figure 12-8.
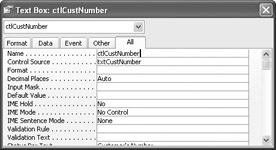
Figure 12-8: The Properties window for a text box
Notice that in Figure 12-8, I changed the Name property to ctlCustNumber to differentiate the control name from the Control Source of txtCustNumber.
The label controls are usually named Label1, Label2, Label3, and so on. Once again, I usually change them to something like lblCustNumber, lblCustFirstName, and so on. As you will be seeing in a few minutes, this practice will make your life a lot easier in a VBA environment.
You can use the form module to set a control’s properties programmatically. As an example, you may want to set the visibility of the control to either true or false. Or you may want to change the control to a read-only mode.
As you saw in earlier chapters, in a form module, the name of an event procedure is based upon a form’s actions. As an example, let’s say we want certain properties set when a form first loads. You would use a Form_Load procedure in a form module.
Don’t worry too much about naming conventions; VBA will handle a lot of that for you.
Let’s see a quick demonstration.
While in the Design View of frmCustomer, click the form’s Properties window, as opposed to the control’s, by double-clicking on the square located in the upper-left corner, as shown here:

This will open a Properties window like the one shown in Figure 12-9. In the figure, the Event tab is selected, where you can see the various events associated with the form. The most common events are On Load and On Close. The On Load handles actions that will be triggered when the form loads, and On Close triggers before the form closes.
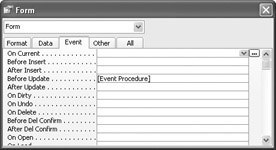
Figure 12-9: The form’s Properties window
If you click inside the On Load field, you see the Expression Builder button located on the right. Clicking on that will open this dialog box:
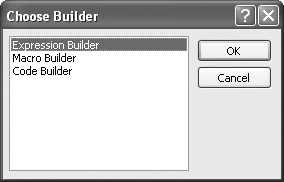
You use the Expression Builder to construct an expression. You saw an example of macros in Chapter 2. However, in VBA, you would choose the Code Builder. Selecting OK then opens a form module with the following procedure:
Private Sub Form_Load() End Sub
The actual name of the procedure is Form_Load().
You could go into the procedure and do something simple like add a message box, as follows:
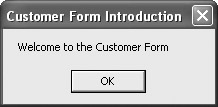
Private Sub Form_Load() MsgBox "Welcome to the Customer Form", , "Customer Form Introduction" End Sub
If you now go into the Database window and open the form, you will see the following message box:
The concept of the On Close procedure is similar when the form closes.
While in the code for the form module in the VBA Editor, you will notice that the Project window now shows the form module Form_frmCustomer and our working VBA module, myTest. This window is shown in Figure 12-10. You can switch back and forth between the two modules from this window.
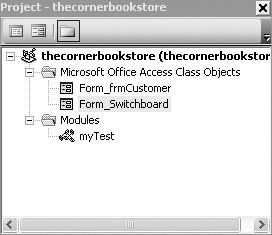
Figure 12-10: The Project window
Here is one of the niceties of ADO. You can actually pass code into the form module and through the Form_Load procedure. The result is exactly the same as if you wrote the code in the form module.
Let’s take a look at the following block of code.
Sub runFormAll() Dim con As ADODB.Connection Dim recSet As Recordset Dim strFrmNm As String Set recSet = New ADODB.Recordset recSet.CursorType = adOpenKeyset recSet.LockType = adLockOptimistic recSet.CursorLocation = adUseClient Set con = New ADODB.Connection con.Open "Provider=Microsoft.Jet.OLEDB.4.0;" & _ "Data Source=C:\BegVBA\thecornerbookstore.mdb;" recSet.Open "SELECT * FROM tblCustomer", con strFrmNm = "frmCustomer" DoCmd.OpenForm strFrmNm Set Application.Forms(strFrmNm).Recordset = recSet Form_CustomerForm.ctlCustFirstName.SetFocus Form_frmCustomer.ctlCustNumber.Visible = False recSet.Close con.Close Set recSet = Nothing Set con = Nothing End Sub
Let’s pay particular attention to the line
Form_frmCustomer.ctlCustNumber.Visible = False
From within the VBA code you call up the Form_frmCustomer. However, as you’re entering code, when you type the period after Form_frmCustomer, VBA displays an interesting prompt, as shown in Figure 12-11. You will see all the controls for the form object that you would normally associate with the form module. From there on, you can set the properties of controls as if you were setting them directly in the form module.
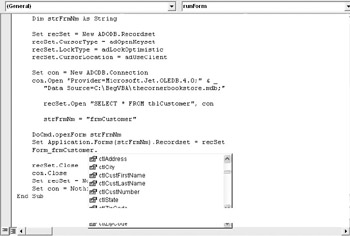
Figure 12-11: Control prompt for Form_frmCustomer
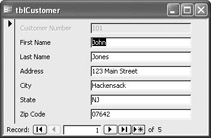
In the previous example, the visibility of ctlCustNumber is set to False. If you run the procedure now, the form should look like this:
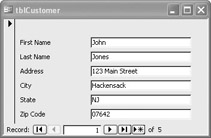
The ctlCustNumber is hidden. As a variation, you could have changed the property with the two lines as follows:
Form_frmCustomer.ctlCustNumber.Visible = True Form_frmCustomer.ctlCustNumber.Enabled = False
Essentially, this makes the ctlCustNumber read only, as can be seen here:
As you can see, every control has a large number of possible properties that you can use as needed. It is not unusual to see an If….Then structure—if condition A occurs, use one set of properties; but if condition B occurs, use a different set of properties.
It is important to note that you can even do conditional formatting. For instance, if a number is negative, you can change its color to red. However, Access 2003 handles this a little differently. Please refer to the Access 2003 documentation to learn how to use this feature.
EAN: 2147483647
Pages: 214