Switchboard Manager
Up to this point we have talked about forms interacting with our data. However, do you want your end users to go into the code to run it? I would suspect not.
You can easily build a form to serve as the “front end” of this system. This will contain a menu to show users their options. For this example, I am going to keep it simple and just put one item on it. After seeing how it is done, you should be able to easily add more items as they are needed.
Go to the Database window and select Tools | Database Utility | Switchboard Manager. If this is your first time using the manager, you may get a prompt asking if you want Access to create a default form for you. If you get that, just go ahead and click OK.
Once you have the manager open, it should look something like Figure 3-12.
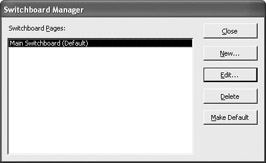
Figure 3-12: Switchboard Manager dialog box
The default form can be a bit quirky to work with sometimes. For that reason, I like to create one from scratch by clicking New.
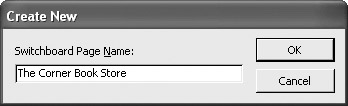
Once you select New, you will be prompted to give the form a name. This name will appear as the page title also. For that reason I like to lay it out exactly as I want it to look, for example:
Once you select OK, the name will appear in the Switchboard Manager window. You should then click on it and select Edit. This brings you to the Edit Switchboard Page dialog box that will permit you to add or edit the menu items you want. It should look like Figure 3-13.
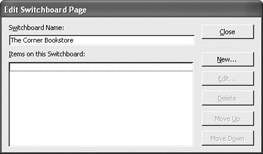
Figure 3-13: Edit Switchboard Page
To add a new menu item, just click on New. Here is an example of the filled-out Edit Switchboard Item dialog box.
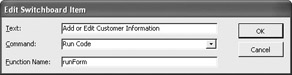
In this case I added the wording for the menu item: Add or Edit Customer Information. For the Command, I selected Run Code. Finally, I specified that I want to run the runForm procedure. (Note that the name of the field, Function Name, is unfortunate; it implies, falsely, that you can only run functions.) I could have specified any arguments I wanted passed to the procedure also. We will talk about the implications of that in a few moments. However, for now, click OK.
You should now be back on the Edit Switchboard Page dialog box. Just select Close from there.
I find it is a little easier to work if you make your front-end form the default one. You can do this by clicking on it—in this case The Corner Bookstore—and then clicking the Make Default button. You should now see the word “Default” next to The Corner Bookstore.
If you switch to Forms in the Database window, you should have a form listed called Switchboard, as shown in Figure 3-14. If you open it, it should look something like Figure 3-15.

Figure 3-14: Your Switchboard form in the Database window
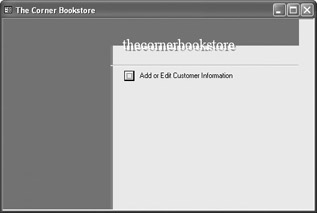
Figure 3-15: The new Switchboard form
Go ahead and click on its only item, and the runForm procedure will run to open frmCustomer.
Of course, you can edit this form using the same methods you would use with any other form. You can change colors, add graphics, change fonts, and so on.
In many design situations, I create separate menu items for browsing and editing records. Then, when I build the procedure call from the menu, as we just did, I build a program to put in a parameter that the procedure can accept, such as runForm 1, or runForm 2. Next, in the procedure code, I build a decision structure that will turn the CursorType and CursorLocation objects on and off as needed. That way, a single form can handle multiple duties.
I find that it is easiest to add and delete items from the Switchboard form by using the manager as we have done. However, interestingly, if you look at the list of tables, Access created a new table called Switchboard that handles all the functioning of the board. If you open it, it should look something like Figure 3-16.
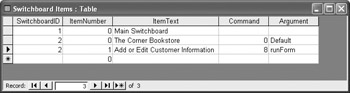
Figure 3-16: Switchboard form table
This form shows that we have two switchboards, with the one we created as number 2 set as the default. It also shows that we have one item, and the argument is runForm.
You can take Switchboard one step further by forcing it to open as soon as the database opens. To set this, go to Tools | Startup. Figure 3-17 shows the dialog box filled out.
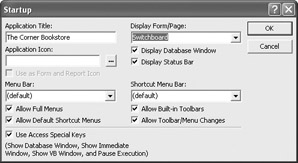
Figure 3-17: The Startup dialog box
This is, in some ways, the first step to security. You can give your application a title and set the Switchboard, or any other form you want, to open as soon as the database opens.
In addition, you can prevent the Database window from opening. This will add greatly to security in that it prevents end users from getting behind the scenes.
Interestingly, you can also add an icon for the desktop. That way, there is no reason for the end user to go directly into Access.
EAN: 2147483647
Pages: 214