Security and Access 2003
With the release of Access 2003, there are two new security features previously unavailable: the Jet Sandbox, and Macro Security.
Jet Sandbox
There are three potential ways you can run a query in Access. The first way, which we saw in the chapter on Forms, is to build the query right into the form or report. The second way is to run the query through the command line shell (better known to most as the DOS prompt). This means you can actually run the Jet query through the DOS shell without even being in Access. This is rarely done and beyond the scope of this book. The third way is to build it into a module, as we have been doing through most of this book.
The first two techniques are loaded with dangers. As you saw, it is not that difficult for someone to gain access to the query code and make harmful changes to it that could allow improper access to, or destruction of, data.
Placing your code in a module, or even a macro, can offer extra levels of security. In a few moments, we are going to look at the Macro Security feature.
Unless you specifically shut it off, the Jet Sandbox, by default, will prevent potentially harmful code (code that could unexpectedly change or damage data) from form and report controls. You cannot shut it off in Access but must, instead, go into the registry to change the settings.
You need to look for the registry key:
HKEY_LOCAL-MACHINE\SOFTWARE\Microsoft\Jet\4.0\Engines\SandBoxMode
A full discussion, with a specific list of what the Jet Sandbox blocks, can be found in the help files that accompany Access 2003. Please note, before you make any changes to the registry, make sure you know what you are doing. You could inadvertently cause damage to the operating system and other programs on your computer.
Macro Security
In Chapter 1 we looked at macros. Essentially, VBA is the macro language of the Microsoft Office environment. Because of its popularity, there are a lot of places where developers can download macros to do various jobs. However, this has led to the propagation of viruses and security problems in macros.
Access 2003 addresses these issues with the introduction of Macro Security. You can access it by going to Tools | Macros | Security. You will see the dialog box shown in Figure 16-8.
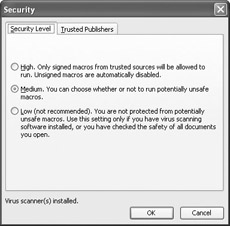
Figure 16-8: Macro Security dialog box
There are three potential settings here:
-
High will run only signed macros (which we will discuss shortly).
-
Medium gives you the option of running an unsigned macro or not.
-
Low will run anything and gives you virtually no protection.
It is interesting to note that this feature has been available for version 2000 of Word and Excel. However, Access implements it beginning in version 2003.
It is worth taking a few moments and discussing this whole concept of a digital signature. Basically, a digital signature is a certification that the code is virus free and safe to run.
For testing purposes only, you can self-certify the code with a program that ships with Office 2003 called selfcert.exe. For true certifications, however, there are third-party certifiers who will test and verify the code. The most popular of these is a company called Verisign (www.verisign.com). These firms will provide you with a third-party validation and a digital certificate that is encrypted. The certificate must also be renewed on a regular basis.
When a digital certificate is obtained, there are two keys on it. A private key is encrypted into the file, and a public key is used for identification. If the file is changed in any way, the public key will not verify the private key.
As a demonstration, click on Start | All Programs | Microsoft Office | Microsoft Office Tools | Digital Certificate for VBA Projects. You should see the dialog box shown in Figure 16-9. This opening screen explains the process and warns about self- signed digital certificates. You can also obtain a list of third-party authorities here.
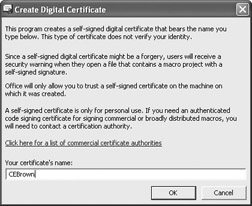
Figure 16-9: Opening screen to create a digital certificate
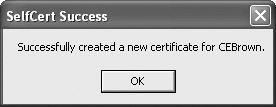
Once you give your certificate a name, click OK. You will be notified that the certificate was successfully created:
This is the first step. Let’s assume that you now want to attach this certificate to a module you created in VBA. You would start by opening the module and selecting Tools | Digital Signature. The resulting dialog is shown in Figure 16-10.
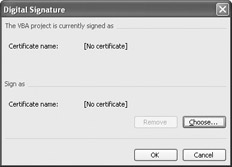
Figure 16-10: Digital Signature attachment box
Initially, the dialog box shows no signature at all. However, if you click Choose, it will bring up a list of certificates available on your computer, as Figure 16-11 shows.
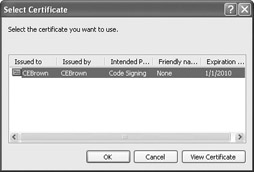
Figure 16-11: List of available certificates
The only one available, at this point, is the one you just created. By selecting it, you can either just attach it or view it first. If you choose View Certificate, you will see something like Figure 16-12. It is not verified by a third party, so there are warnings attached to it. You can also view various details about the certificate.
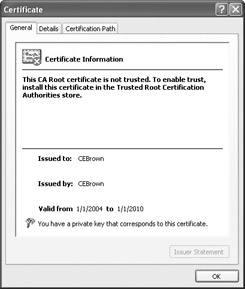
Figure 16-12: The digital certificate
Select OK twice to return to the screen shown in Figure 16-10, and then select OK to attach the certificate. If you now save and close this session of TheCornerBookstore and start a new session, the dialog box shown in Figure 16-13 should appear.
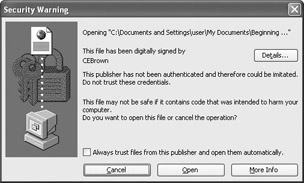
Figure 16-13: Security Warning box
It is warning you because the certification has not been authenticated by a third party. You can select the option of always trusting this particular certifier by checking the box. If you feel safe with it, you can just go ahead and open it.
EAN: 2147483647
Pages: 214