Setting Up the Server Policy PackageThe Server Scripts Policy
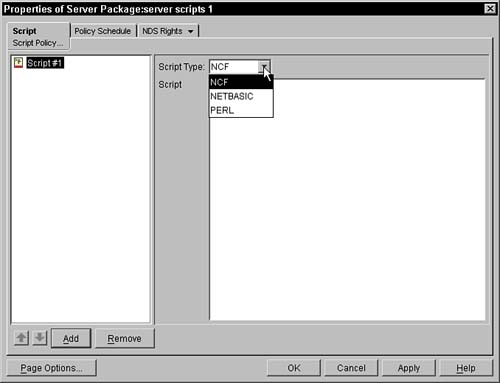
Setting Up the Server Policy Package The Server Scripts PolicyThis policy is a plural policy, which means that you can create multiple instances of this policy in a single policy package. You create this policy by clicking the Add button at the bottom of the main Server Policy Package screen. When you click the Add button, you are prompted to select a policy and to name the policy. You need to select Server Scripts for the policy and enter a unique policy name. After you do this, you can activate and modify the policy. Figure 5.25 displays a sample Server Script policy. Figure 5.25. Script policy page of the scheduled load/unload policy in a Server Policy Package.
This policy enables you to specify a set of scripts that you want to have run on your server. You add a script to the policy by clicking the Add button. When you click the Add button, an entry is placed in the left window and you can edit the name of the script. After you name the script, you can choose the type of script that you will be creating. The choices of script types are currently NCF, NETBASIC, and PERL. After you identify the script type, you are free to type the script in the provided window. ZENworks for Servers provides no syntax checking or validation for the script you enter. You may enter ZENworks for Servers variables into the script and they will be processed prior to the script being executed. You can add multiple scripts of any of the available types into this one policy. The scripts are executed in the order shown on the administration screen (from top to bottom). If you want to reorder the running of the scripts, you must select a script name from the left pane and click the up or down arrows to move the script into a different order. When the ZENworks for Servers policy engine launches this policy, it creates a temporary script file (in its working directory) that contains the specific script, and then launches the corresponding NLM that works with the identified script, passing the NLM the name of the script to run. Consequently, netbasic.nlm and perl.nlm must already exist on the server where the script is to be run. These are normally installed with the standard NetWare server. Regardless whether a script fails or succeeds, the engine proceeds on to the next script. On the Policy Schedule page, you may specify the time frame within which you want the system to enforce this policy. The details concerning your choices for the schedule are described in the next section, "Setting Up the Server Policy Package The SNMP Community Strings." |
EAN: N/A
Pages: 137