Making Your Own Textures
| [ LiB ] |
Making Your Own Textures
In Paint Shop Pro, Textures are used with many painting tools and with the Texture effect.
Any greyscale or 16-million color image can be saved for use as a texture. For best results, the image should be a seamless tile and should have dark areas and relatively high contrast. The image must be placed in one of the Texture folders specified in your file locations (accessed with F iles > Pre f erences > File L ocations).
NOTE
 TIP
TIP
To create a seamless tile in Paint Shop Pro, you can use the Offset or Seamless Tiling effects. (These are both discussed in Chapter 7, "Paint Shop Pro 8 Effects.")
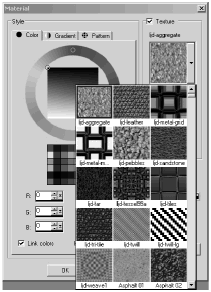
After you create your new texture file and save it to one of your Texture folders, the new texture will be available in the Texture drop-down list in the Material dialog box the next time you use a painting tool. Figure 11.1 shows this list with a few of my custom patterns displayed.
Figure 11.1. The new texture appears in the Texture drop-down list in the Material dialog box.

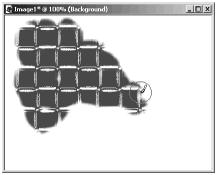
You use the new texture just as you would use one of Paint Shop Pro's own textures. Figure 11.2 shows the result of painting with blue on a solid-white background with one of the custom textures shown in Figure 11.1.
Figure 11.2. Using the new texture.

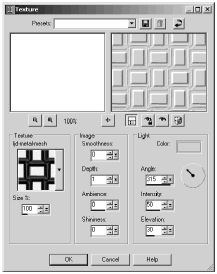
Any image located in one of your Texture folders can also be used with the Texture effect. Figure 11.3 shows the same example texture in use with the Texture effect.
Figure 11.3. Using the new texture with the Texture effect.

Keep in mind that not all images that make good textures for painting also make good Texture effect textures (and vice versa). You need to use your discretion when selecting a texture.
NOTE
 NOTE
NOTE
Any seamlessly tiling greyscale or 16-million color image can also be made available as a bump map for use with the Balls and Bubbles effect. In this case, you need to save your image to one of the Bump Map folders designated in your file locations.
A bump map simulates bumps and indentations (as the Texture effect example in Figure 11.3 shows). By default, light areas look raised and dark areas look indented. Set Depth on the Map tab of the Balls and Bubbles dialog box to a negative value to reverse this behavior.
| [ LiB ] |