| There's an attractive alternative to opening up your desktop computer to add a Wi-Fi card. Microsoft and a number of other vendors make a Universal Serial Bus (USB) Wi-Fi adapter. These adapters fit in a USB connector, so you have to have a free USB port to be able to use one of these adapters. Figure 9.21 shows a cute, little USB Wi-Fi connector that also doubles as a key ring (I kid you not). Figure 9.21. An inexpensive USB Wi-Fi adapter. 
One of the best things about using a USB Wi-Fi adapter is that it should work on any computer (Apple or Windows) that has a free USB connector. It will work on laptops, or on desktops. You can carry it around in your pocket. Great for a portable world! USB Wi-Fi and a Mac To use a USB Wi-Fi adapter with a Mac, power the computer down. Next, plug the USB adapter into an empty USB port on the Apple computer as shown in Figure 9.22. Figure 9.22. The USB Wi-Fi adapter is plugged into a USB outlet. 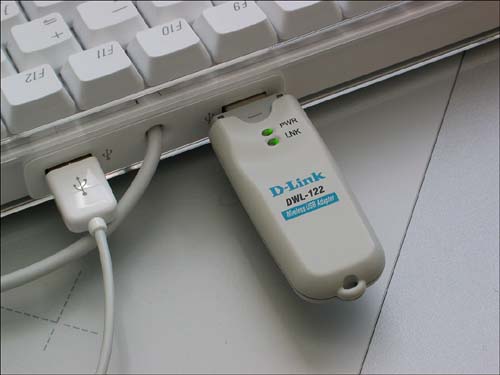
 | The text describes a fairly typical USB Wi-Fi adapter installation. Your experience will vary depending on the make and model of USB Wi-Fi adapter that you choose. |
If it is awkward to plug the adapter directly into a USB port, you can use a USB extension cable, which may have been provided with your adapter. Also, if your USB ports are getting crowded, it's easy to buy an inexpensive USB replicator (also often referred to as a USB hub). With the USB Wi-Fi adapter plugged in, insert the software CD-ROM that shipped with your product, and turn the computer on. When your computer is fully booted, an icon representing the installation software CD will appear on the desktop. Double-click the icon and drill down until you find the Mac folder. Within the Mac folder, you'll see the installation package, DlinkUsbDriver.pkg, as shown in Figure 9.23. Figure 9.23. The installation package. 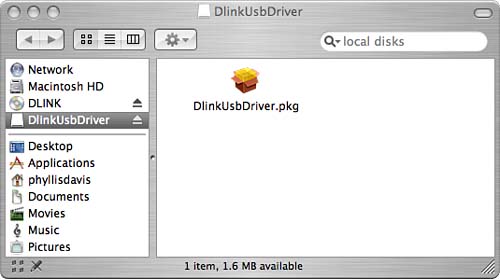
Double-click the installation package to open it. The Welcome screen will appear. Click Continue to proceed through the Installer. You will be asked for a variety of information, such as where to place the files (see Figure 9.24), but you can accept the defaults and simply click Continue until the end of the installation process. Figure 9.24. The installer allows you to input a number of items, but it is OK to just accept the software's suggestions. 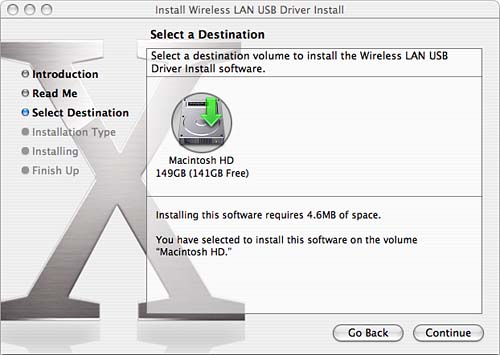
When the installation completes, the wireless adapter software will scan for available networks and show you the results (see Figure 9.25). Figure 9.25. The USB Wi-Fi Adapter software scans for available networks. 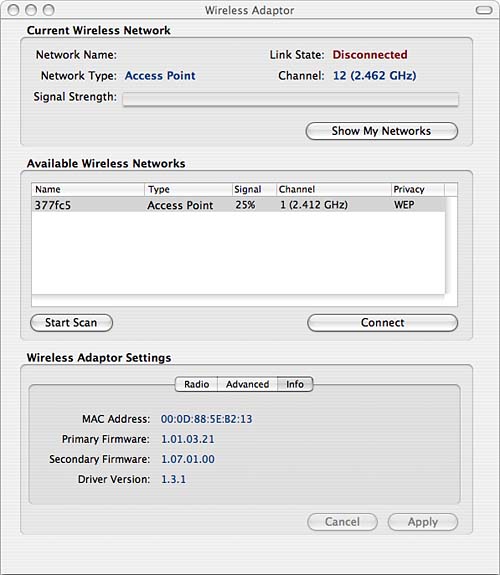
You can select a network by clicking Connect. If your wireless network requires an encryption key (network password), you will be prompted for it when you try to connect (see Figure 9.26). Figure 9.26. You will be prompted for an encryption key (network password) when you try to connect to a wireless network. 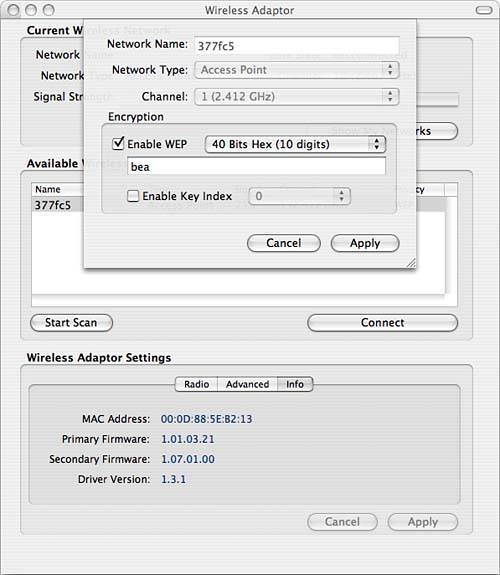
With the USB Wi-Fi adapter installed, things aren't different from any other Wi-Fi adapter (although admittedly the process is not quite as seamless as working with Apple's own Wi-Fi software for the AirPort card, as described earlier in this chapter). USB Wi-Fi Adapter Does Windows Figure 9.27 shows the same USB Wi-Fi adapter used with an Apple desktop plugged into the USB port of a Windows desktop. Figure 9.27. The USB Wi-Fi adapter is plugged into the USB port of a Windows computer. 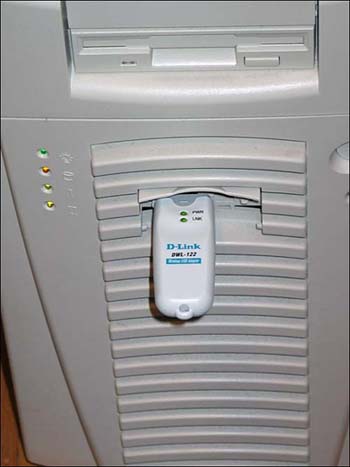
It's important to follow the manufacturer's instructions for installing the software drivers for the USB Wi-Fi adapter. With the software drivers installed, the USB Wi-Fi adapter on the Windows platform functions just like an internal Wi-Fi card as shown earlier in this chapter. The Wireless Network Connection Properties dialog, shown in Figure 9.28, is used to select the wireless network to connect to. Figure 9.28. The Wireless Network Connection Properties dialog works the same way whether your Wi-Fi adapter is internal or connected via USB. 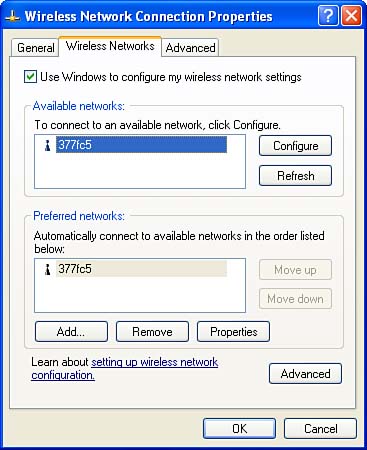
You can use the Wireless Network Properties dialog, shown in Figure 9.29, to set the encryption key (here called the network key). Figure 9.29. The Wireless Network Properties dialog is used to set the encryption key. 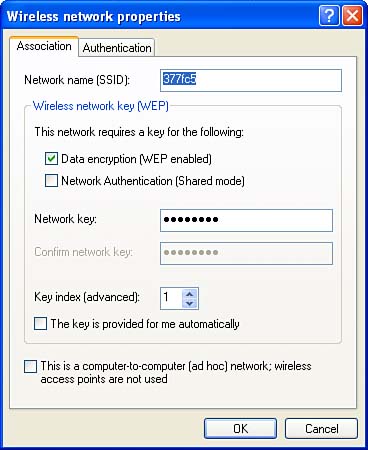
It's really fast, easy, and inexpensive to add Wi-Fi capabilities using a USB Wi-Fi adapter. I'm looking forward to putting one of these adapters on my key ring, or adding one to my pen holder using the handy-dandy clip provided, and bringing Wi-Fi access to computers of every nation and creed wherever I travel! You, too, may find that adding Wi-Fi access using an external USB Wi-Fi adapter is very easy and, as they say, the better part of valor! The Absolute Minimum Here are the key points to remember from this chapter: Installing an AirPort card in an AirPort-ready Apple desktop is fairly easy. Installing a Wi-Fi PCI card in a Windows desktop takes some willingness to fuss with recalcitrant hardware, but it's really not that hard. A USB Wi-Fi adapter can be plugged in and used regardless of operating system and without having to open the computer's case. Though not totally trivial, retrofitting a Windows desktop computer to work with Wi-Fi is not beyond the ability of most people.
|
|