| We tell our children that sharing is good, but when it comes to computers, running with sharing turned on can pose a security risk. If you are connecting to a Wi-Fi network or any network and sharing is turned on, anyone else on the network can read your files across the network. For that matter, your files can be altered or deleted across the network, as well.  | You cannot lock the entire Documents and Settings folder, only the individual user's folders listed under Docu ments and Settings. Otherwise you would be able to lock out other users of the same machine. |
If your folders are private, your files cannot be shared. This may not be very convenient when you are at home, but it certainly improves security when you connect to a network on the road. Windows XP In Windows XP, to turn file sharing off, and make your folders private, locate the top-level folder you want to make private (the folders beneath this one will also be private). A good choice would be your entire hard drive, or your folder in the Documents and Settings folder, which contains your My Documents folder (among other things). With the folder you want to make private selected in Windows Explorer, right-click and select Properties to open its Properties window. Click the Sharing tab. On the Sharing tab of the Properties window for the folder, deselect the Share This Folder on the Network check box as shown in Figure 18.1. Figure 18.1. The Sharing tab of the Properties window for a folder is used to make a folder (and its files) private. 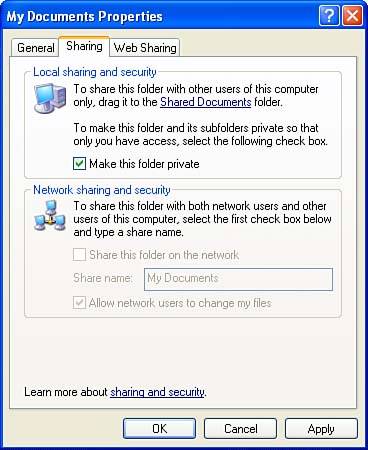
| Under Windows XP, you can only change the permissions on files and folders to make them private if the NTSF file system is being used. The NTSF file system is superior to the alternatives, FAT and FAT32 (which are used in Windows 9x/Me and optional in Windows XP), anyhow, so there is little reason not to be running it. If you can't make folders private, the reason is probably that your computer is not running NTSF. For information about how to convert to NTSF, open Windows Help and Support, and search for NTSF. You should also know that the details of the process for setting sharing will differ from what I described if you are in a network with a domain controller, rather than in a workgroup network. For details of resetting permission in a network with a domain controller, see "Sharing and Security" in Windows Help. |
Next, check the Make This Folder Private check box. Click Apply. The folder, folders beneath it within your computer, and the files in those folders are now private and not shared. If you want to reverse the process when you get home, clear the Make This Folder Private check box, and check Share This Folder on the Network. Your files and folders are now public, meaning shared. If you really want to live dangerously, you can also check the Allow Network Users to Change My Files box, also shown in Figure 18.1. MacOS On an Apple computer, to disable sharing, open System Preferences from the Apple menu. Within System Preferences, in the Network group, open the Sharing application. Within Sharing, click the Stop button, shown in Figure 18.2, to stop sharing. Figure 18.2. Click the Stop button within the Sharing application in System Preferences to turn off sharing on an Apple. 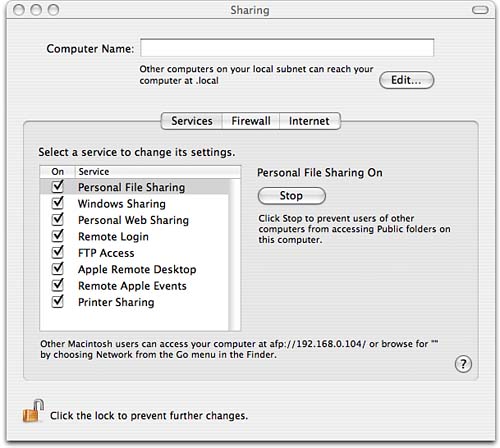
When sharing is turned off, a message will display that information as you can see in Figure 18.3. If you later decide to turn sharing back on, just click the Start button. Figure 18.3. Sharing has been turned off; to turn it back on, click the Start button. 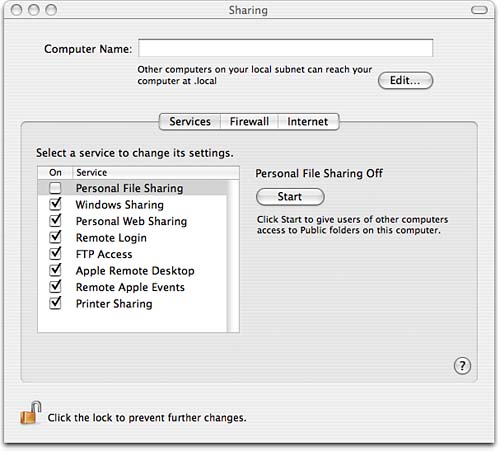
|