Selecting Hardware
| Selecting hardware for online and offline projects involves many factors, including budget, convenience, and flexibility. When you make any choices about hardware, take into account the other components in the system to avoid conflicts. A helpful reseller can make the difference between a smooth and rough first day, so choose your supplier based not only on price but also support and experience. ComputerSelecting your computer setup is relatively straightforward. Basically, when it comes to speed and RAM, the more you have, the greater the power and flexibility. Final Cut Pro is amazingly flexible, and it can run on a variety of CPU and laptop configurations. You can find the current minimum system requirements for Final Cut Pro on the Apple Web site (www.apple.com/finalcutpro/specs.html). However, if you want an optimal system, you must go beyond the minimum requirements. Generally the computer equation depends on your needs: project size + media codec + media storage + additional components + portability + budget = correct choice. For the offline workflow of The Magic Hour project, the media codec was within the low data rate range, the storage requirements were modest (under a terabyte), it did not require capture cards, and it involved editing while traveling. The decision: laptop.
If you're working on a small offline workflow project with a tight budget, a single desktop computer with minimum Final Cut Pro requirements is the way to go. If you're working on a large project, beginning with an offline workflow and finishing with an online resolution, a higher-end system will be the best option. An offline workflow project that requires a team of editors working on individual components of a larger project might consider multiple Power Mac G5s with extra RAM. If the same team of editors needed simultaneous access to their media, they could install the necessary cards and components to run Xsan. Apple offers many configurations. Because you can interchange hardware components, like upgrading the video card, increasing the factory installed RAM, and installing Fibre cards, in many ways your decision boils down to how much computer horsepower you need for a given set of project parameters. Keep in mind that more is better when it comes to computer systems, so always aim for a little more power than you anticipate needing. Selecting a Picture and Sound I/O DeviceAdding a video card to your system will provide additional video horsepower within Final Cut Pro and let you connect to external devices such as monitors, tape decks, and serial control cables. Generally, the input/output (I/O) device, whether external or internal, is dictated by your project workflow and deck interface. Offline workflows will often use external I/O devices connecting via a basic FireWire device and capturing lower data rates; online workflows regularly use internal video cards that enable the capture of uncompressed 8-bit and 10-bit SD and HD through a professional deck. An exception to the external I/O for offline and internal I/O for online norm is AJA's (www.aja.com) I/O FireWire interfaces, which allow online workflow projects the option of capturing D1 10-bit uncompressed video without the need for an internal video card. For offline workflows or simple projects with straightforward capture and common effects, an external I/O device is usually ample. However, if your project is using an online workflow, and you plan to use a large number of effects, consider a powerful internal card to make your render times shorter.
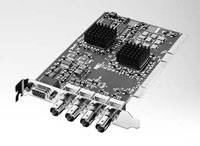
Note Genlock is short for generator locking device, and it is also referred to as blackburst. In simple terms, it's a composite signal, commonly containing black video that allows the synchronization of two video signals so that the chroma levels in your video remain consistent and stable. RS-422 is a serial connector commonly used by professional decks for timecode and control. DeckLink high definition capture card The most important factors for choosing external/internal devices are your project workflow and deck interface requirements. An online workflow can benefit greatly from an internal card, especially one that can handle some of the render processing. The Apple Web site lists a number of qualified devices, and the Apple support pages (www.apple.com/finalcutpro/qualification.html) contain pertinent information on compatible I/O devices. Selecting a VTR or Video DeckYour VTR (videotape recorder) will likely follow your picture acquisition format in a video online workflow or the picture transfer format in an offline workflow. For example, the online New England Aquarium project was shot with a Panasonic Varicam camera and captured via a Panasonic AJ-HD1200A deck. The Cohen brothers' film Intolerable Cruelty was shot on film and transferred to HD 24p then down converted to DVCAM for the offline ingest via a DVCAM deck. There are a variety of decks and a wide range of functionality for each format, so check all the options and models prior to making your final decision. (See the video recording formats section in Lesson 7 for more information.) Occasionally a small, low-budget DV project will use the shooting camera itself as a tape deck to capture media. However, you should avoid using video cameras as a deck since they aren't designed for the wear and tear of constantly shuttling and playing back. If you do use the camera as your capture device, you can limit the wear and tear on the heads by either capturing the entire tape or by using Capture Now in Final Cut Pro. On professional projects, you should use a professional VTR to capture your media.
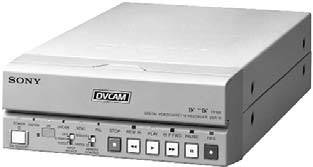
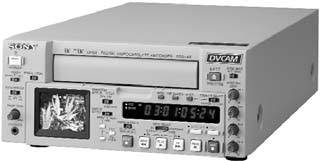
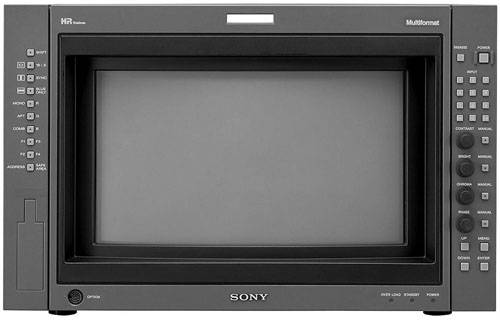
Usually the deck format will be predicated by your picture acquisition or transfer format and budget. However, within one category you'll find many deck models with options ranging from basic to advanced. Since the Cohen Brothers transferred the raw footage of Intolerable Cruelty to DVCAM, they could have captured their footage via a basic Sony DSR-11 deck with minimal deck options. However, if they needed additional options such as an LCD monitor for viewing content directly on the deck face panel, audio levels, and RS-422 control, they could have opted for the Sony DSR-45. Sony DSR-11 DVCAM deck Sony DSR-45 DVCAM deck Regardless of workflow, a professional deck is robust and technically superior to using a camera or a consumer/prosumer deck. If you can't afford a professional deck for your project, consider renting one for capture ingest and output of your project. Selecting a Playback MonitorMost projects use a mix of monitors for playback. You can choose from a wide variety of devices for flexibility and performance. A small, low-budget project may use a consumer TVwhich is readily available and generally less expensive than the professional equivalentfor viewing cuts. Offline and online workflow projects benefit from using professional reference monitors because the color calibration between Final Cut Pro and external venues is important. Let's assume for stylistic reasons you decide to saturate the blue tones in your clips, and you base your color decisions on a consumer uncalibrated TV monitor. If the screening venue for your edit is professionally calibrated, you may discover that your saturated blues on the consumer TV are flat and drab at the screening venue. Monitor calibration is important to ensure that the colors you see when viewing and correcting your project are the same colors that your audience will see when they view the final product. The same output can look strikingly different on different displays, so you need to understand the technical specifications for color variance of the monitor you choose. (See the sections on monitoring environment and setting up a video monitor in Lesson 8 for more information.)
In most cases, choose a playback monitor that mimics your material as closely as possible. A professional, calibrated monitor is probably going to be your best choice. Keep in mind that the gamma response of each of the displays we listed varies significantly. (See the section on measurement and control in Lesson 8 for more information.) You might also consider your final output. If, for example, you are cutting a film, you might use a plasma display because it can replicate the look of film quite well. However, if you're cutting a documentary destined for video, and your budget is tight, you may choose a consumer TV for the offline workflow phase. Whenever you're considering a consumer playback monitorwhether it's a TV, video projector, or plasma displayremember to perform only temporary color corrections, because the choices you make while using an uncalibrated device may not be accurate. Prior to completing a project, allow time for final color corrections using a professionally calibrated monitor as your reference. |
EAN: N/A
Pages: 205