Technique 37. Gritty Extremecontrast EffectVersion 2


Technique #37. Gritty Extremecontrast EffectVersion 2

This version of the high-contrast/gritty look relies on using one or more channels to give us a head start.

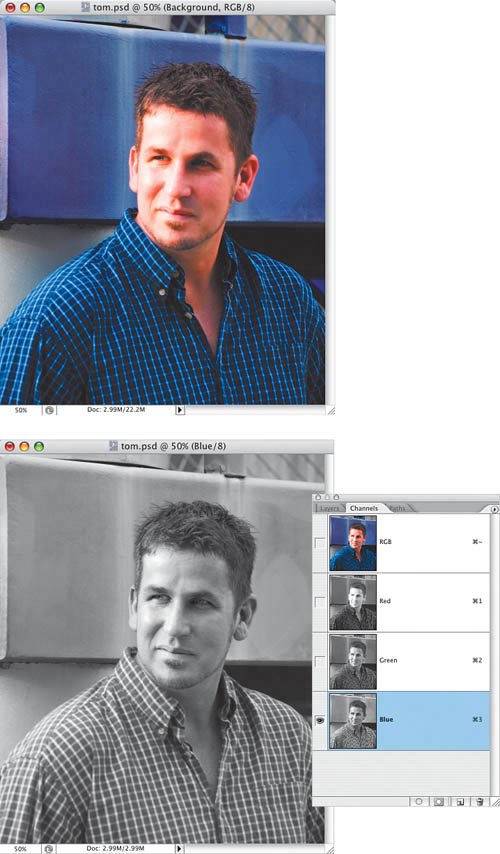
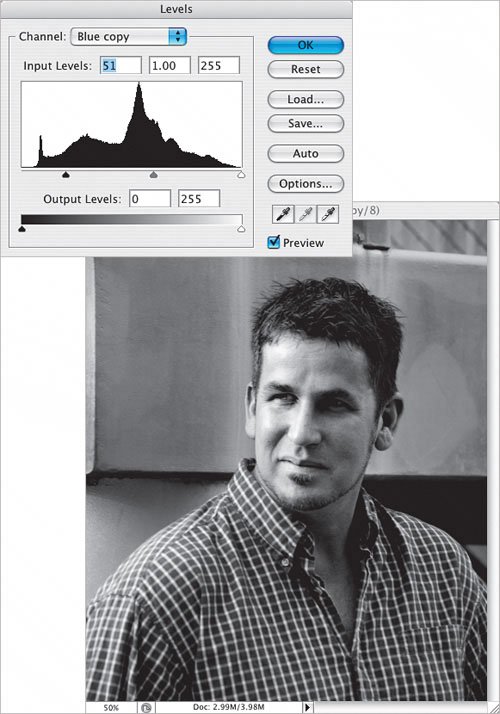
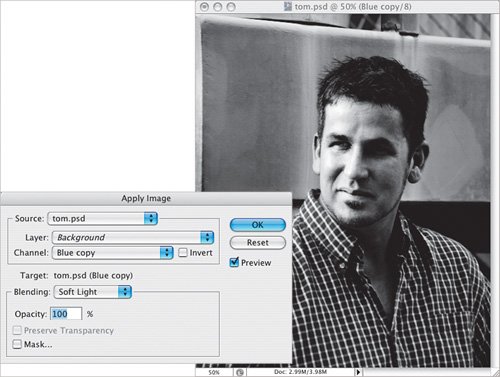
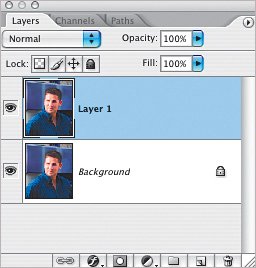
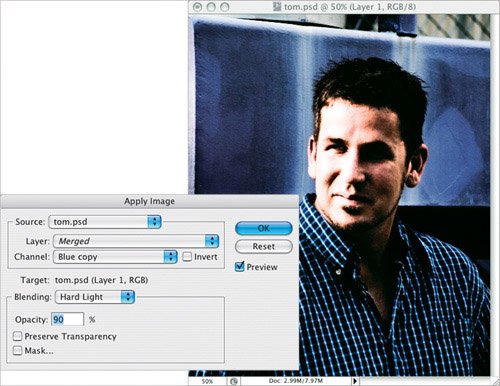
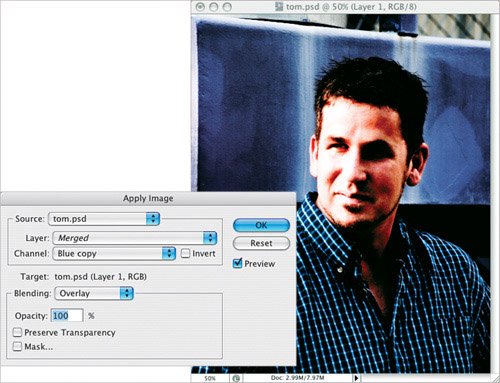
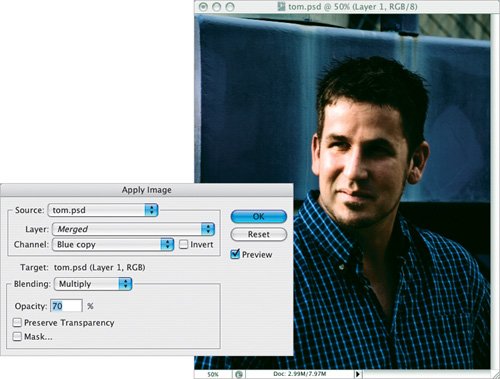
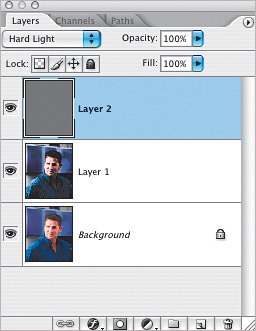
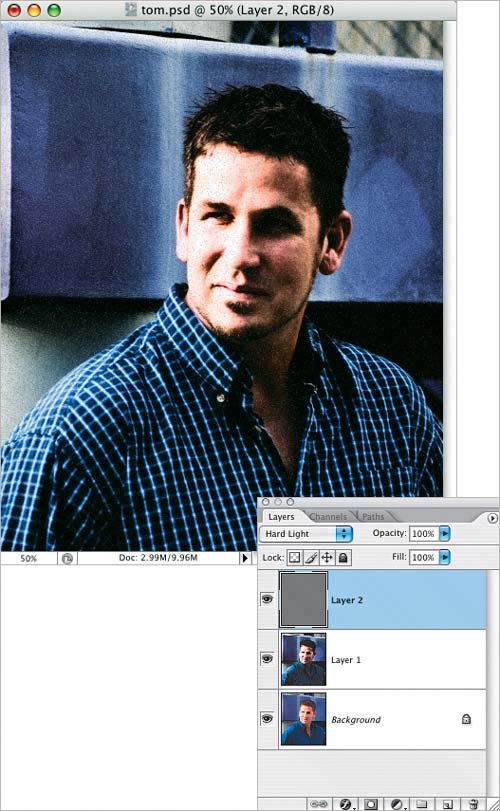
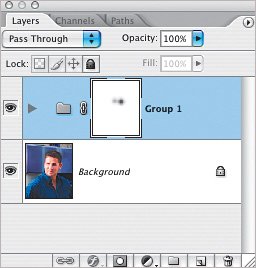
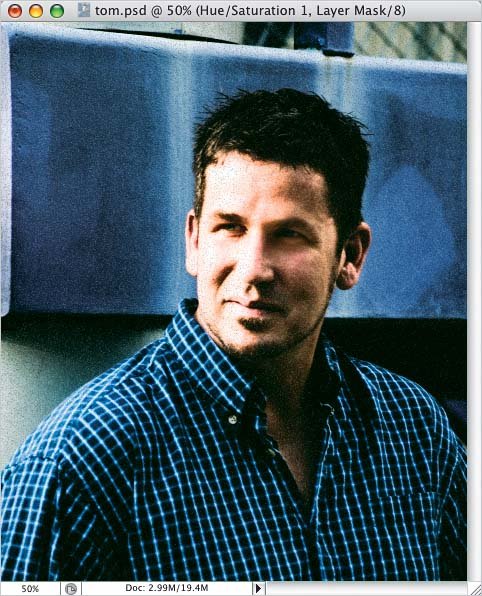
key concepts:

blend modes

filters

Here's the original photo.

Step One.

In the Channels palette (nested behind the Layers palette by default), look at the Red, Green, and Blue channels to find the one that has the most contrast in the key area of the photo (in this case, I'm looking for the most contrast in his face). Very often it will be the Green or Blue channelin this photo the Blue channel gives the most contrast.

Step Two.

Click-and-drag the Blue channel onto the Create New Channel icon at the bottom of the palette to duplicate the channel. The new channel will be called "Blue copy" (unless, of course, you duplicate the Green channel, making the name "Green copy").

Step Three.

With the copied channel still active, press Command-L (PC: Control-L) to open the Levels dialog. Drag the black Input Levels slider to the right to darken the image.

Optional:

With the copied channel still active, from the Image menu, choose Apply Image. Select Blue copy as the channel and Soft Light from the Blending pop-up menu. This will darken up the channel just a little more.

Step Four.

Click on the RGB Composite channel and then go to the Layers palette. Press Command-J (PC: Control-J) to duplicate the Background layer.

Step Five.

From the Image menu, choose Apply Image, and choose Blue copy as the channel. In the Blending pop-up menu, choose from the blend modes shown here to get slightly different results. You can also try tweaking the Opacity setting.

Blending: Hard Light; Opacity: 90%

Blending: Overlay; Opacity: 100%

Blending: Multiply; Opacity: 70%

Step Six.

Add a new layer on top of the layer stack by clicking on the Create a New Layer icon at the bottom of the Layers palette, and fill it with 50% gray (using Edit>Fill, where 50% Gray is a built-in choice). Change the layer blend mode of this gray layer to Hard Light.

Step Seven.

From the Filter menu, choose Noise>Add Noise. Turn on the Monochromatic checkbox and experiment with fairly low numbers to add a little noise to the image.

Variations

If the detail gets lost a little too much in some areas (like his eyes, in this example), Command-click (PC: Control-click) on all the layers except the Background layer to select them, and press Command-G (PC: Control-G) to put the layers into a Group. Then, click on the Add Layer Mask icon to add a layer mask to the Group and use the Brush tool (B) to paint with 50% black to slightly hide the effects around the eyes.


Photoshop Finishing Touches
ISBN: 0321441664
EAN: 2147483647
Year: N/A
Pages: 129
Authors: Dave Cross

flylib.com © 2008-2017.
If you may any questions please contact us: flylib@qtcs.net