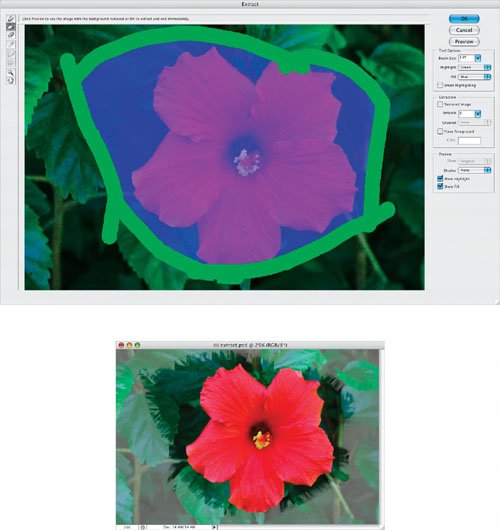
When I showed this technique on Adobe® Photoshop® TV my cohosts laughed at my description of this as an "adventurous" technique. So maybe it would better be described as unpredictable, since the results you get will vary dramatically depending on your photo and the highlight you create in the Extract filter. Still, it offers some interesting possibilities.
key concepts:
filters
layer masks
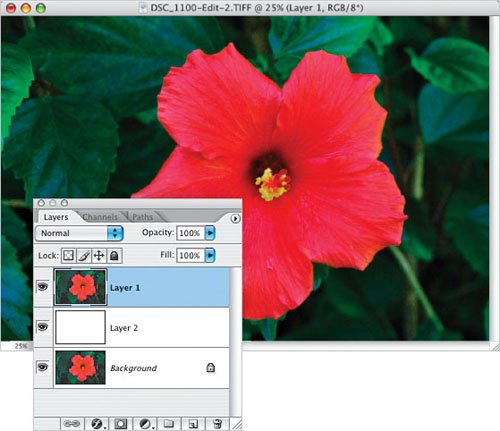
Step One.
Press Command-J (PC: Control-J) to duplicate the Background layer. Press-and-hold the Command key (PC: Control key) and click on the Create a New Layer icon at the bottom of the Layers palette to add a new layer below the copied Background layer. Press D to set your Foreground and Background to the default colors, and then press Command-Delete (PC: Control-Backspace) to fill the new layer with white.
Step Two.
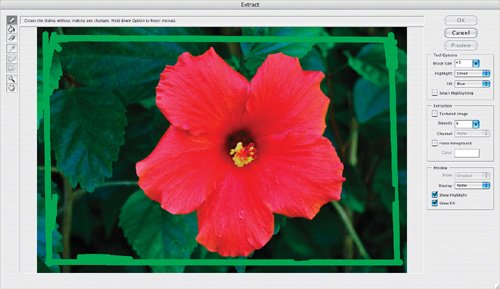
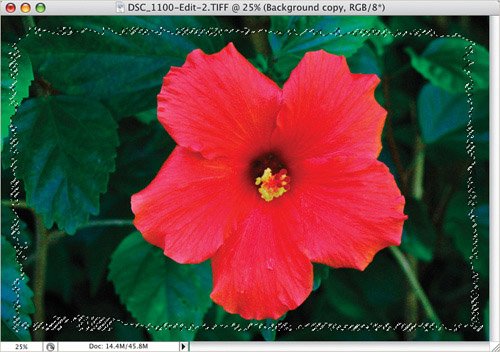
Click on the copied Background layer and from the Filter menu, choose Extract. With the Edge Highlighter tool (B), choose a small brush size and click once just inside the top-left corner of the photo. Press-and-hold the Shift key and click on the top-right corner of the photo. Continue painting straight lines to create a border, each time leaving a small amount of space between your painted border and the edge of the photo. For a more unusual border, paint some additional short lines here and there, and press-andhold the Option key (PC: Alt key) while you paint to remove some areas of the border. (You can also paint a highlighted border freehand if you likejust make sure there are no gaps in the border as I mention in the next step.)
Step Three.
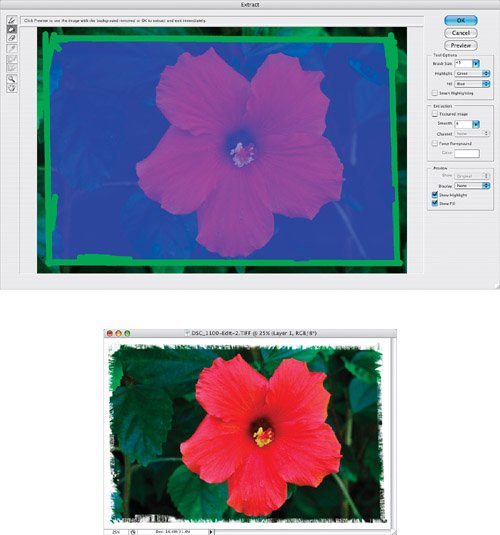
Using the Fill tool (G), click once inside the border to fill the inside area with blue. If the blue fill spills outside the border, press Command-Z (PC: Control-Z) to Undo and use the Edge Highlighter tool to close up any gaps. Then click OK.
The result, or should I say the unpredictable result, will depend on the colors in your image and the width of the border you highlighted, but in general this should give you a pretty interesting effect. Of course, you could continue to work with this border effect, especially if you turn it into a layer mask as shown in these next few steps.
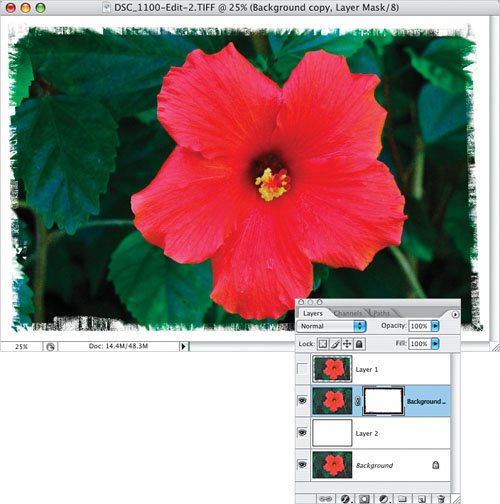
Step Four.
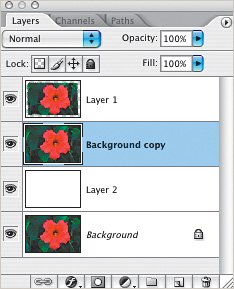
Click on the original Background layer and press Command-J (PC: Control-J) to duplicate it. Drag the Background copy layer above the white layer.
Step Five.
Press-and-hold the Command key (PC: Control key) and click on the extracted layer's thumbnail to create a selection that follows the extracted border. Click on the Eye icon beside the extracted layer to hide it, and make sure the Background copy layer you made in Step Four is active.
Step Six.
Click on the Add Layer Mask icon at the bottom of the Layers palette to create a layer mask for your Background copy layer, which will duplicate the results of the Extract filter. By creating a layer mask, you can experiment further by applying filters or using a custom brush to tweak the mask.
Variations
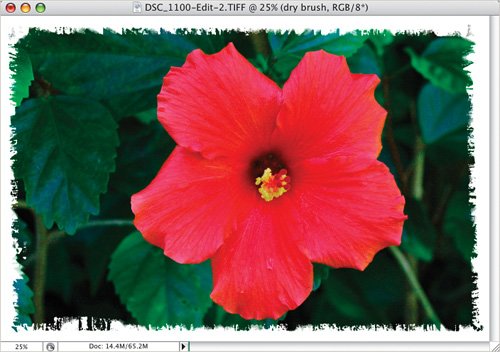
Here, I applied the Dry Brush filter to the layer mask to alter the effect slightly.
Variation 1: Dry Brush filter
In this case, I painted a series of random lines with the Edge Highlighter tool (making sure to create a closed outline), and then made a layer mask as previously described. I applied a slight Gaussian Blur to the mask, and then lowered the opacity of the white layer so that the original background showed through slightly.