Chapter 19: Finishing Duck Blast 3D
In the last chapter, we worked on 3D models for Duck Blast. This was the third chapter in a row in which we have worked on this project, with the previous two setting up the graphics and basics of the game. In this chapter, we are now going to finish the game in MMF.
Let’s Start
To begin the project, we need to open MMF and create a new application. Open the Frame Editor for the first frame. The next step is to click Insert, New Object, Backdrop and position your mouse inside the frame. Click the left mouse button to place the object. A new icon will be visible on the form (see Figure 19.1).
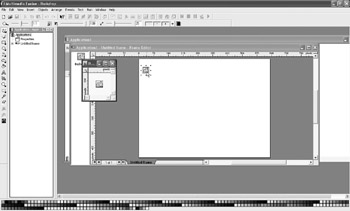
Figure 19.1: A new icon is visible at the insertion point.
While the backdrop is still selected, choose File, Import, Bitmap. Browse to find the file we created back in Chapter 17, “Drawing Graphics for Duck Blast in Paint Shop Pro,” and open the file as the new backdrop by clicking the Open button (see Figure 19.2).

Figure 19.2: The file is imported.
Click the OK button to close the window. You can see the results in Figure 19.3.
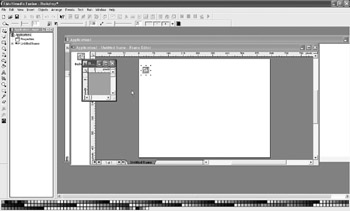
Figure 19.3: Your screen now looks like this.
Click the X in the upper-right corner of the small window in the middle of the screen. MMF will ask if you would like to save the changes to the backdrop (see Figure 19.4). Click Yes and you will see the final result of importing the file (see Figure 19.5).
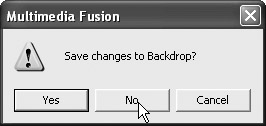
Figure 19.4: You will be asked if you want to save the changes.
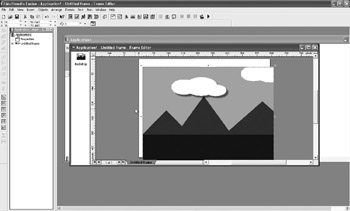
Figure 19.5: We have successfully imported the file.
Right-click the backdrop and from the pop-up menu choose Align in Frame, Horizontal, Center (see Figure 19.6). Next, right-click the backdrop again, and from the pop-up menu choose Align in Frame, Vertical, Center (see Figure 19.7). You can see the alignment in the frame in Figure 19.8.
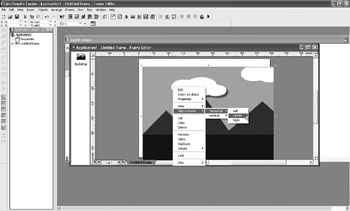
Figure 19.6: Choose horizontal center.
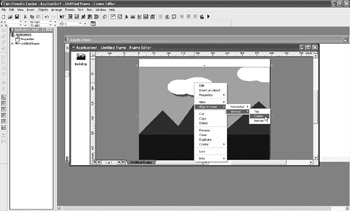
Figure 19.7: Choose vertical center.
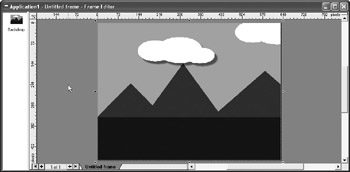
Figure 19.8: The backdrop is now aligned.
From the Insert menu choose Object, Active, position your mouse in the frame, and left-click the mouse button. The window seen in Figure 19.9 is displayed.

Figure 19.9: The Animation Editor is opened.
Double-click the Frame 1 image of a diamond and choose File, Import, Bitmap. Browse to find the ![]() duck1.bmp file we created in Chapter 18, “3D Models for Duck Smash,” and click the Open button (see Figure 19.10).
duck1.bmp file we created in Chapter 18, “3D Models for Duck Smash,” and click the Open button (see Figure 19.10).
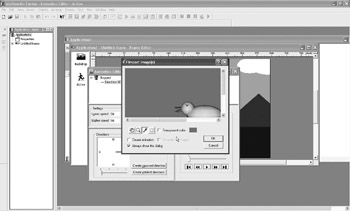
Figure 19.10: The image is opened.
You need to click the Transparent Color selection option (see Figure 19.11) and click OK. MMF usually does a great job of realizing the correct color button as it does this time. Next, choose Object, Crop. You should be left with only the duck like the one seen in Figure 19.12.
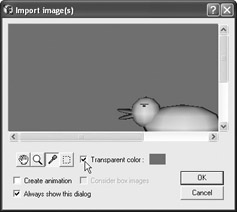
Figure 19.11: The Transparent Color option.
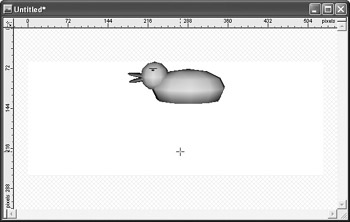
Figure 19.12: The duck is left by itself.
Click the X in the upper-right corner. A message box is displayed, asking if you would like to save changes. Choose Yes. The Animation Editor should now look like Figure 19.13.
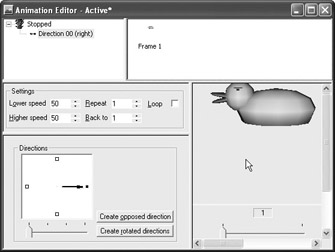
Figure 19.13: Animation Editor with changes.
Right-click in the Animation Editor (see Figure 19.14) to display a pop-up menu. Choose the only option, which is called Insert a New Animation. The window seen in Figure 19.15 is displayed.
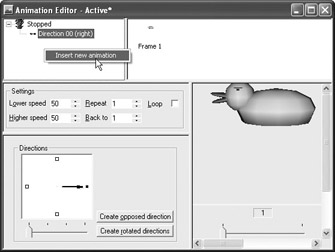
Figure 19.14: Insert a New Animation is displayed.
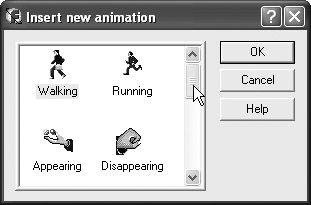
Figure 19.15: The Insert New Animation window.
Choose Walking from the editor and click OK. Select the newly created walking animation in the Animation Editor. Right-click in the Animation Editor and choose Insert New Direction (see Figure 19.16). When you choose the menu item, the Insert New Direction window is displayed (see Figure 19.17).
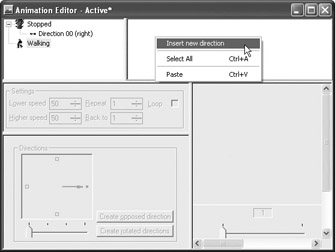
Figure 19.16: Insert New Direction is available as a pop-up menu.
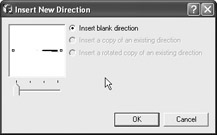
Figure 19.17: The Insert New Direction window.
You can select the left direction and click OK. In the Animation Editor, you can now see the newly created walking animation with a direction of left. If you click the left direction, you will also see that a standard frame has been created automatically (see Figure 19.18).
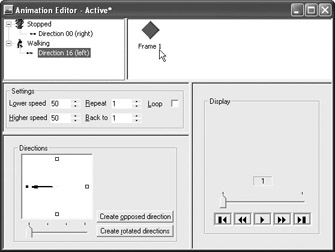
Figure 19.18: A frame was created by MMF.
Double-click the frame and import ![]() duck1.bmp into it, making sure to remember to crop the image after importing and make sure that Transparency has been selected. After the frame is created, let’s copy the lone frame to the opposite direction as well so that, regardless of the movement, the same frame is displayed. In the Animation Editor, you can click the right direction (see Figure 19.19). A new window is displayed with several options (see Figure 19.20).
duck1.bmp into it, making sure to remember to crop the image after importing and make sure that Transparency has been selected. After the frame is created, let’s copy the lone frame to the opposite direction as well so that, regardless of the movement, the same frame is displayed. In the Animation Editor, you can click the right direction (see Figure 19.19). A new window is displayed with several options (see Figure 19.20).
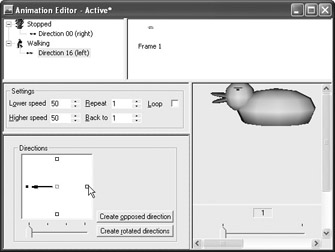
Figure 19.19: Click the right direction.
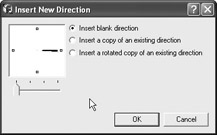
Figure 19.20: Insert New Direction options.
We will now insert a copy of an existing direction from the list (see Figure 19.21) and make sure that the left direction will be the source. Now, click OK. The walking animation is complete as the duck will move only left and right on the screen. Insert another new animation by right-clicking in the Animation Editor and choosing Disappearing from the list. Insert a new direction for Disappearing and choose the left direction. In the first frame created by default, import ![]() duck1.bmp. Make sure to crop and use transparency on the image so that we are left with only the duck.
duck1.bmp. Make sure to crop and use transparency on the image so that we are left with only the duck.
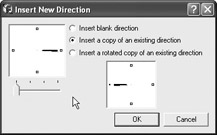
Figure 19.21: Make a copy of the existing direction.
Insert a new animation by right-clicking next to Frame 1 and choosing Insert New Animation from the pop-up menu. Double-click Frame 2 to display its default blue diamond image and import ![]() duck2.bmp into its location, again remembering to crop the image to leave only the duck. We now have a view of the duck sitting normally in Frame 1 and an image of the duck at a 45-degree angle in Frame 2. The next step is to single-click Frame 1. Along the upper left side of the screen, you will see several options, including Insert Animation, which is the second button from the top (see Figure 19.22). The Insert Animation window (see Figure 19.23) has an option for Create Morphed Animation. You can choose Frame 1 or Frame 2 and click OK. The screen seen in Figure 19.24 is displayed. Click on the button displayed in Figure 19.25. If you are given any warnings, you can ignore them. You should see a series of frames being inserted into the animation, and you can use this to preview the final result (see Figure 19.26). Click OK to close the window, and click OK to create the frames.
duck2.bmp into its location, again remembering to crop the image to leave only the duck. We now have a view of the duck sitting normally in Frame 1 and an image of the duck at a 45-degree angle in Frame 2. The next step is to single-click Frame 1. Along the upper left side of the screen, you will see several options, including Insert Animation, which is the second button from the top (see Figure 19.22). The Insert Animation window (see Figure 19.23) has an option for Create Morphed Animation. You can choose Frame 1 or Frame 2 and click OK. The screen seen in Figure 19.24 is displayed. Click on the button displayed in Figure 19.25. If you are given any warnings, you can ignore them. You should see a series of frames being inserted into the animation, and you can use this to preview the final result (see Figure 19.26). Click OK to close the window, and click OK to create the frames.

Figure 19.22: The Insert Animation button.
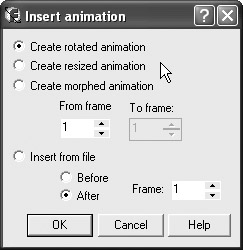
Figure 19.23: The Insert Animation window.
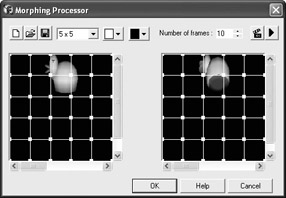
Figure 19.24: Morphing processor in action.
![]()
Figure 19.25: You’ll need to find and click this button.
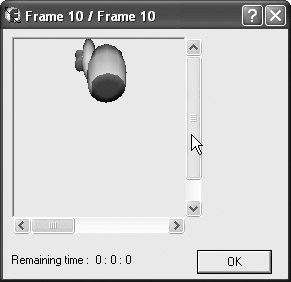
Figure 19.26: Final results are displayed.
Now add another new frame (see Frame 11) and import ![]() duck3.bmp into it. We can create another morphed animation between Frames 10 and 11 to give us a total of 19 frames for this animation. Click the X in the upper right of the Animation Editor to close it. When you close it, a message box will be displayed, giving you the option of saving the changes. Choose Yes. You’ll now have a duck visible in the Frame (see Figure 19.27).
duck3.bmp into it. We can create another morphed animation between Frames 10 and 11 to give us a total of 19 frames for this animation. Click the X in the upper right of the Animation Editor to close it. When you close it, a message box will be displayed, giving you the option of saving the changes. Choose Yes. You’ll now have a duck visible in the Frame (see Figure 19.27).
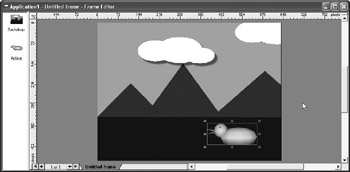
Figure 19.27: The duck is visible in the frame.
EAN: 2147483647
Pages: 168