Menu
The menus in MilkShape 3D are consistent with the majority of Windows-based applications.
File
The last thing we’ll look at in this introduction to MilkShape is the File menu, which can be seen in Figure 14.25. There really isn’t much to discuss with this menu. It contains all of the standard file operations such as Open, Close, and Save. Most of the items in the File menu are self-explanatory, with the exception of Merge, which does just what its name implies. It merges two 3D files together.
![]()
Figure 14.25: MilkShape has a standard Windows menu.
Lastly, the Import and Export options offer a great deal of functionality for game developers. Perhaps the most important aspect of any modeler is the file formats they offer. MilkShape excels in this area. Depending on your needs, MilkShape can export models to many popular game formats, including the following:
| • Half-Life SMD | • Wavefront OBJ |
| • Quake I MDL | • 3dstudio ASC |
| • Quake II MD2 | • Lightwave LWO |
| • Quake III Arena MD3 | • AutoCAD DXF |
| • Vampire t:MR NOD | • POV-Ray INC |
| • Lithtech ABC v11, v12 | • VRML1 WRL |
| • Genesis3D BDY 1.0 | • Autodesk 3DS |
| • Genesis3D MOT 1.0 | • MilkShape 3D |
| • Unreal/UT 3D | • ASCII RAW |
| • Nebula Engine | • Renderman RIB |
Edit
The Edit menu is missing several of the normal features you might expect in a Windows application. It does not offer the standard Cut, Copy, and Paste commands. Instead, you can use Duplicate Selection, which will copy any faces you currently have selected. It will not copy vertices. Also, the duplicated section will be placed in the exact location as the original, so you may not see it at first glance.
Vertex
The Vertex menu offers several options, all related to vertices. First, you can snap two vertices together with Snap Together. You can also snap a vertex to the grid or weld them together, which you always do after you snap them together. Flatten allows you to flatten all of the vertices to a particular plane. Lastly, the Mirror commands are particularly useful when you have duplicated an object.
Faces
This menu offers options for faces in MilkShape. The first menu option, Reverse Vertex Order, will make a visible face invisible or an invisible face visible. It does this because a face has only one visible side. You can just think of it as a type of toggle that allows a face to be on or off. Subdivide 3 and 4 both subdivide a face into three or four parts, respectively.
In Figure 14.26, you can see a square with two faces selected. If you click on Faces, Turn Edge, you will notice that the edge will turn and will now appear like that seen in Figure 14.27. The last command we’ll look at is Face to Front, which works the opposite of Reverse Vertex Order.
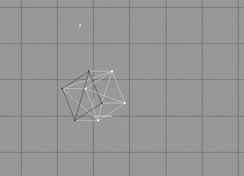
Figure 14.26: A square with two faces selected.
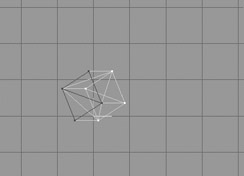
Figure 14.27: The edge between two faces has been turned.
Others
The remaining menus can be covered very quickly. The Animate menu contains everything related to animation. We will look at it in greater detail in a later chapter. The Tools menu contains information specific to individual model formats such as Half-Life and Quake III Arena. If you are planning to use MilkShape for a specific type of file format, you may want to invest a little time to work through this menu. The last menu, Window, was already looked at earlier in the chapter. It gives us the option to arrange our viewpoints in specific ways.
EAN: 2147483647
Pages: 168